


How to Live Stream – A Quick Guide to Streaming for Beginners [2025 Update]

Live streaming is now one of the simplest ways for businesses, educators, and creators to reach people in real time. This guide walks you through how to live stream in 2025 with clear steps, exact OBS encoder settings, and a pre-live checklist. You will also learn a quick 10-minute setup using OBS and Dacast so you can go live with confidence.
Table of Contents:
- How to Live Stream Video
- Beginner Troubleshooting Tips
- Live Streaming Analytics for Beginners
- Business Use Cases for Live Streaming in 2025
- Global Streaming in 2025: What to Know
- How AI is Simplifying Live Streaming in 2025
- Tips for Increasing Viewership and Promoting Your Live Stream
- Conclusion
How to Live Stream Video
Wondering how to do live streaming? With the right tools and support, getting started with live streaming is relatively quick and easy. You can produce professional streams with a few minor investments and a solid plan.
That said, let’s take a look at the 8 steps you can follow to get your live stream up and running in no time. You will know how to live stream in no time!
1. Choose a Streaming Solution
The first step in learning how to live stream is picking the right platform. Free consumer tools like YouTube or Twitch are fine for casual creators, but businesses usually need more control. A professional streaming solution like Dacast provides white-label branding, secure delivery, built-in monetization, and real-time analytics.
Modern business platforms also rely on multi-CDN delivery (Akamai + Cloudflare) to ensure streams are reliable worldwide, including in challenging regions. These features make the difference if you plan to host paid events, stream to internal teams, or expand to a global audience.
Here are a few core features to look for in any streaming solution:
- White-label video player for brand control
- Built-in paywall with pay-per-view, subscription, or ad support
- Real-time analytics to measure performance
- Security tools like password protection, domain restriction, and AES encryption
- Responsive customer support when issues come up
Quick Feature Matrix
| Feature | Dacast | Restream | Vimeo | YouTube Live | Castr |
| White-label | Yes | Partial | Limited | No | Paid plans |
| Paywall | Yes (PPV, SVOD, AVOD) | Limited | Advanced (higher tiers) | Ads only | Limited |
| Analytics | Real-time, detailed | Basic | Good | Basic | Moderate |
| Security | Password, AES, geo/domain control | Limited | Moderate | Limited | Basic |
| Support | 24/7 live | Email/chat | Forum/community | Live chat |
2. Invest in Required Components

When you’re just starting out, live streaming for beginners comes down to three essentials:
- A reliable internet connection
- A camera and microphone
- An RTMP encoder
Reliable Internet Connection
Your upload speed is the foundation of your live stream. For beginners, one of the most common mistakes is streaming too close to your maximum bandwidth. Always test with a wired Ethernet connection, not Wi-Fi, and keep at least 40–50% of your upload speed in reserve as headroom. Tools like TestMy.net can give you more realistic results than your provider’s advertised speeds.
Example: if your tested upload is 10 Mbps, your combined video and audio bitrate should stay below 5–6 Mbps. This rule of thumb will also help later when you configure your OBS settings for live streaming.
Camera and Audio

Your camera can be as simple as a laptop webcam or as advanced as a DSLR. If you use a higher-end camera, you may need a capture card such as a Blackmagic device unless your hardware encoder accepts direct input.
Prioritize audio. Viewers are more likely to abandon a stream with poor sound than one with less-than-perfect video. Even a basic Lavalier mic or USB microphone can make your stream feel more professional.
RTMP Encoder
An encoder takes the video from your camera and microphone and converts it into a stream your viewers can watch.
- Software encoders like OBS Studio are popular in live streaming for beginners because they are free, flexible, and relatively easy to set up. Later in this guide, we’ll share recommended OBS settings for live streaming, including bitrates, keyframe interval, and audio setup.
- Hardware encoders are dedicated devices built for stability and advanced workflows. They are common in larger productions where reliability matters most.
If you need to go live from unstable networks, consider bonding encoders or mobile apps (like LiveU Solo or Speedify) that combine multiple internet connections (Ethernet, Wi-Fi, 4G/5G) for smoother delivery.
Before you go live, make sure you run through a simple live streaming pre-live checklist. This should include testing your internet speed, confirming audio levels, checking your keyframe interval, and running a private test stream. We’ll walk through a full checklist later in this guide.
3. Create a Live Channel
The next step is to create a live-streaming channel. You’ll use your chosen live streaming platform from step 1 to host your content, transcode files, and stream. All Dacast trial account users can create one live channel to test this step.
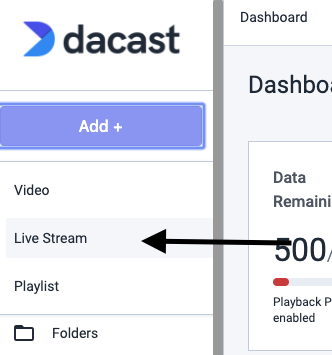
To set up live streaming through Dacast, you must first log in to your Dacast account. Click on the “Add +” button, and select “Live Stream”:
A pop-up will appear. Here you can name your channel and select “Standard”:
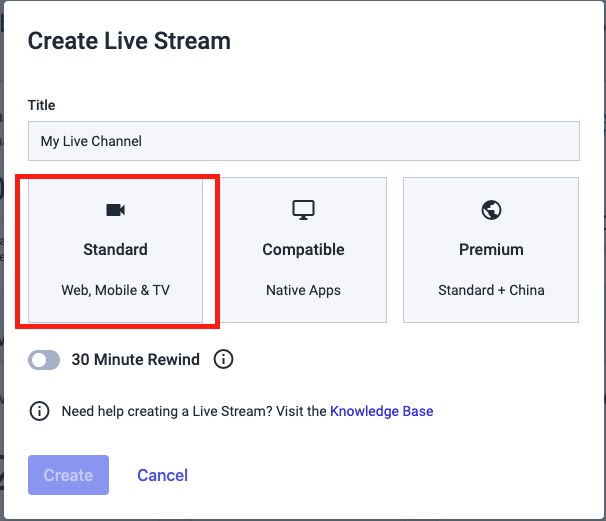
Please contact us, if you need to stream via an unsecured m3u8 link for Roku or if you would like to have your VOD available in China.
This is the first page you should see after you’ve created your new channel:
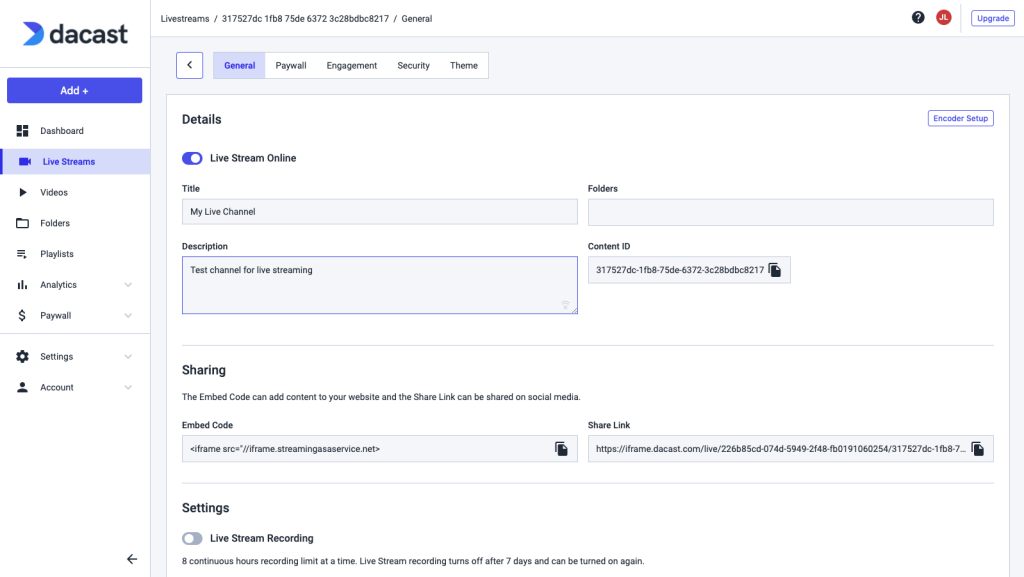
The most important feature on this page is this one:
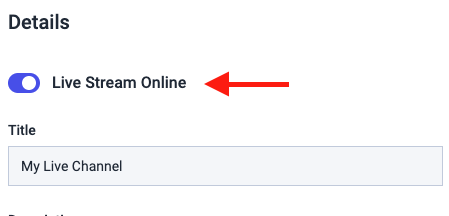
Please note that your live channel is turned OFF by default. You can turn it ON whenever you want to put your channel online. The rest of the settings are optional. Folders and Descriptions relate to how your content will be displayed on your dashboard.
The rest of the settings are optional. The Category Description and Splash Screen relate to how you’ll share your content over the Dacast Viewer Portal. If you plan on sharing content on your site only, you can ignore these options.
However, please note that if you want your content to display on the Dacast Viewer Portal, you’ll need to add a description and splash screen.
The splash screen will display when content is offline for live streams. The thumbnail will represent your content inside packages and on the viewer portal.
Please click SAVE once you enter your information in this step.
4. Configure Publish Settings
The next step in the process involves Publish Settings, which control embeds and advanced features.
Advanced features include geographic and website restrictions. Player themes are also selected here, and you can turn autoplay on or off. Also, you can utilize the viewer counter, Google Analytics tracking, and publication on the Dacast portal.
For added protection, you can also apply domain and referrer restrictions, as well as geo-controls, to keep your live stream secure and accessible only where you want it.
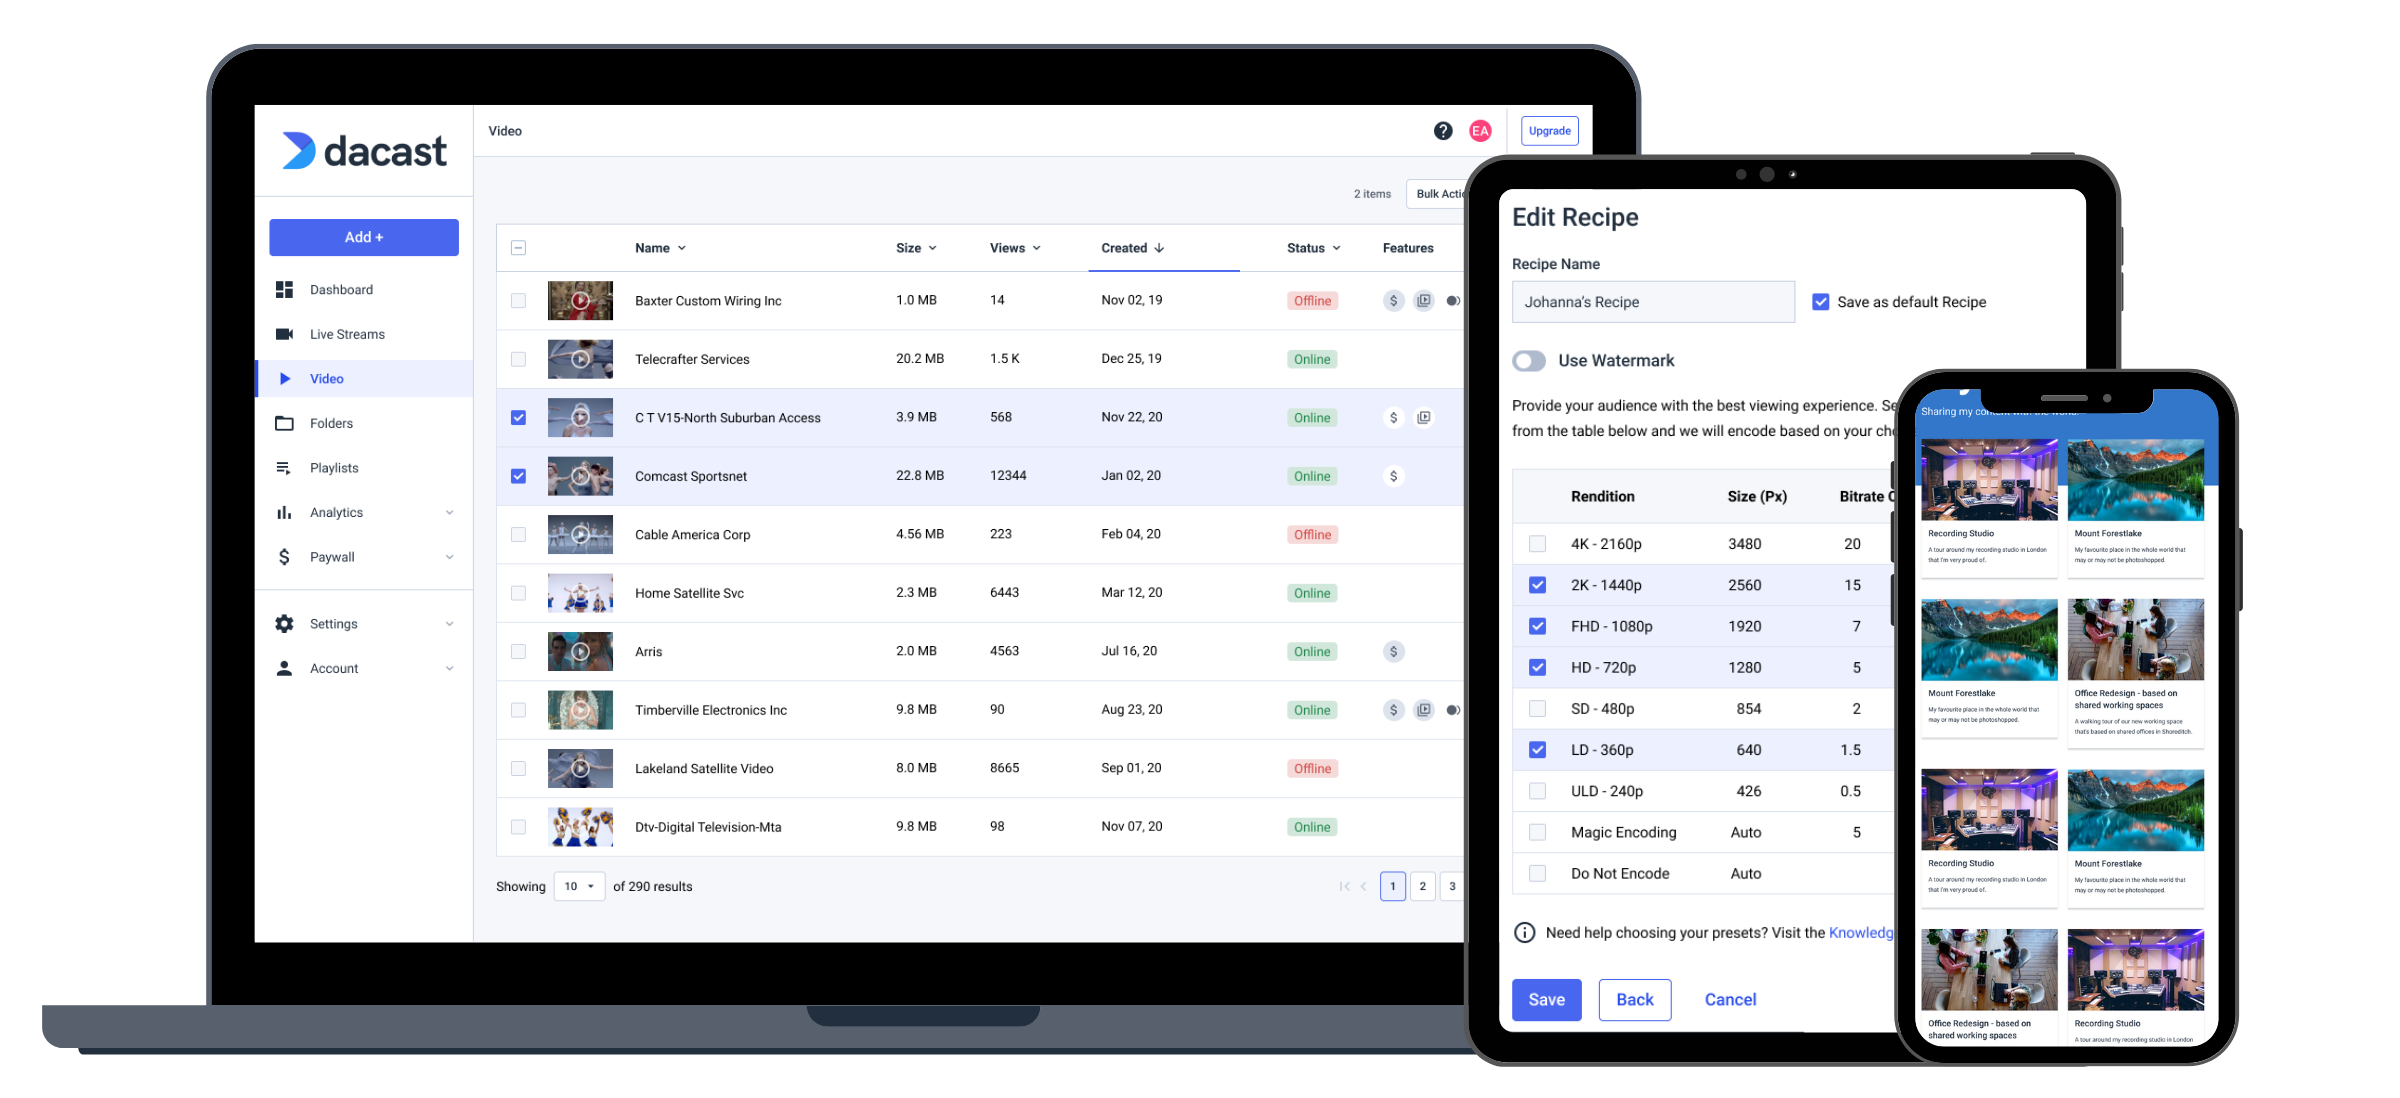
5. Set Up Your Encoder
Your encoder is the bridge between your camera and your viewers. For most people learning how to live stream, the easiest starting point is OBS Studio, a free software encoder that integrates well with Dacast.
Step 1: Connect OBS to Dacast
- In your Dacast dashboard, create a live channel and copy the RTMP URL and Stream Key.
- Open OBS, go to Settings > Stream, and paste both values into the fields.
- Leave Service set to “Custom.”
This connection replaces the old XML profile flow and gets you ready to stream in minutes.
Step 2: Apply Encoder Settings
For stable playback across platforms, use these baseline OBS settings for live streaming:
- Video codec: H.264 (AVC)
- Rate control: CBR (Constant Bitrate)
- Keyframe interval: 2 seconds (OBS keyframe interval for live streaming matches YouTube and Twitch guidelines)
- Profile: Baseline for compatibility, High for modern devices
- Audio: 48 kHz, 128–192 kbps AAC
- Resolution & bitrate: see ABR ladder below
These defaults align with major platform recommendations and help reduce buffering. If you’d like more detail, bothYouTube and Twitch publish current bitrate ranges you can use as reference.
Step 3: Build an ABR Ladder
To reach viewers on different devices and networks, use adaptive bitrate (ABR) streaming. Dacast supports multi-bitrate playback, so viewers automatically get the best quality their connection can handle.
| Resolution | Video Bitrate | Audio Bitrate | Upload Budget Needed |
| 1080p30 | 6,000 kbps | 160 kbps | ~7 Mbps |
| 720p30 | 3,000 kbps | 128 kbps | ~3.5 Mbps |
| 480p30 | 1,200 kbps | 96 kbps | ~1.5 Mbps |
Tip: Keep your total upload usage below 50–60% of your tested speed. For example, if you have 12 Mbps upload, you can comfortably support a 1080p + 720p + 480p ladder.
Cloud vs Local Encoders
- Cloud encoders: Stream from anywhere, lighter setup, offload the processing.
- Local encoders: Installed on your device, more control, but they use your CPU/GPU and local bandwidth.
OBS Studio vs Streamlabs
Both OBS Studio and Streamlabs can work with Dacast. Here’s the quick breakdown:
- OBS Studio: Free, lightweight, fully customizable, best for control.
- Streamlabs: Built on OBS, easier interface with templates and alerts, good for beginners.
- Recommendation: Start with OBS Studio for business streaming, try Streamlabs if you prefer a guided setup.
With these steps, you’ll have a solid live stream setup that balances quality, stability, and reach, ready to deliver through Dacast’s multi-CDN streaming network.
6. Set Up Video Monetization
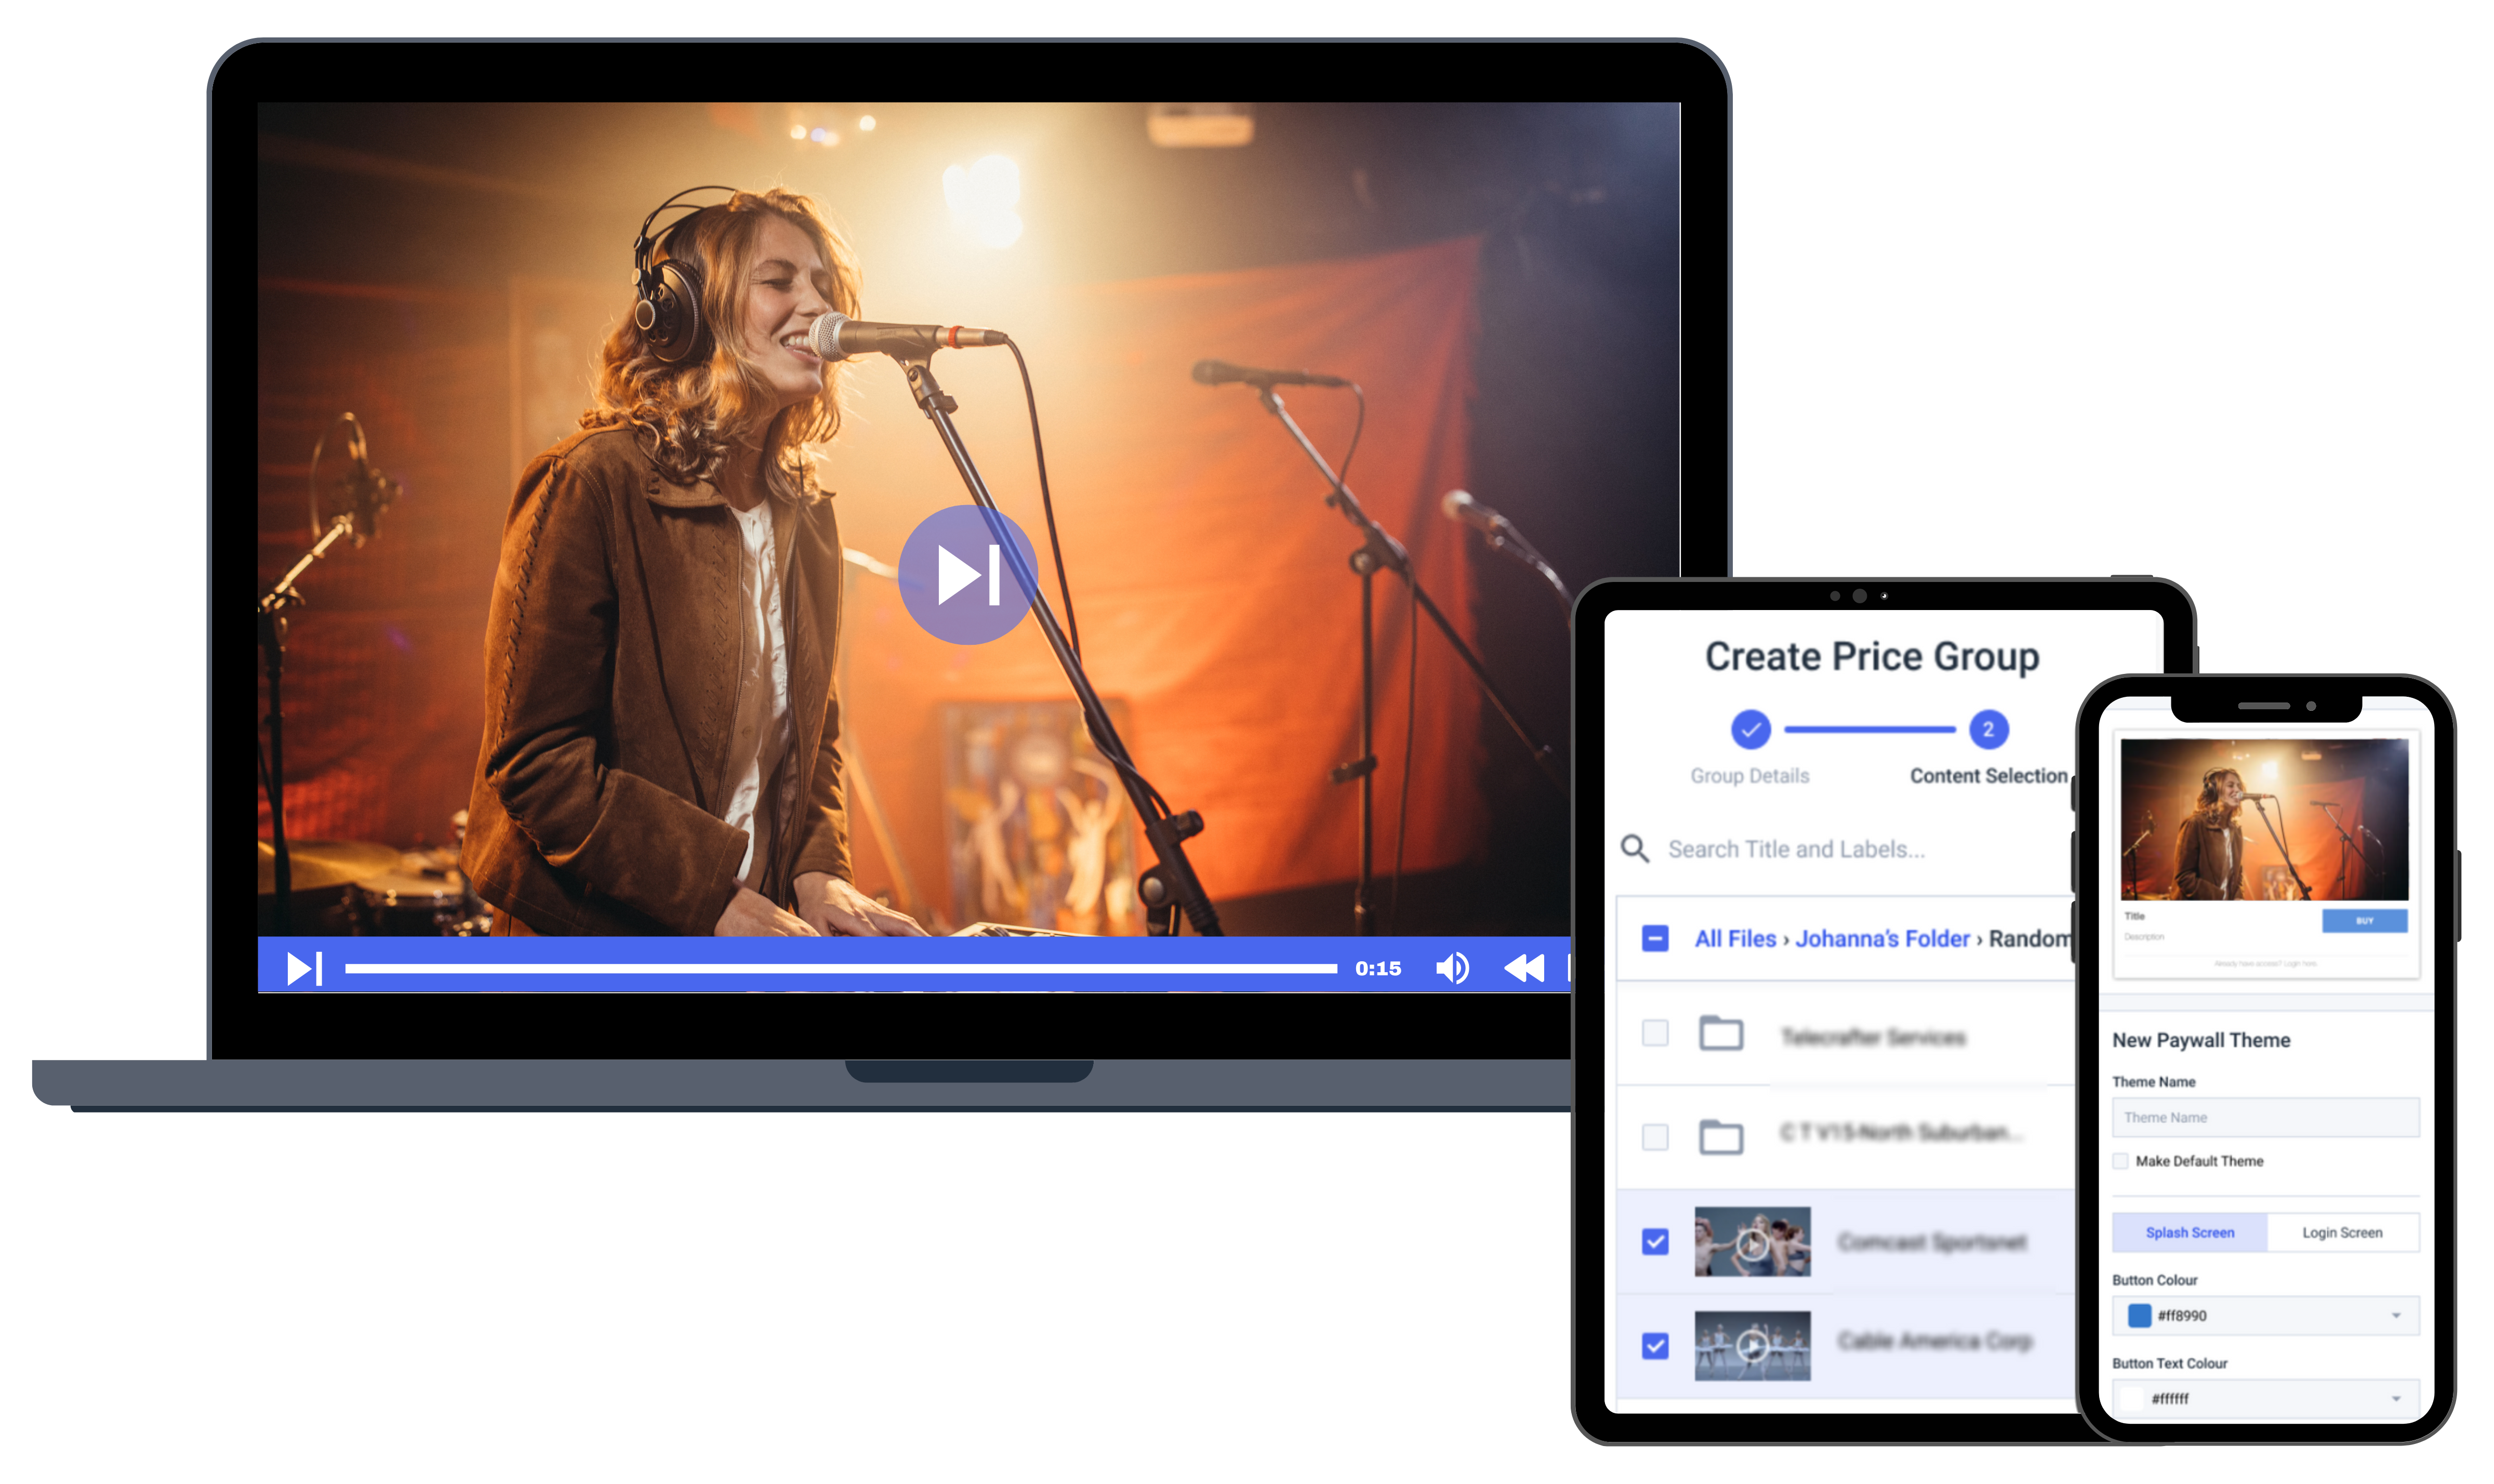
To generate revenue from your video, you must set up video monetization. This area offers the option to set up a paywall for your live channel. In other words, viewers need to pay for access to your content. You can charge a subscription fee or charge for individual access to each piece of content.
Please note that you can also set up a promo code to offer discounts to your viewers.
You can also insert sponsored ads to generate revenue on each view.
7. Embed Your Video Player
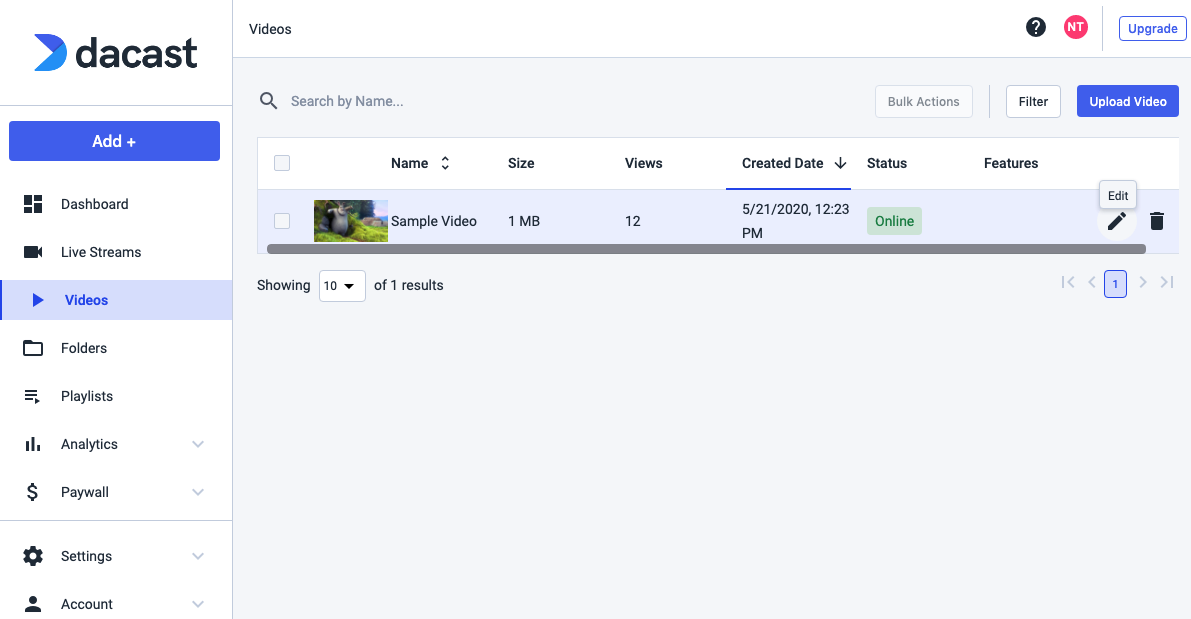
Next, you will embed your live streaming on your website. Go to the live channel you’ve created, and click the “Edit” button:
Navigate to the “Sharing” section under the “General” tab and copy the “Embed Code”:

Two types of embed codes are available: JS (Javascript) and iframe.
We recommend using the JS embed code because it’s more universally compatible with the full-screen feature. The JS embed code is also a requirement for the URL referral restriction feature to work (which restricts content based on the websites allowed to host it).
That said, the iframe embed code is more compatible with and/or required for some frameworks, including WordPress and WIX.
Once you have selected your embed code type, the last thing you have to do is insert it into your website. It will not look the same for everybody, but assuming you have access to edit at the HTML level, it will look something like this:

You can change the width and height parameters, as well. The parts for the code that you must change to do this are highlighted in red above.
If you go to the “General” tab and navigate to “Sharing,” you will also see a “Share Link” option. This is not an embed code but a link that allows you to share directly with viewers or to your social networks.
8. Start Streaming
Once you’ve confirmed that your video player is working properly, it is time to start streaming. This process should be enjoyable, so take a deep breath and have some fun connecting with your audience.
For additional support, you can contact our 24/7 support team at Dacast.
Interactive Features
Adding interactive elements is essential when learning how to start streaming for beginners or exploring live streaming for dummies. Real-time chat allows viewers to engage with your broadcast instantly, boosting connection and audience retention. Use live polls and Q&A sessions to make your stream more dynamic—perfect for educators, business webinars, or product launches.
Embedding donation links or product CTAs directly into your stream helps drive action, especially for nonprofits, ecommerce brands, or event hosts. Whether you’re researching how to broadcast live, how to create a streaming channel, or how to do a live webcast, these features enhance viewer experience and make your stream more effective.
Live Streaming from Mobile Devices (iOS/Android)
In 2025, live streaming for beginners is easier than ever, especially from mobile devices. Yes, you can stream directly from your phone, making web streaming accessible anytime, anywhere. Whether you’re an entrepreneur, educator, or nonprofit leader, understanding how to start a live stream on the go is key to reaching your audience fast.
With Dacast, you can stream live from iOS or Android using our platform’s mobile-friendly tools or an RTMP-compatible app like Larix Broadcaster. These apps let you connect to your Dacast account, schedule events, and broadcast in HD directly from your smartphone.
If you’re asking “how do you live stream” or “what do I need to start live streaming,” mobile apps are a great entry point. For full control and scalability, Dacast also supports website live streaming and pro setups.
Beginner-Friendly Streaming Workflows (2025)
Solo creator setup: iPhone + app + cloud encoder
For beginners, a simple yet effective streaming setup involves using an iPhone combined with a streaming app and a cloud encoder. This setup eliminates the need for expensive equipment while providing great quality. The iPhone can capture high-quality video, and streaming apps like Streamlabs or OBS Studio make it easy to manage your stream. Using a cloud encoder allows for seamless streaming to platforms like Dacast without the need for powerful hardware.
Business setup: DSLR + capture card + OBS
For businesses, a DSLR camera offers high-quality visuals that are key for professional streams. Pairing it with a capture card ensures smooth video input into your streaming platform. OBS Studio is a free, open-source software that enables easy control over your stream, including graphics and transitions. This setup is perfect for corporate events, webinars, or product launches, providing a polished, professional experience for viewers.
Advanced: Multi-camera + hardware switcher + encoder
An advanced streaming setup is ideal for larger productions or multi-person events. A multi-camera setup, combined with a hardware switcher, allows you to seamlessly switch between different angles. The encoder ensures your stream runs smoothly across different platforms. This setup is often used for live sports, concerts, or large-scale conferences, offering a dynamic viewing experience. While more complex, it provides high production value and a professional broadcast feel.
Beginner Troubleshooting Tips
Now that we’ve covered the 8 steps to setting up a live stream, it’s time to discuss some basic beginner troubleshooting tips that you may encounter.
What to check if your stream isn’t working
If your stream isn’t working, the first thing to check is your internet connection. A slow or unstable connection can prevent your stream from going live. Make sure you have a reliable upload speed, ideally at least 5 Mbps for standard quality.
Next, ensure your streaming software is configured properly, and that your encoder settings match your platform’s requirements. Lastly, check if your streaming platform (like Dacast) is online and not experiencing issues.
How to fix lag, buffering, or dropped frames
Lag, buffering, or dropped frames can be frustrating, but these issues are usually fixable. Start by reducing the resolution of your stream to lessen the load on your internet connection and computer. Lowering the bitrate can also help improve stability.
If the problem persists, check for any applications or devices that might be using up bandwidth on your network. Additionally, updating your encoder software and using a wired internet connection instead of Wi-Fi can improve performance.
Live Streaming Analytics for Beginners
Break down key metrics:
When learning what is live streaming, it’s important to understand key metrics that help evaluate the success of your streams. Key metrics give you insight into how well your stream is performing and what adjustments you can make for better results.
Concurrent viewers
This refers to the number of people watching your stream at any given time. Monitoring concurrent viewers helps you gauge the popularity of your stream and identify peak viewing moments.
Engagement rates
Engagement rates track how active your audience is during the stream. This includes actions like comments, likes, and shares. High engagement often means your content is resonating with viewers, making it an essential metric for understanding your audience.
Viewer retention
Viewer retention shows how long viewers stay tuned in during the live stream. A high retention rate indicates that your stream is holding people’s attention, while a drop-off could mean you need to adjust your content or pacing.
How analytics help improve future streams
Analytics are a powerful tool to help you refine your live streaming setup. By reviewing your metrics, you can adjust your content, timing, or platform to better align with your audience’s preferences. For business owners, this can mean more effective marketing and a stronger connection with your audience. Using streaming tips for beginners and the insights gained from analytics, you can continuously improve your live stream performance.
Business Use Cases for Live Streaming in 2025
Live streaming is more than just a trend—it’s a practical tool businesses use every day. If you’re learning how to stream online or exploring how to stream for beginners, it helps to understand real-world use cases. Many companies are now hosting live webinars, town halls, and product launches to connect with remote teams and global customers.
E-commerce brands are using livestreaming online to promote live shopping events, while educators and nonprofits use it to share training sessions and virtual conferences. Knowing how to live stream and how to webcast effectively helps you stay relevant, reach wider audiences, and boost engagement. Whether you’re starting with web live streaming or need a full live streaming guide, Dacast offers reliable solutions for businesses at every level.
Global Streaming in 2025: What to Know
Streaming in Different Regions
When considering how to live stream globally, it’s important to be aware of regional restrictions and compliance regulations. For instance, in China, content restrictions are strict, and using platforms like Dacast can help you comply with local laws. Make sure to research regional guidelines, including what content is allowed, and explore platform-specific tools that ensure compliance while streaming in different parts of the world.
Using CDN for Low Latency Worldwide
A Content Delivery Network (CDN) is essential for ensuring smooth streaming, especially when broadcasting to global audiences. Using a CDN can reduce buffering and latency, delivering your content quickly and efficiently no matter where viewers are located. Platforms like Dacast offer CDN integration that helps you provide a seamless experience for audiences worldwide, ensuring high-quality video playback with minimal delay.
Time Zone and Audience Targeting Tips
Timing is crucial when live streaming for a global audience. Consider your viewers’ time zones and schedule your streams accordingly. If your audience spans across different regions, tools like Dacast allow you to track audience behavior and optimize your streaming schedule for maximum engagement. Additionally, take advantage of analytics to understand peak viewing times and tailor your content to better suit your audience’s preferences.
How AI is Simplifying Live Streaming in 2025
Auto-captioning and translation
Modern live streaming platforms like Dacast now include AI-powered auto-captioning and real-time translation. This makes your online live streaming accessible to global audiences—no extra software needed. It’s a must for brands, nonprofits, and educators looking to live stream online with inclusivity in mind.
AI-based content moderation
Worried about comments or trolls during a web streaming session? AI-driven moderation filters chats in real time, ensuring a clean, brand-safe experience—especially helpful for teams exploring how to start live streaming for business.
Stream highlights and summaries
AI tools now auto-generate stream highlights, recaps, and even social snippets. Whether you’re learning how to webcast live or building a website live streaming presence, this tech saves time and boosts reach—ideal for anyone asking, “how do you stream live?”
Tips for Increasing Viewership and Promoting Your Live Stream
If you’re just starting out with live streaming for business, growing your audience can feel overwhelming. But with a few smart steps, you can boost viewership steadily. Start by focusing on consistency. Stream regularly so your audience knows when to tune in. Engage with viewers in real time by responding to comments and asking questions. This makes your stream feel more like a conversation than a presentation.
It also helps to offer something of value in every broadcast. Whether you are demonstrating a product, answering FAQs, or hosting a webinar, aim to teach or solve a problem. That’s what turns casual viewers into loyal followers.
- Promote streams in advance
Give your audience a heads-up. Share your live stream schedule through email, social media, and your website. Promote at least 24–48 hours ahead so people can plan to watch.
- Optimize stream titles, descriptions
Use clear, keyword-rich titles that explain what viewers will learn or gain. Add short, helpful descriptions with the time, topic, and call-to-action. Make it easy for both viewers and search engines to understand your content.
- Use social simulcasting (if supported)
Broadcast to multiple platforms at once—like your website, Facebook, YouTube, or LinkedIn. This expands your reach and helps you meet viewers where they already spend time online.
Tips to Promote Your Live Stream
- Post teasers or countdowns on social media
- Collaborate with partners or influencers to cross-promote
- Use email newsletters to share stream details
- Include a live stream section on your homepage
- Turn live streams into on-demand videos for replay value
If you’re asking, how do I start streaming or looking for a full beginners guide to streaming, start small and stay consistent. Use this streaming tutorial as part of your live streaming guidance to grow over time. Whether you’re learning how to create a streaming channel, how to do streaming, or even how to create a live TV streaming website, platforms like Dacast make live streaming online simple, scalable, and professional for business users.
This section is part of our complete guide to live streaming, tailored for businesses looking to explore how to broadcast live in 2025.
Conclusion
It’s easy to start live streaming. Using this guide, you can stream a live broadcast quickly and easily. Combining the correct streaming equipment, whether you’re a novice or experienced, you can use this guide at any time to get you connecting with your audience online in the best way.
Live streaming offers businesses unparalleled flexibility—whether you’re streaming from mobile devices, remote locations, or in the studio. As digital transformation continues to evolve, streaming becomes essential for reaching wider audiences and engaging customers. Dacast is a scalable solution, perfect for both beginners and growing teams, offering a seamless, professional experience for any business looking to get started with live streaming.
If you want to get the best possible start in streaming, consider Dacast. Dacast’s is a professional-grade live-streaming platform. Built for professional broadcasters, you can broadcast and host on-demand and live content with the highest quality production. Get started today—schedule a free onboarding call or demo with us.
You can try Dacast for today with our 14-day free trial.
For exclusive offers and regular tips on live streaming, you can also join our LinkedIn group.