
The video experts blog
Live Stream Not Working? How to Troubleshoot Live Streaming Issues with Broadcasting

When it comes to live streaming, there are many moving parts. Broadcasters need a workflow for filming the live event, encoding or transcoding the files, delivering the video to users, and allowing playback by viewers. While a modern live streaming platform makes it simple to get started, issues can still pop up, and that’s why it’s important to know how to troubleshoot live stream issues.
Even though only 2.6% of live streams fail to start—the biggest problem with live video now—businesses can still lose viewers when streams have issues. If something goes wrong, therefore, broadcasters must respond with error handling best practices for streaming.
That’s why we’ll take a deep dive into how to troubleshoot video streaming issues immediately. Our suggestions follow a typical streaming workflow from video encoding to delivering and playback.
Let’s see what you can do if your audio or video live stream is not working correctly. Let’s get right into it so you can troubleshoot your live streaming issues confidently.
Table of Contents:
- Why Isn’t My Live Streaming Working?
10 Ways to Troubleshoot Live Streaming Issues
- Check Encoder Settings
- Confirm Bandwidth Availability
- Compare Upload Speed & Bitrate
- Turn Live Channel On
- Open Streaming Ports & Firewall
- Review CDN Status
- Verify Embed Code For Video Player
- Ensure Video Player Compatibility
- Inspect Viewer Restrictions
- Switch Streams
- Conclusion
Why Isn’t My Live Streaming Working?
Before you troubleshoot, first, let’s explore some of the reasons why your live stream might not work as planned. Audio and video streaming issues can occur at any point during the process, so it can be helpful to understand all the steps involved in successful live streaming.
Here are some of the most common reasons for live streaming failures:
1. Using the Wrong Technology
Whether you’re a vlogger doing a simple live stream from your bedroom or a broadcaster doing an elaborate multi-camera stream, you need to use the proper hardware and software.
A lack of preparation is one of the most common reasons for live audio streaming not working. For instance, for live streaming a music event, you need to ensure that every musician is properly mic’d up, that the audio is being mixed properly, and that all the cameras are capturing good-quality video.
What’s more, you also need to ensure that you’ve got adequate lighting arrangements or enough natural lighting to illuminate the environment. Else, your live stream viewing experience will take a hit.
2. Not Enough Bandwidth
Nothing will drive your viewership down quicker than a live stream with a lot of buffering. Even one short buffering interruption can lower your viewership by nearly 40%. To troubleshoot it, you need to test your internet connection before you start streaming.
But even with enough bandwidth, your live stream is not working, possibly due to a lack of speed. For example, most internet service provider plans in the U.S. have an upload speed of 5 Mbps or less. That means you can only live stream video at 720p resolution with a bitrate of 3 Mbps or lower.
So, make sure you check your internet speed to troubleshoot any potential audio and video quality problems that could occur in your live stream.
3. Audio and Video Not Synced
If your audio and video are out of sync, it can be extremely jarring for viewers. An issue usually causes this stream to broadcast unexpected errors with the encoder software, but poor internet connections or playback issues can also cause it.
To fix this problem, check your encoder settings and ensure the audio and video bitrates are identical. Simply restarting your encoder software can also fix your video streaming issues. We’ll discuss this process in more detail later. Also, checking your connection and playback devices can help too.
4. Live Streaming Mistakes to Learn From
Mistakes are bound to happen during live audio and video broadcasts. Sometimes, you can’t do anything about it, and sometimes you can troubleshoot. You probably remember this infamous (and hilarious) BBC interview from a few years back. If not, do you remember when a power outage disrupted the Super Bowl feed?
Luckily, you can troubleshoot some mistakes and your live stream not working can be avoided. With enough preparation, you can ensure your live stream goes off without a hitch.
5. Not Testing Your Equipment
One common live streaming mistake is not testing your equipment before going live. That can be a costly mistake, especially if you’re using new or rented equipment.
To troubleshoot your live stream not working, always test your equipment before going live. A good rule of thumb is to conduct a test live stream and use it as an opportunity to understand where any problems are occurring. You can then troubleshoot any potential audio or video issues through this test stream and ensure your live stream won’t be harmed.
That way, you can identify and fix any potential issues. The same goes for software. For instance, if you’re using a new live streaming platform like Dacast, it’s important to try it out, learn the ins and outs, and test it with your equipment before going live.
6. Weather Issues
No matter what country you live in, the weather can always be a potential issue. For example, if you’re live streaming an outdoor event and it starts raining, you need to have a plan in place. The last thing you want is your equipment damaged due to bad weather conditions.
You need to listen to weather reports in the days leading up to your live streaming event and plan accordingly. If it’s windy outside, make sure your equipment is properly secured. If it’s raining, have a plan to keep your equipment dry.
7. Unintended Eavesdropping
What’s worse than live streaming not working? Having your surroundings create unexpected audio and video problems to troubleshoot. When live streaming, you have to be aware of your surroundings. That’s because anything – and anyone – near your live streaming setup can be picked up by the camera and microphone.
For example, if you’re conducting an interview and someone walks by and starts talking loudly, the microphone and broadcast will pick up audio from your viewers. To avoid this problem, you need to be aware of your surroundings and, if possible, have a dedicated area for your live streaming setup.
8. Power Outages
No matter how well you prepare, there’s always the potential for a power outage. Between 2011 and 2021, the annual number of power outages caused by bad weather increased by nearly 80%. When the power goes out, your audio or video live stream will go down too.
So, it’s important to have a backup plan in an emergency. For example, you can use a battery-powered UPS (uninterruptible power supply) to keep your live streaming equipment running for a few hours. You can also use a generator to power your equipment if the power is out for an extended period.
This is especially important if you’re an enterprise or OTT platform that’s launching a paid live stream to a massive audience. The last thing you want is to be troubleshooting your issues when the stream has already started. So, make sure you’re prepped for such issues beforehand.
10 Ways to Troubleshoot Live Streaming Issues
When live streaming, your environment may cause some issues. But as we all know, live streaming technical difficulties can give you a much stronger headache. So, how can you decrease the chances of a live stream not working and troubleshoot problems?
Here are ten ways to troubleshoot live streaming issues:
1. Check Encoder Settings
 Double-checking for the correct encoder settings is the best way to ensure a quality live streaming experience.
Double-checking for the correct encoder settings is the best way to troubleshoot and ensure a quality live streaming experience.
Most live streams require a hardware or software encoder to convert RAW video files into a format suitable for streaming. Modern encoders, however, have a lot of settings to choose from, and an improper configuration could cause issues.
That’s a common live stream problem, so we always suggest you double-check your encoder settings if your live stream isn’t working correctly to troubleshoot this problem.
| VIDEO CODEC | H.264 (x264 may work) |
| FRAME RATE | 25 or 30 |
| KEYFRAME INTERVAL | 3 secs (or 3x frame rate) |
| SCANNING | Progressive |
| ENCODING BITRATE | Constant (CBR) |
| AUDIO CODEC | AAC |
| AUDIO BITRATE | 128 kbps |
| AUDIO CHANNELS | 2 (Stereo) |
| AUDIO SAMPLE RATE | 48 kHz (48,000 Hz) |
These settings are a baseline requirement for a live streaming setup with Dacast. That’s because they’re ideal for ensuring compatibility with the Dacast video platform and a wide range of user devices.
If you don’t see a message that indicates the encoding hardware or software is streaming to primary, there could be an issue with your encoder settings.
First, you’ll want to ensure your live stream encoder is pointed at your streaming server, which delivers the stream to end-users. The encoder’s “Stream Name” and “Stream URL” should match the values provided by your Online Video Platform (OVP).
If the encoder only has a single URL field, you’ll need to use the ‘Backup URL’ under the ‘Other RTMP encoders’ section of Dacast’s encoder software setup page.
If you’re using encoding software that’s not integrated with Dacast, you may also need to enter a login and password during configuration. That information—different from your Dacast account—will also appear on the Dacast encoder setup page.
When multi-bitrate streaming, some encoders require specific names for each stream. However, the requirements may be different, depending on which encoder you’re using. If there still seems to be an issue with your encoder, we recommend trying another option, like OBS Studio.
If an encoder software error occurs while audio or video streaming, try the steps above to address the issue and troubleshoot it.
2. Confirm Bandwidth Availability
Bandwidth measures the data transfer rate, which varies depending on streaming quality, viewers, and more. That means some streams will use more traffic than others, and you’ll need to analyze your bandwidth usage and availability if you’re experiencing live streaming problems.
Every Dacast plan has a limited amount of bandwidth available for streaming. Once you’ve hit the limit, your stream will stop unless you’ve set up overage protection. You can also upgrade your video bandwidth anytime, but it won’t go into effect mid-stream.
That is why it is important to check and ensure you have enough bandwidth before starting your live stream to troubleshoot this streaming issue.
You can check if you’ve hit the limit by viewing the “Upgrade my plan” option within your Dacast account. You can also use our calculator to determine which plan matches your bandwidth requirements based on broadcast frequency, viewers, stream length, and quality.
3. Compare Upload Speed & Bitrate

The bitrate of a stream is a measurement of the number of bits required to be transmitted per second. Transferring the stream to your OVP needs to be at least as fast as the video stream’s bitrate. Streams with bitrates that exceed bandwidth could suffer from lags, buffering, or outages.
If you’re using adaptive bitrate (ABR) streaming, your total bitrate is the sum of every bitrate you’re streaming simultaneously. We recommend keeping this amount at less than half of your upload speed because network conditions often fluctuate throughout the day. It can help you troubleshoot this issue.
You can test your upload speed using https://testmy.net/upload. If your steam’s unable to maintain a stable broadcast, you should compare your upload speed to the total bitrate. Then, adjust the bitrates included in your streaming profile to see if it helps.
You can also improve your upload speed by using a wired connection, increasing your internet plan, moving your encoder closer to the router, or limiting the WiFi usage of other devices on the network. To do this, you need to check with your Internet service provider.
You should adjust your total bitrate and upload speed until you find a balance that offers high-quality streams without issues.
Getting the right bitrate set-up will help you troubleshoot quality issues when live streaming. As always, it helps to have faster internet speeds that can enable you to broadcast your live stream at the best possible audio and video quality.
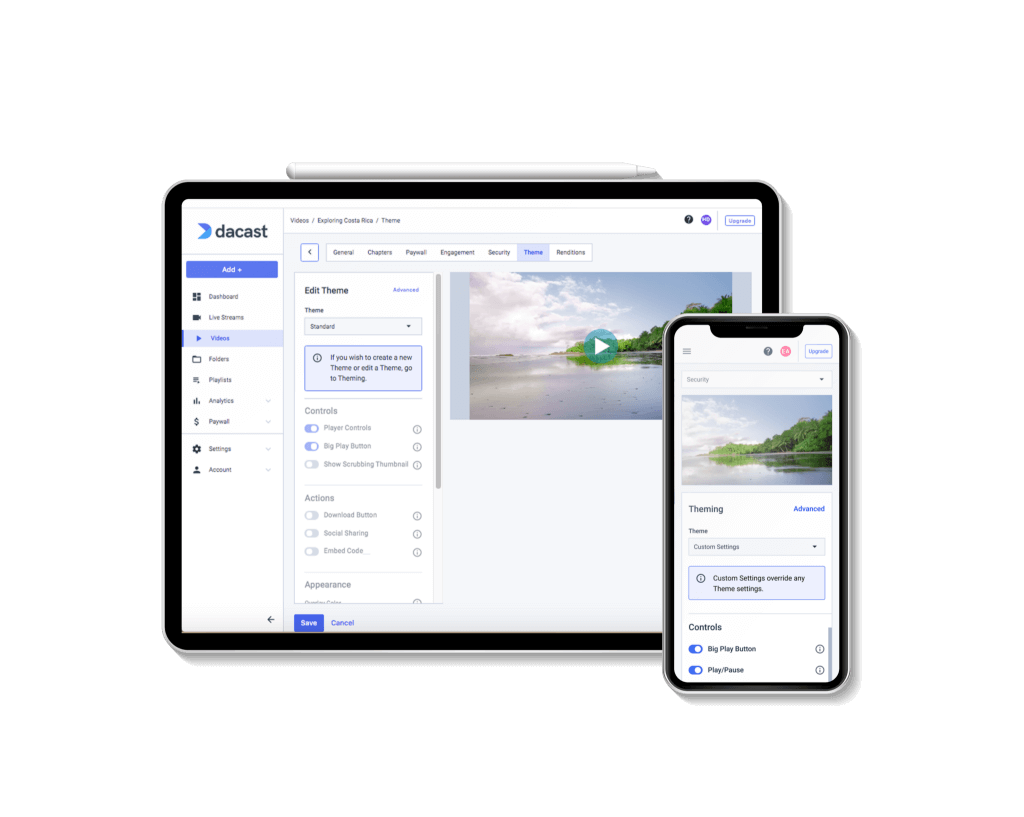
4. Turn Live Channel On
When broadcasting with Dacast, you’ll need a live channel turned on and configured properly. The channel settings determine the enabled features, viewer restrictions, the video player’s branding, and more.
For example, set up a channel to stream to an HTML5 video player, a low-latency live channel, or a playlist channel for a continuous series of videos. Channels give broadcasters full control over how their video content reaches end-users.
You’ll need to create a live channel within the Dacast dashboard to deliver your encoded video stream to users. Live channels are set to off by default, so a simple mistake is forgetting to enable them before the stream starts.
If the encoder is running, but the video preview is black, make sure you’ve turned the correct live channel on within the Dacast dashboard.
That is an easy streaming problem to troubleshoot!
5. Open Streaming Ports & Firewall
While most broadcasters can begin streaming immediately, sometimes certain ports are closed by their IT team or a firewall. In addition, your PC or network may sometimes have an integrated firewall that automatically blocks the required ports.
Firewall blocking a video stream is a common issue that we can help you fix!
If there are issues, you should first check if port 1935 is open when streaming troubleshooting. That’s the default port for RTMP and is necessary for your encoder to transfer the stream to Dacast. In addition, the video platform will also attempt to use port 80 or 443 as a backup. That’s why ensuring all three ports remain open is a good idea.
For Mac users, you can check which ports are open by opening the Network Utility. From there, enter your IP address and click scan. After a few moments, you’ll see a list of open TCP ports.
Windows users can check their open ports using the Command Prompt. Type in the command ‘netstart a’ and press enter. Any ports that appear with the LISTENING state are open already.
If one or more of the necessary ports are closed, you’ll likely need to contact your IT team to get them opened manually.
6. Review CDN Status
A content delivery network (CDN) is a set of worldwide servers used to distribute content. These servers cache the video content (or other data) close to users to shorten the transfer distance or last-mile delivery. That can greatly reduce the latency of streaming video.
While content delivery networks (CDNs) are meant to improve streaming video performance, they can still have issues. Some CDNs, like Cloudflare, have experienced outages in the past.
Once video content is sent to the Dacast platform, it’s automatically transferred to a CDN and distributed amongst its servers. That means Dacast users have little to worry about when it comes to managing the CDN.
You can check Down Detector or a similar site if your viewers in certain regions are experiencing issues, as there could be CDN servers down. If you believe the CDN is down or it’s not functioning correctly, contact us, and we can investigate the issue. It’s not a common streaming issue, but it can occur.
7. Verify Embed Code For Video Player
When using an OVP like Dacast, it’s usually straightforward to embed videos across the Internet on websites or within social media posts. For most broadcasters, copying and pasting the embed code provided within the Dacast dashboard is all it takes to share video content.
There are two types of embed codes available: iFrame and JavaScript. You can insert either of these into HTML to integrate live streaming nearly anywhere around the web.
You can verify that the embed code was copied correctly by checking the page source code. Right-click on the page and choose ‘View Page Source’, then search for ‘Dacast’ within the markup. Compare this to the embed code within the Dacast dashboard and recopy it if necessary.
That’s an easy live streaming issue to fix by following the directions above.
8. Ensure Video Player Compatibility
 Ensure your streaming profile is compatible with the user’s video player.
Today’s viewers watch live streams across various devices with different video player implementations. That means you need to use a streaming protocol compatible with a wide range of video players and devices.
For most broadcasters, that means using HTTP live streaming (HLS), which is compatible with any HTML5 or Video.js-based video player. That includes Dacast’s video player that’s also ready for nearly any device.
In addition, most browsers are phasing out the Flash Player, so if you’re streaming over the RTMP protocol, some users may not be able to watch. If you’re getting user complaints, check which browser and device they use to access your stream.
Ensure your streaming profile is compatible with the video players that your viewers use so that you’re capable of reaching your entire audience.
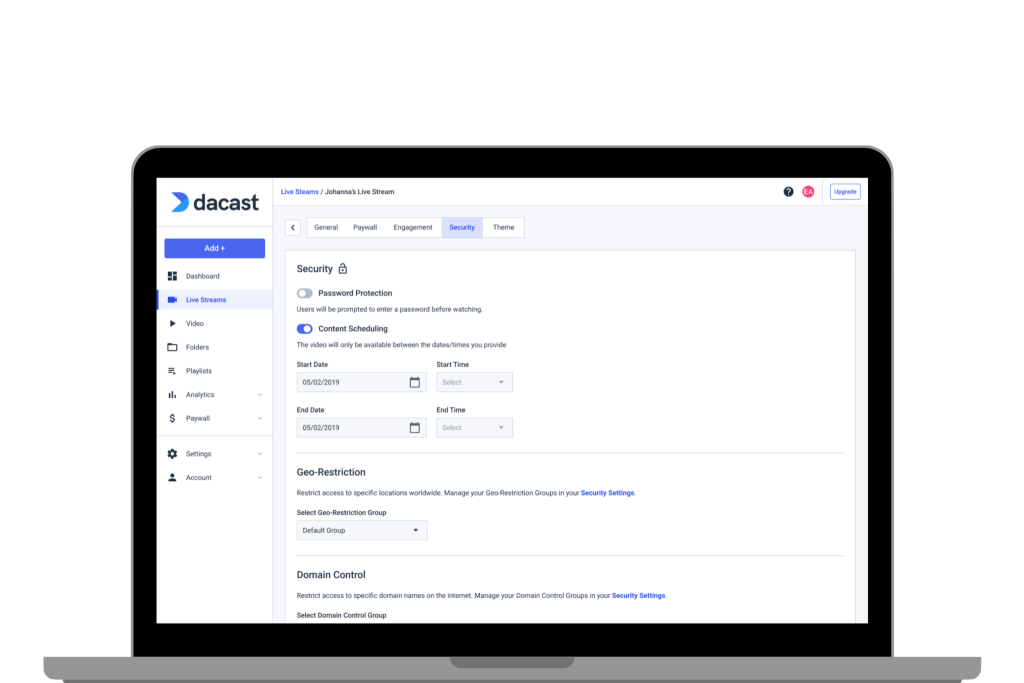
9. Inspect Viewer Restrictions
Geographical or domain-specific restrictions are critical for preventing piracy and complying with regulations in a particular region. For example, broadcasters can limit where the stream is viewed and which websites can embed the video.
If viewers can’t see your live stream, they should be able to, but you should ensure your restrictions are configured properly. You may be inadvertently preventing your audience from accessing the stream.
Within Dacast, all countries can access a stream unless you create a list of countries you want to receive the broadcast. So, make sure you haven’t left off any country your target audience may be viewing from.
Similarly, you’ll want to confirm that any sites you want to display the live stream are included on the list of allowed referrers within Dacast. It’s also important to note that these restrictions only work with JavaScript players and not with iFrame embeds.
If a viewer can’t see your content in a particular country, but other viewers can access it, viewer restrictions are most likely the streaming issue they are encountering.
10. Switch Streams
 Switching between current and backup streaming channels is an ideal way to troubleshoot your professional-grade broadcast.
If none of the previous solutions fix your live broadcast, we recommend trying a backup stream or creating a new one from scratch.
Dacast provides a backup stream URL nearly identical to the primary URL, but there’s ‘b’ at the beginning instead of ‘p.’ Replace this in your embed codes and test the backup stream’s playback again.
We suggest creating a new stream from scratch if the backup live stream’s not working. Sometimes, you may notice settings you misconfigured the first time.
Finally, if all your live streaming troubleshooting doesn’t help, feel free to contact technical support, which is available to Dacast users 24/7. The Starter Plan includes chat support, while the Pro and Premium Plans also provide phone support.
FAQ
1. Why is my live streaming not working?
There can be several reasons why your live streaming broadcast isn’t working well. Here are some of the most common reasons:
- You’re using the wrong technology
- Not enough bandwidth
- Audio and video not synced
- Live streaming mistakes
- Equipment haven’t been tested
- Weather issues
- Unintended eavesdropping
- Power outages
2. How do you diagnose streaming problems?
To diagnose and fix streaming problems, here’s what you can do:
- Check encoder settings
- Confirm bandwidth availability
- Compare upload speed and bitrate
- Turn live channel on
- Open streaming ports and firewall
- Review CDN status
- Verify embed code for video player
- Ensure video player compatibility
- Inspect viewer restrictions
- Switch streams
3. How do I check live streaming?
To check live streaming, you should:
- Open your live streaming app and view the output quality
- Join your live stream from another device to determine its quality
- Check if the bandwidth you’ve allocated to the stream is enough
- Review your CDN status
- Check the live stream on multiple devices for quality testing
4. How do I enable live streaming?
To enable live streaming, you can do the following things:
- Use the right tools for live streaming
- Set your bandwidth right
- Make sure your internet connection is stable
- Determine how the viewers will watch the stream
- Use working equipment to power your live stream
5. How can I stream live for free?
There are several ways to start a live stream for free. You can use social media platforms like YouTube Live, Instagram Live, and Facebook Live to go live. Alternatively, you can leverage a live streaming platform that offers a free or freemium plan to go live without any charges.
Conclusion
There you have it. If you were wondering, “why won’t my live stream work?” before reading this, we hope you found your answer. Remember, experiencing live streaming problems isn’t anything out of the ordinary.
It may require checking your connection speed, contacting your internet service provider, or tweaking your encoder settings, but you’ll be able to do it.
Brands should implement a robust and resilient live stream workflow they can rely on in the future. The last thing a broadcaster wants is issues during a live stream that impact the user experience. That said, knowing how to troubleshoot live streams is critical for companies.
Luckily, Dacast’s streaming platform makes setting up and managing live streams as easy as possible. That’s why the video streaming solution was nominated as the Best Small/Medium Business Platform in the 2019 Streaming Media Readers’ Choice Awards.
Dacast is an end-to-end video streaming solution that gives broadcasters everything they need to deliver high-quality live streaming events to their audiences. It’s compatible with most encoders and provides a powerful video player built to deliver live streams around the web.With Dacast, you can forget about your live stream not working.
If you think Dacast may fit your organization, try our 14-day free trial now (no credit card required). Find out for yourself how straightforward hosting professional video can be.
For regular live streaming tips and exclusive offers, join our professional broadcaster’s LinkedIn group.
Thanks for reading, and good luck with your troubleshooting efforts!