What is Switchboard Live?
Switchboard Live is a video distribution platform allowing you to simultaneously live stream across your own streaming platform (such as Dacast) and all the most popular social media channels (such as Facebook and Youtube).
Do you need a paying Switchboard Live account?
Yes. The minimum cost is $35 per month (billed annually) for 3 simultaneous live streaming destinations. A 7-day free trial is also available.
What if I am not a Switchboard Live customer?
You can still use the multi-destination streaming method with your encoder to live stream simultaneously to Facebook (or any other social media channels) and Dacast.
How to stream to Dacast using Switchboard Live?
To stream to Dacast and other platforms via Switchboard Live, you will need the following:
- A Dacast account.
- A Switchboard Live account.
- An Encoder.
- And any social media account of your choice (YouTube or Facebook for example).
Step 1:
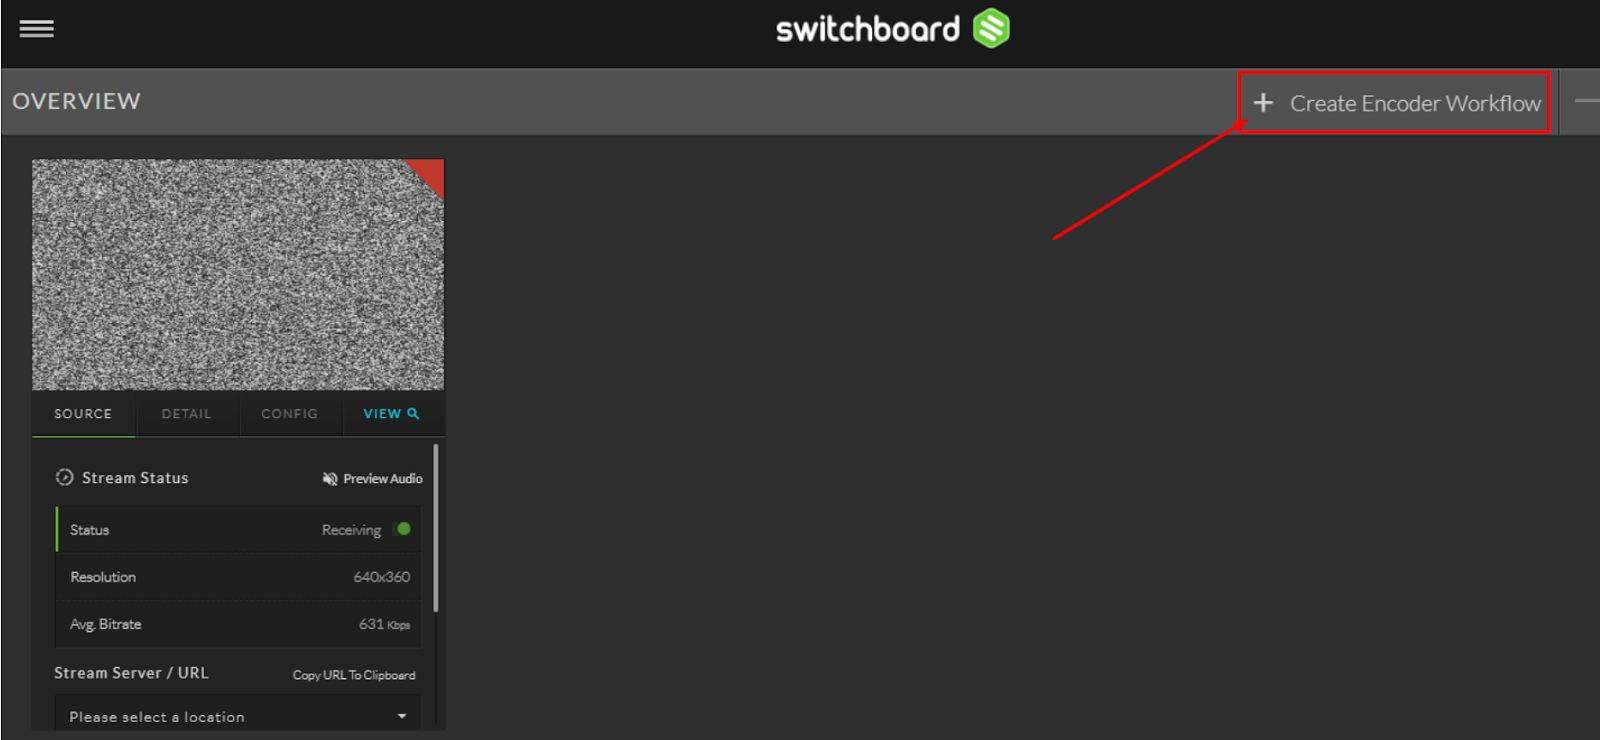
Once in your Switchboard dashboard, click on “+ Create Encoder Workflow”:

Step 2:
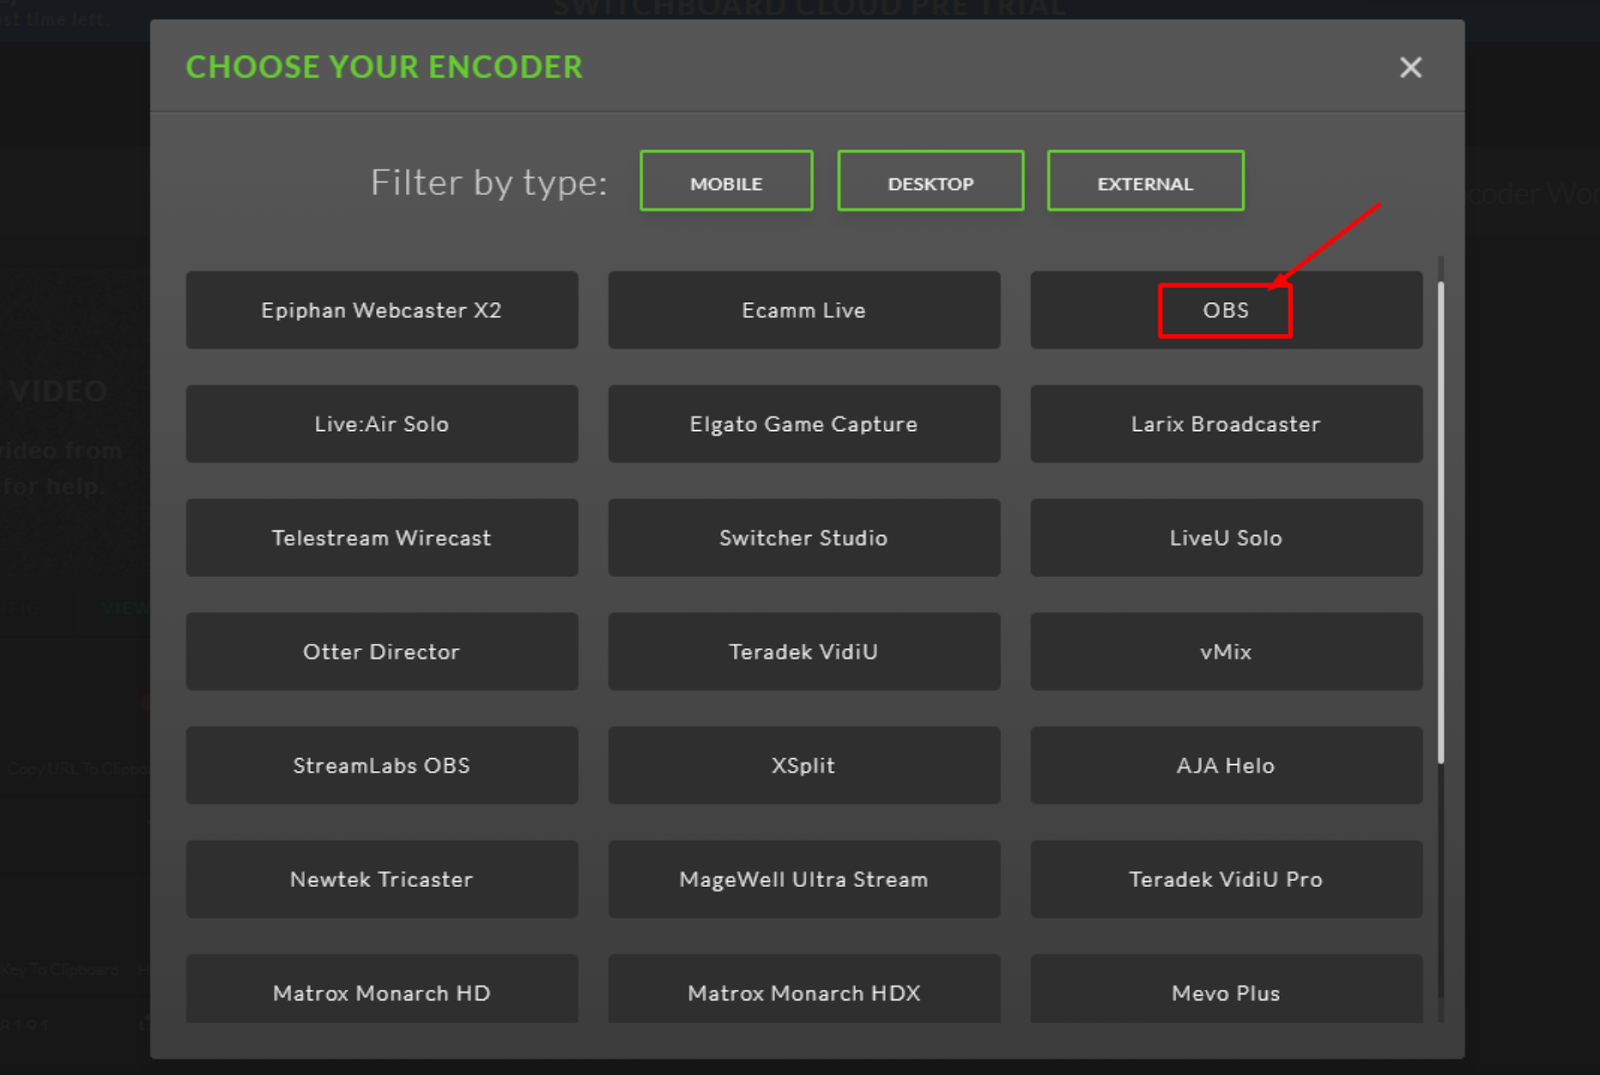
Then select the encoder of your choice (you may filter by type). In this example, I will choose OBS:

Step 3:
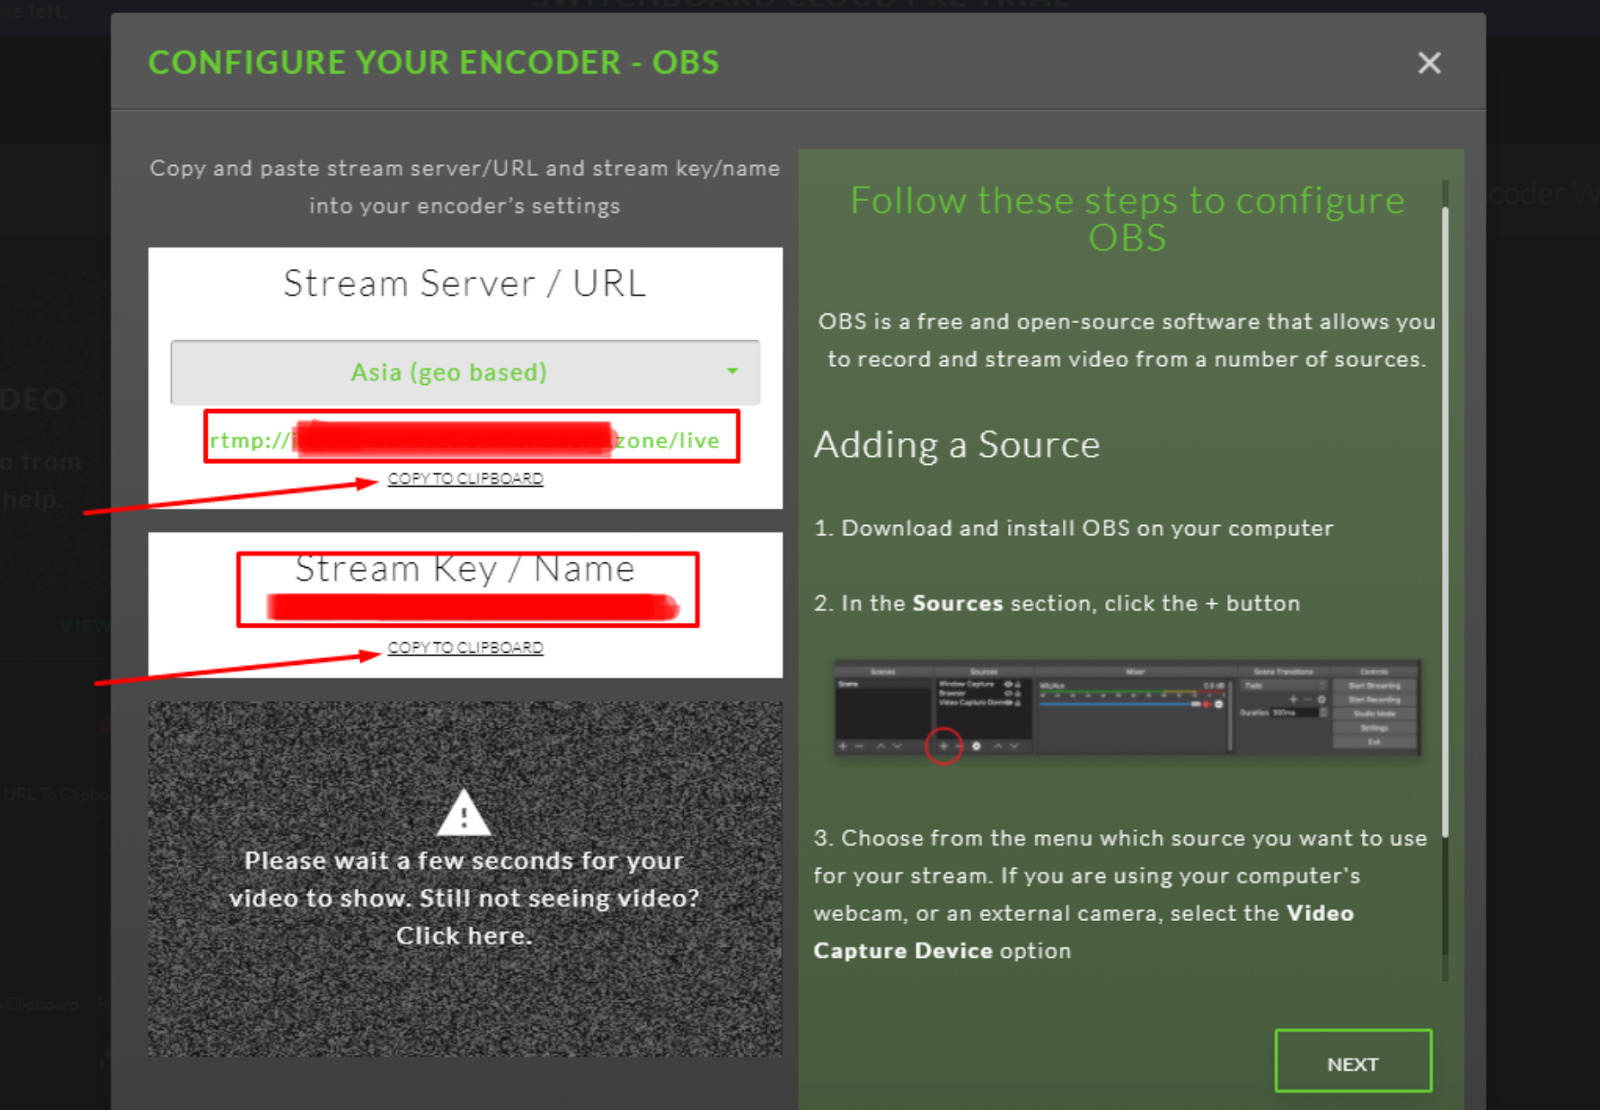
Get the Stream Server/URL and the Stream Key/Name from your Switchboard account. Make sure the location auto-selected is correct:

Step 4:
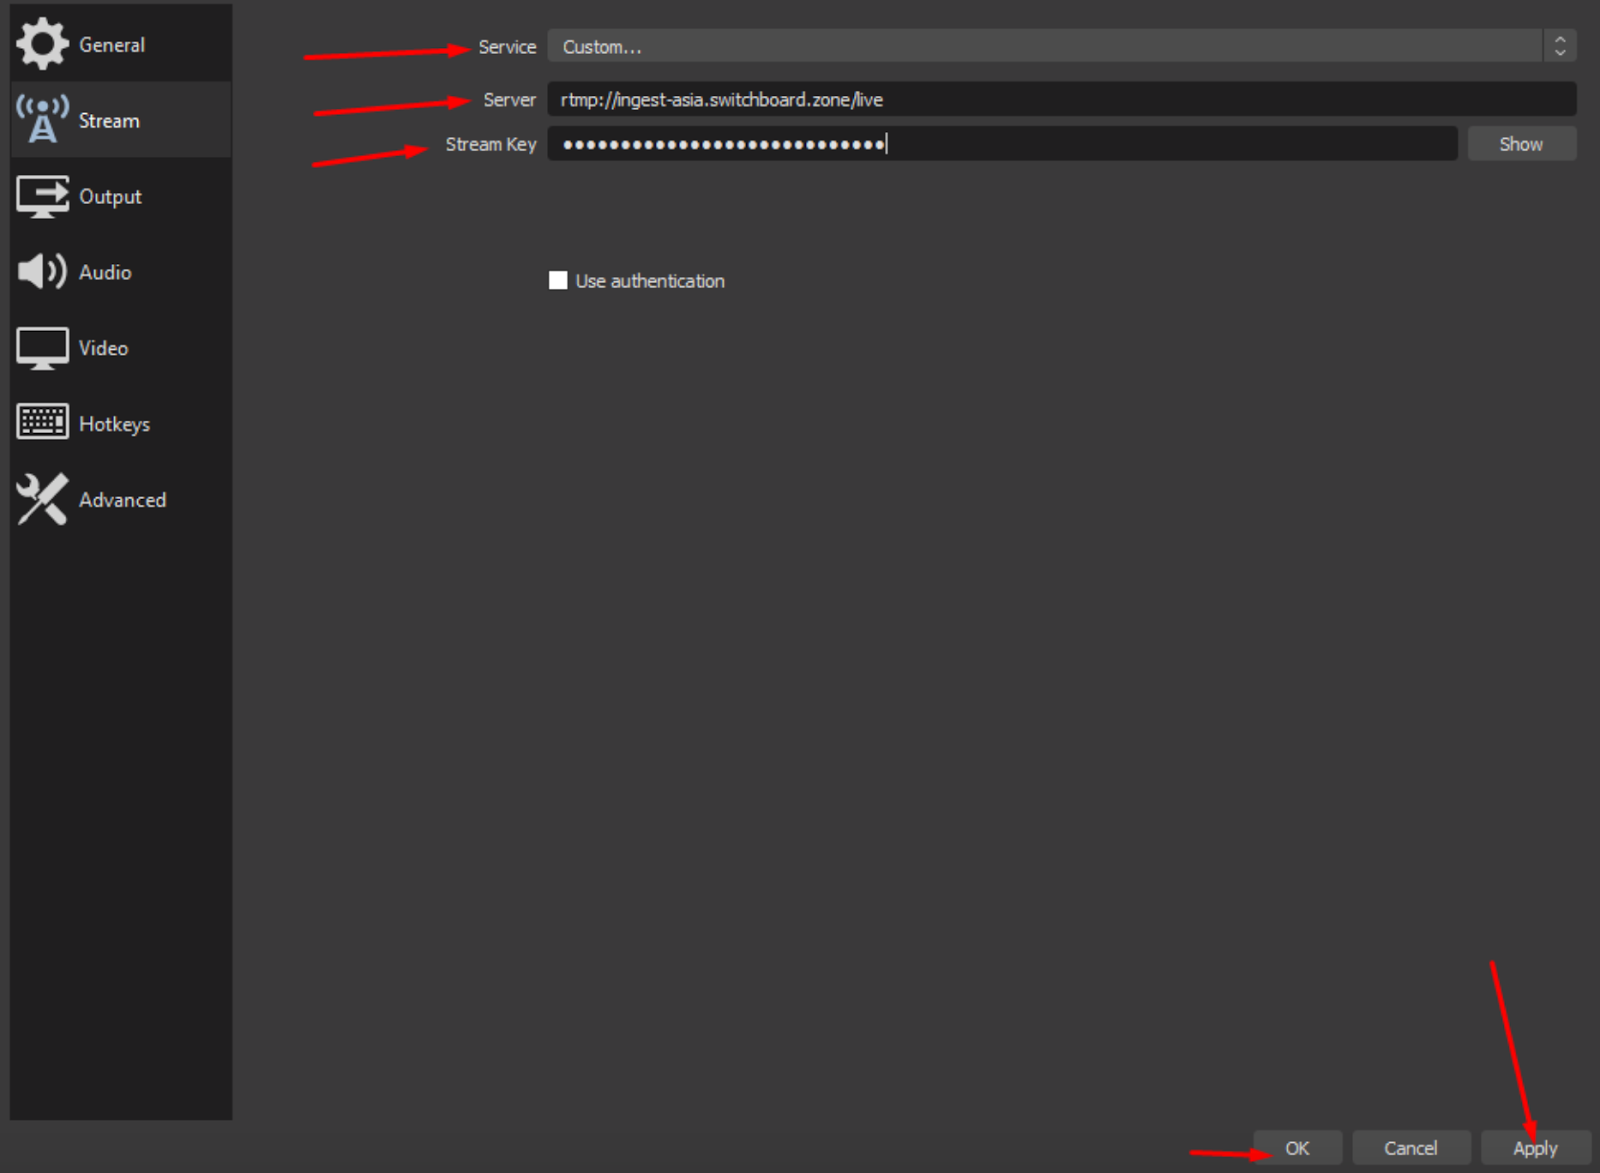
In OBS, you’ll go to “Settings”, then “Stream” and you will select “Custom” in service.
Now you can fill the Stream section with encoder configuration from switchboard live:
- The “Stream Server: info will go into the “Server” field.
- The “Stream Key” info will go into the “Stream Key” field.
Once you are ready, you can click “Apply” and then “OK”:

Step 5:
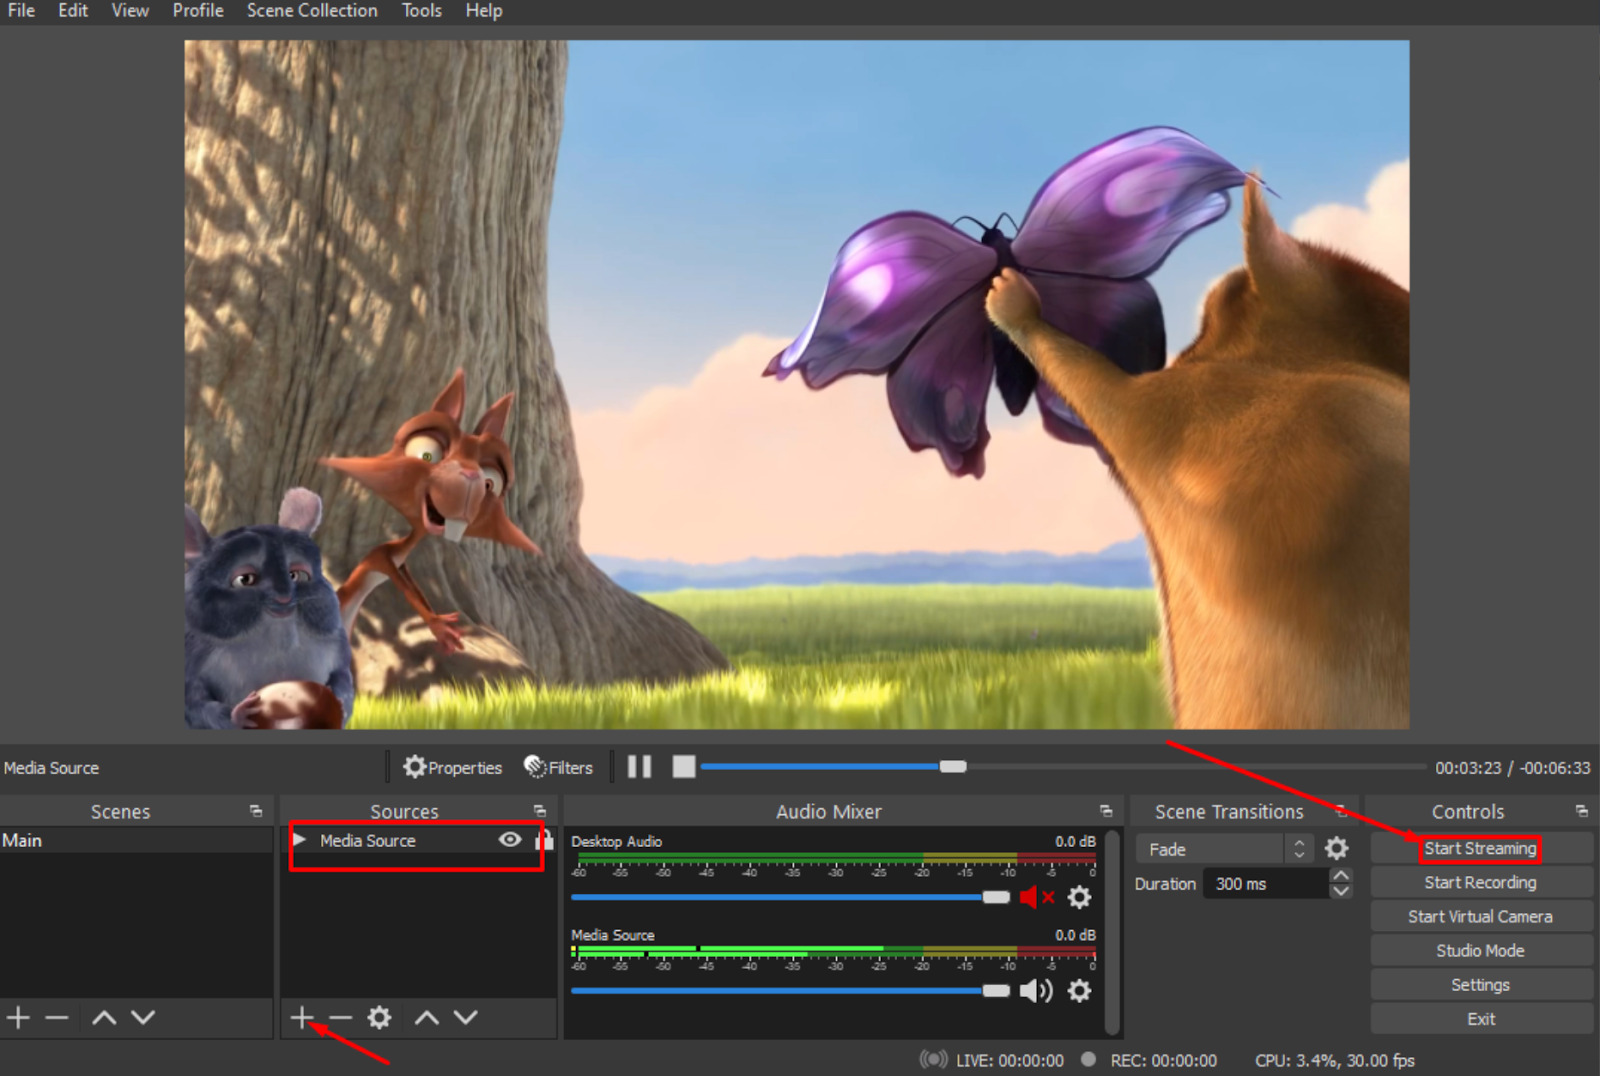
Select your preferred source on your Encoder (OBS in our case), and when you are ready, click on “Start Streaming”:

Step 6:
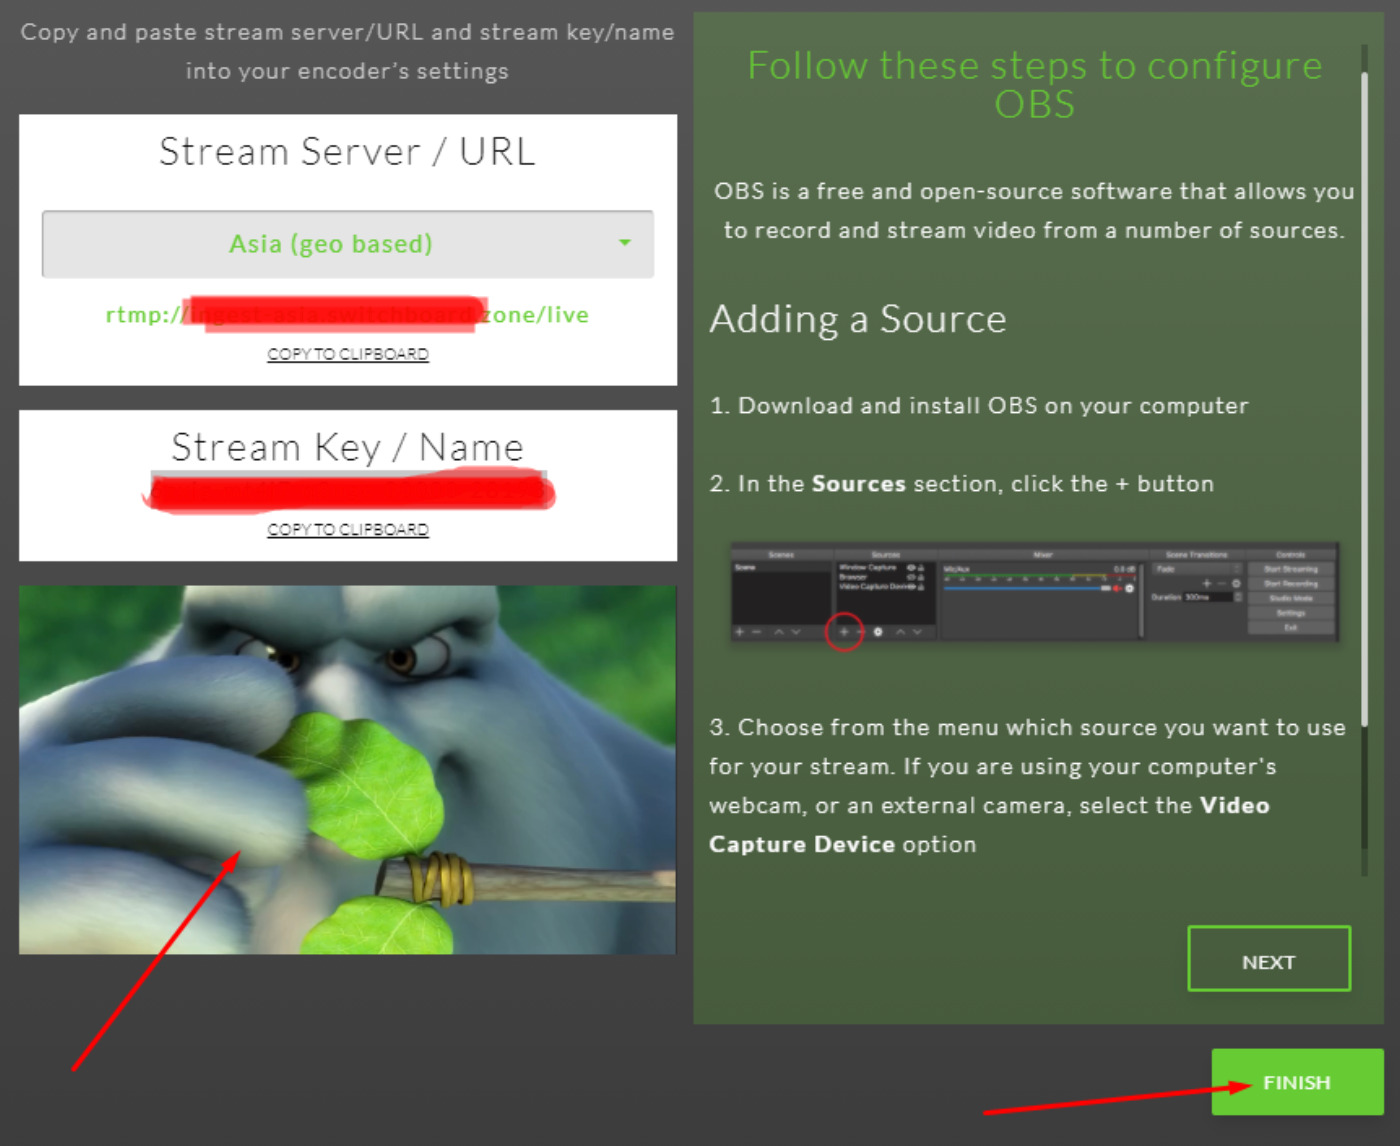
After a few seconds, your stream should appear on your Switchboard dashboard. Once it does, click on “Finish”:

Step 7:
You’re now ready to select the destination of your stream (NOTE: make sure you choose a streaming location before going live).
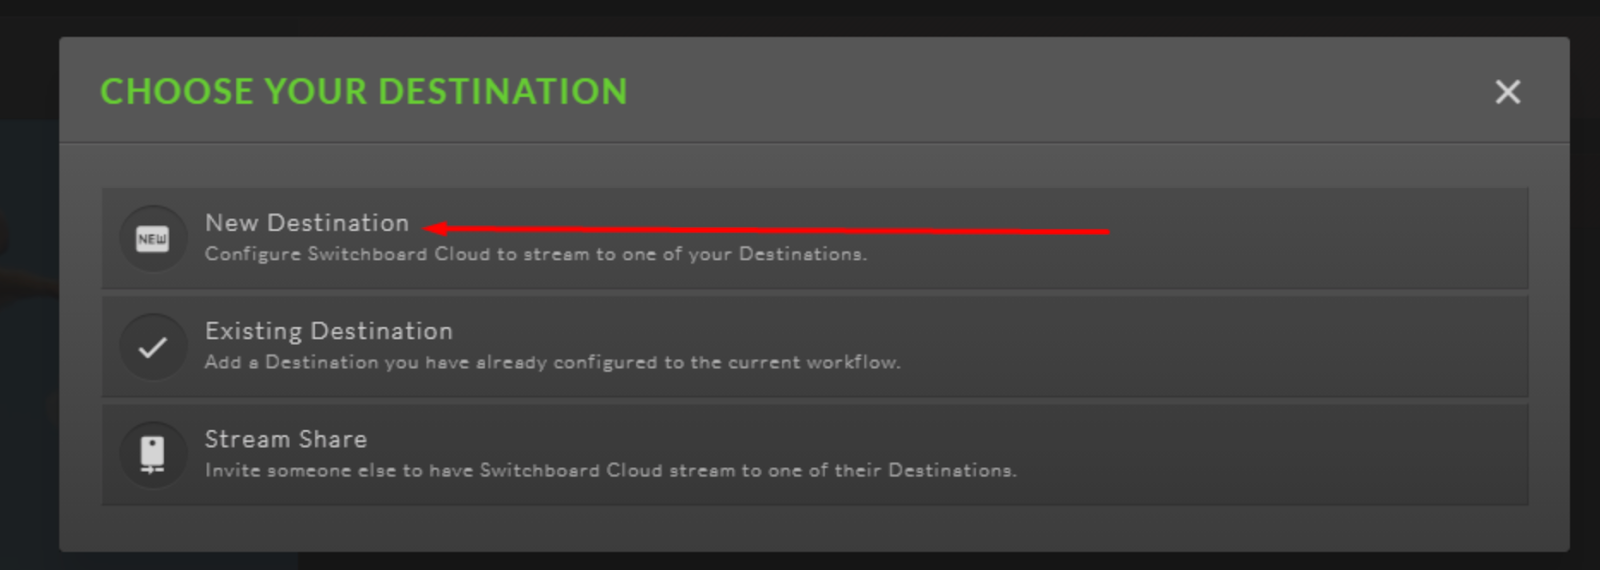
First, click on the plus sign under “Destinations (New)”, and then click “New Destination”.



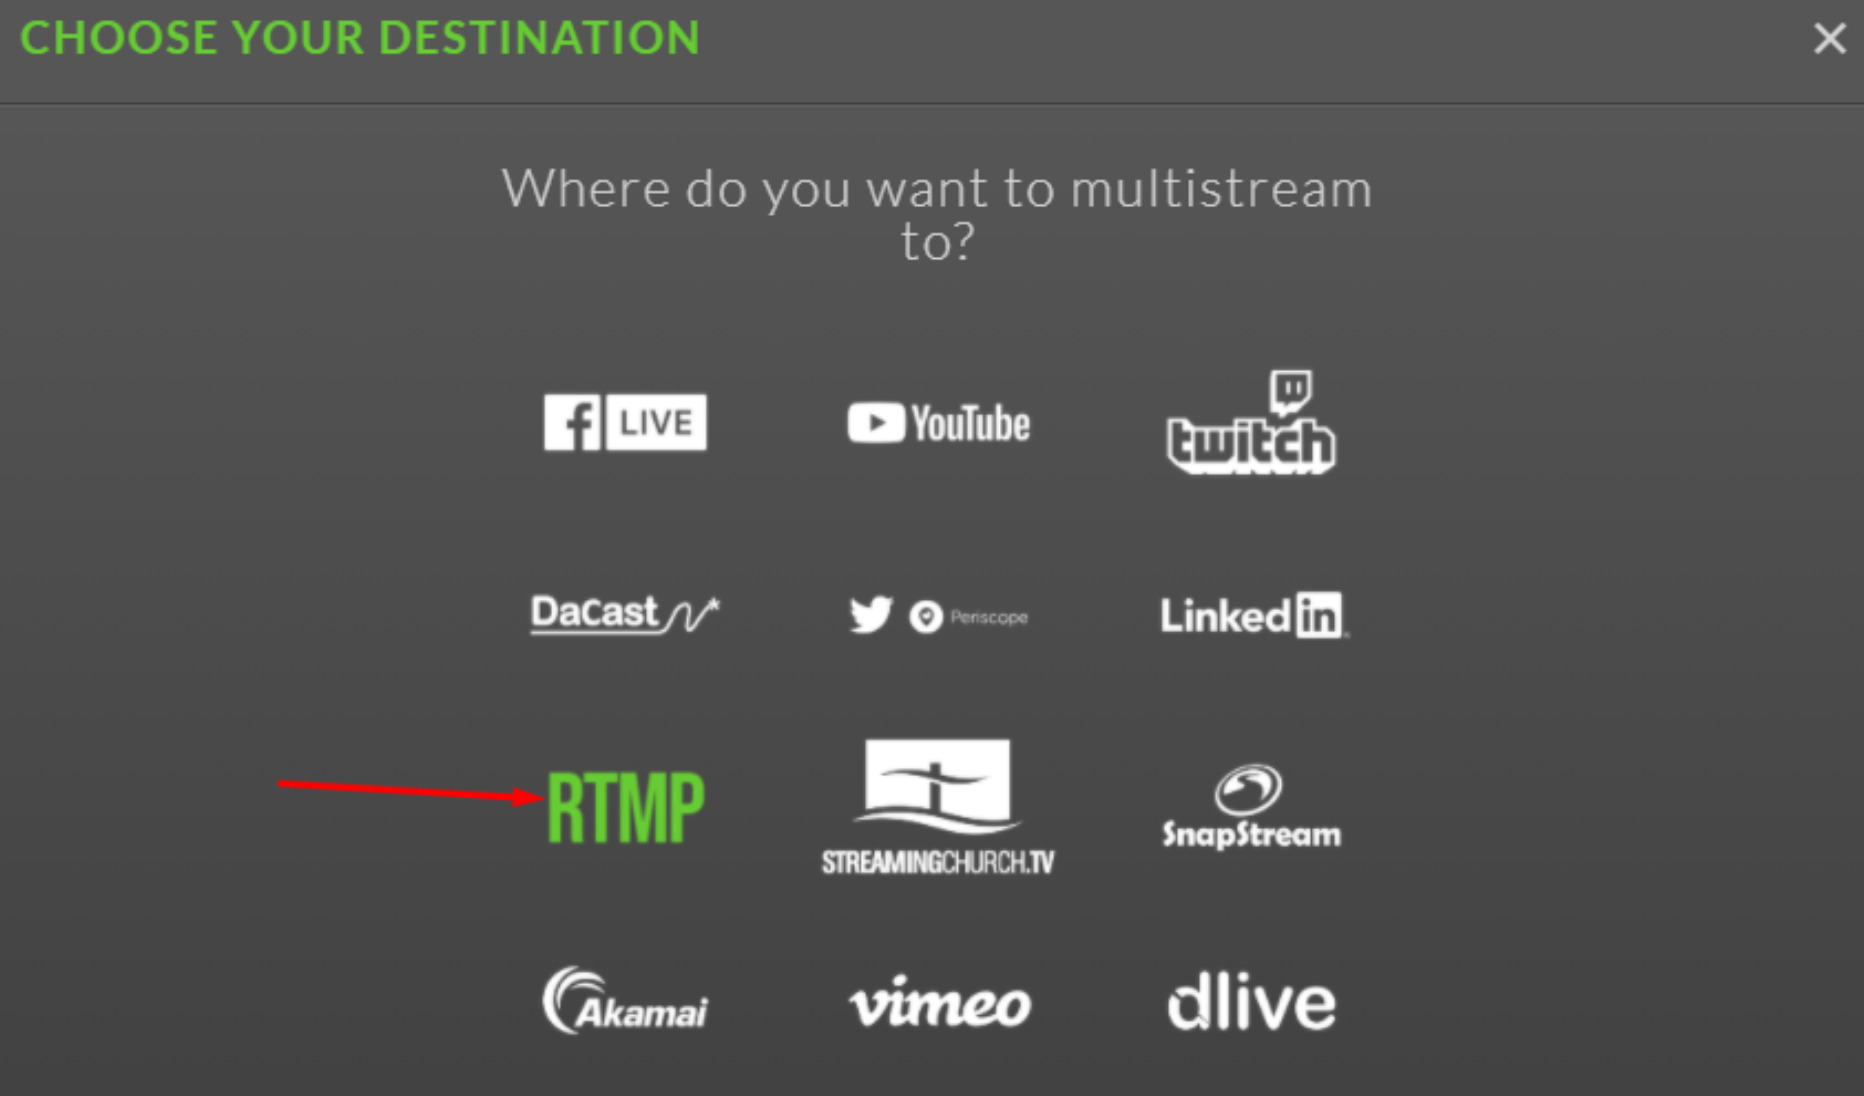
You can now select your destination. In this case, we will select RTMP to live stream to Dacast:

Step 8:
You can now go to your Dacast account and click on the Live Stream you want to broadcast in.
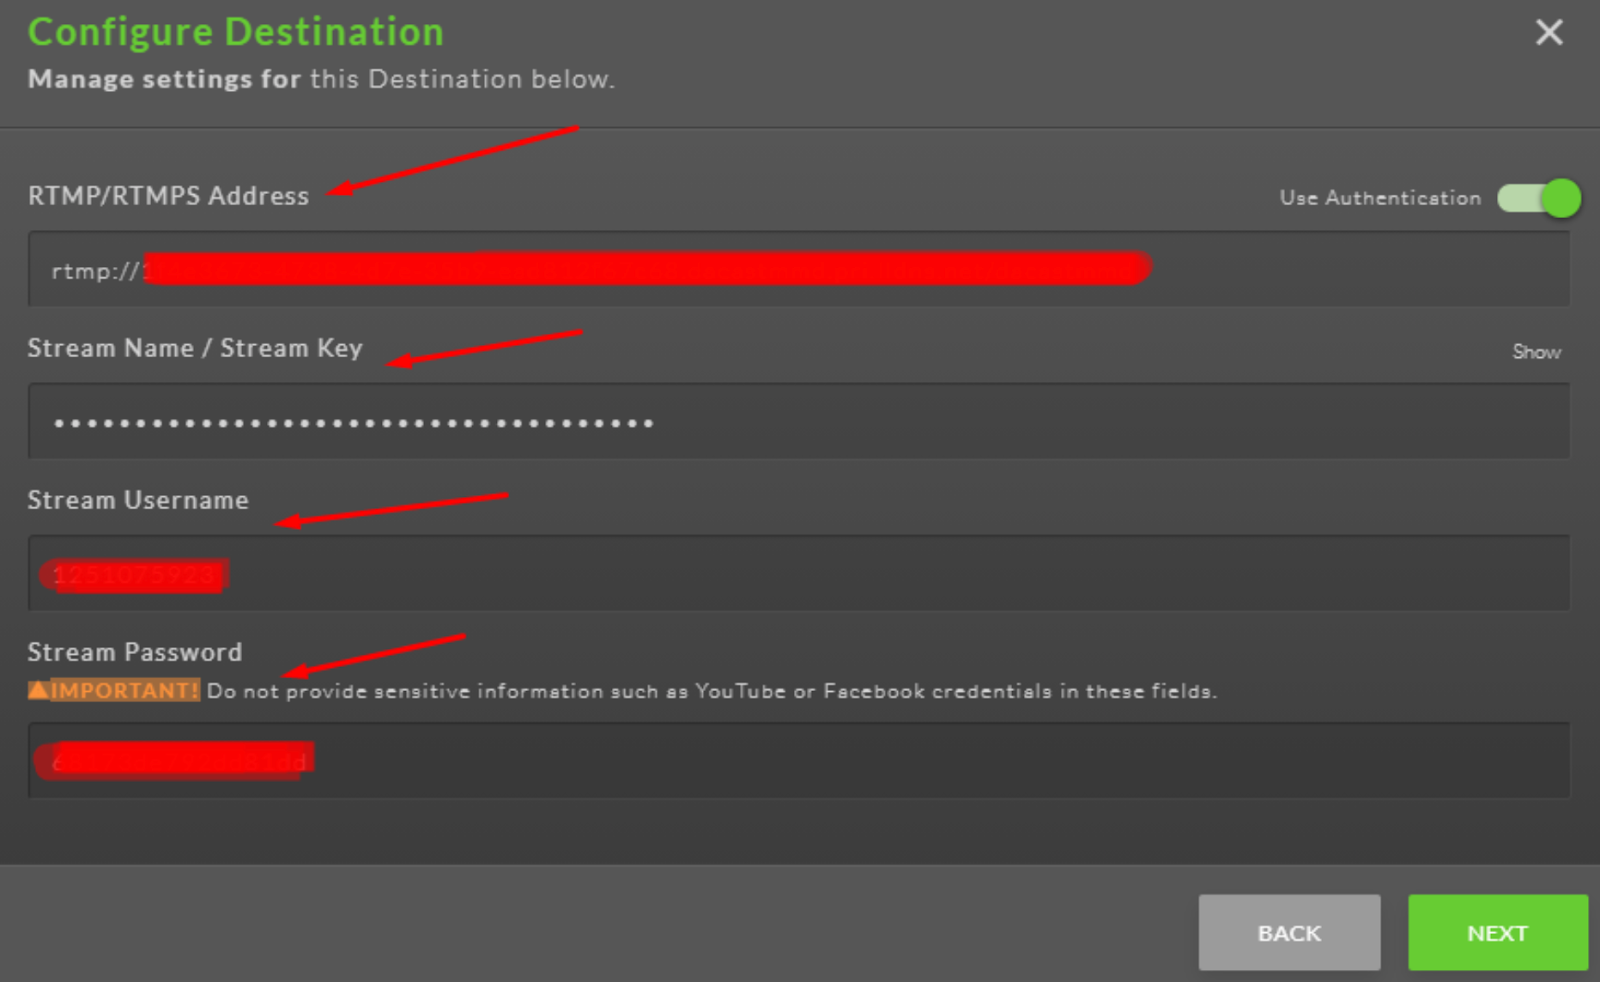
Once in the live stream of your choice, you will go in the “General tab” and click on the “Encoder Setup” button to get your RTMP Server address, Stream key, Username and Password:


Step 9:
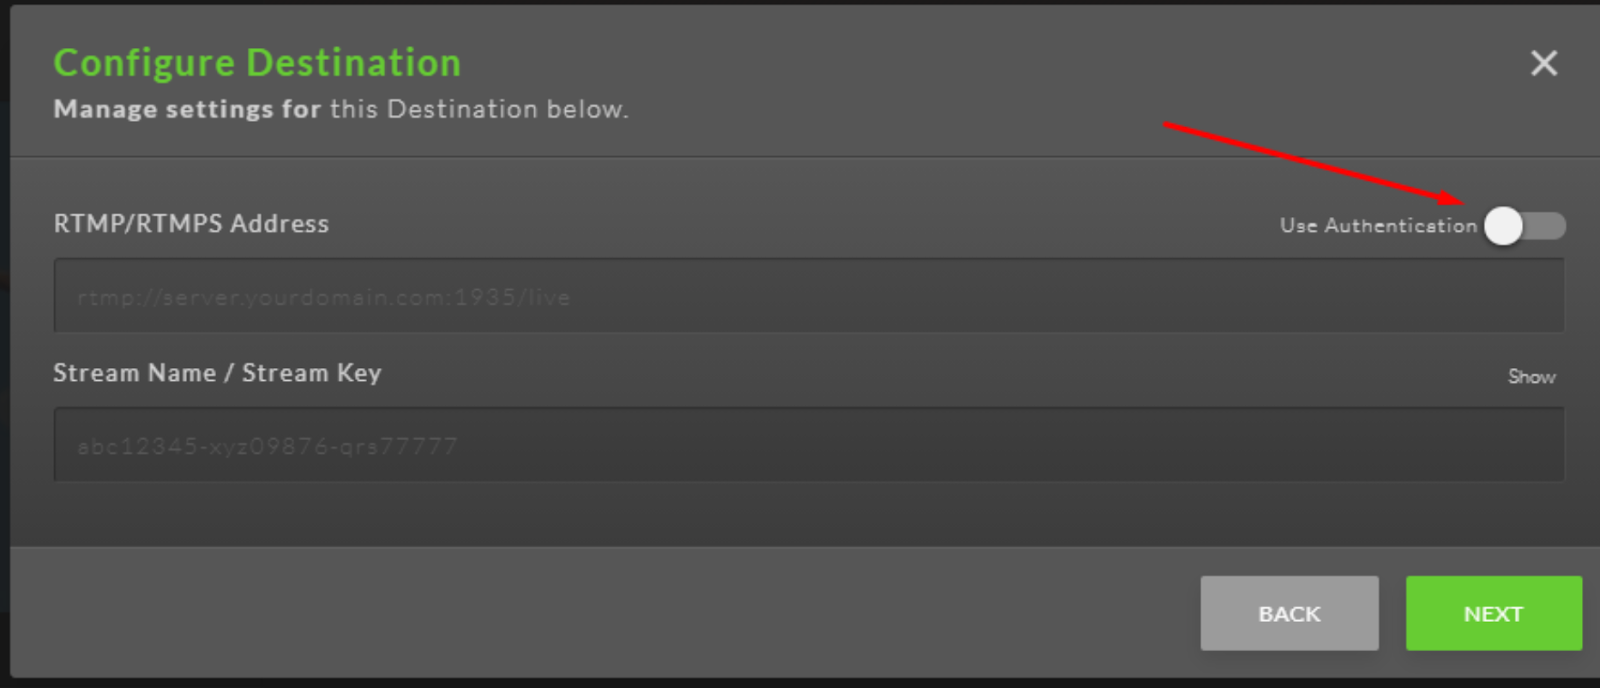
Back in Switchboard Live, you can now fill out the Configure Destination field with the info we just got from our Dacast account. IMPORTANT: Make sure that you enable the “Use Authentication” switch. Once you are ready, click “NEXT”.


Step 10:
Click on “ADD ANOTHER DESTINATION” if you want to stream on other platforms at the same time. When you’re done with the process, click on “FINISH”.
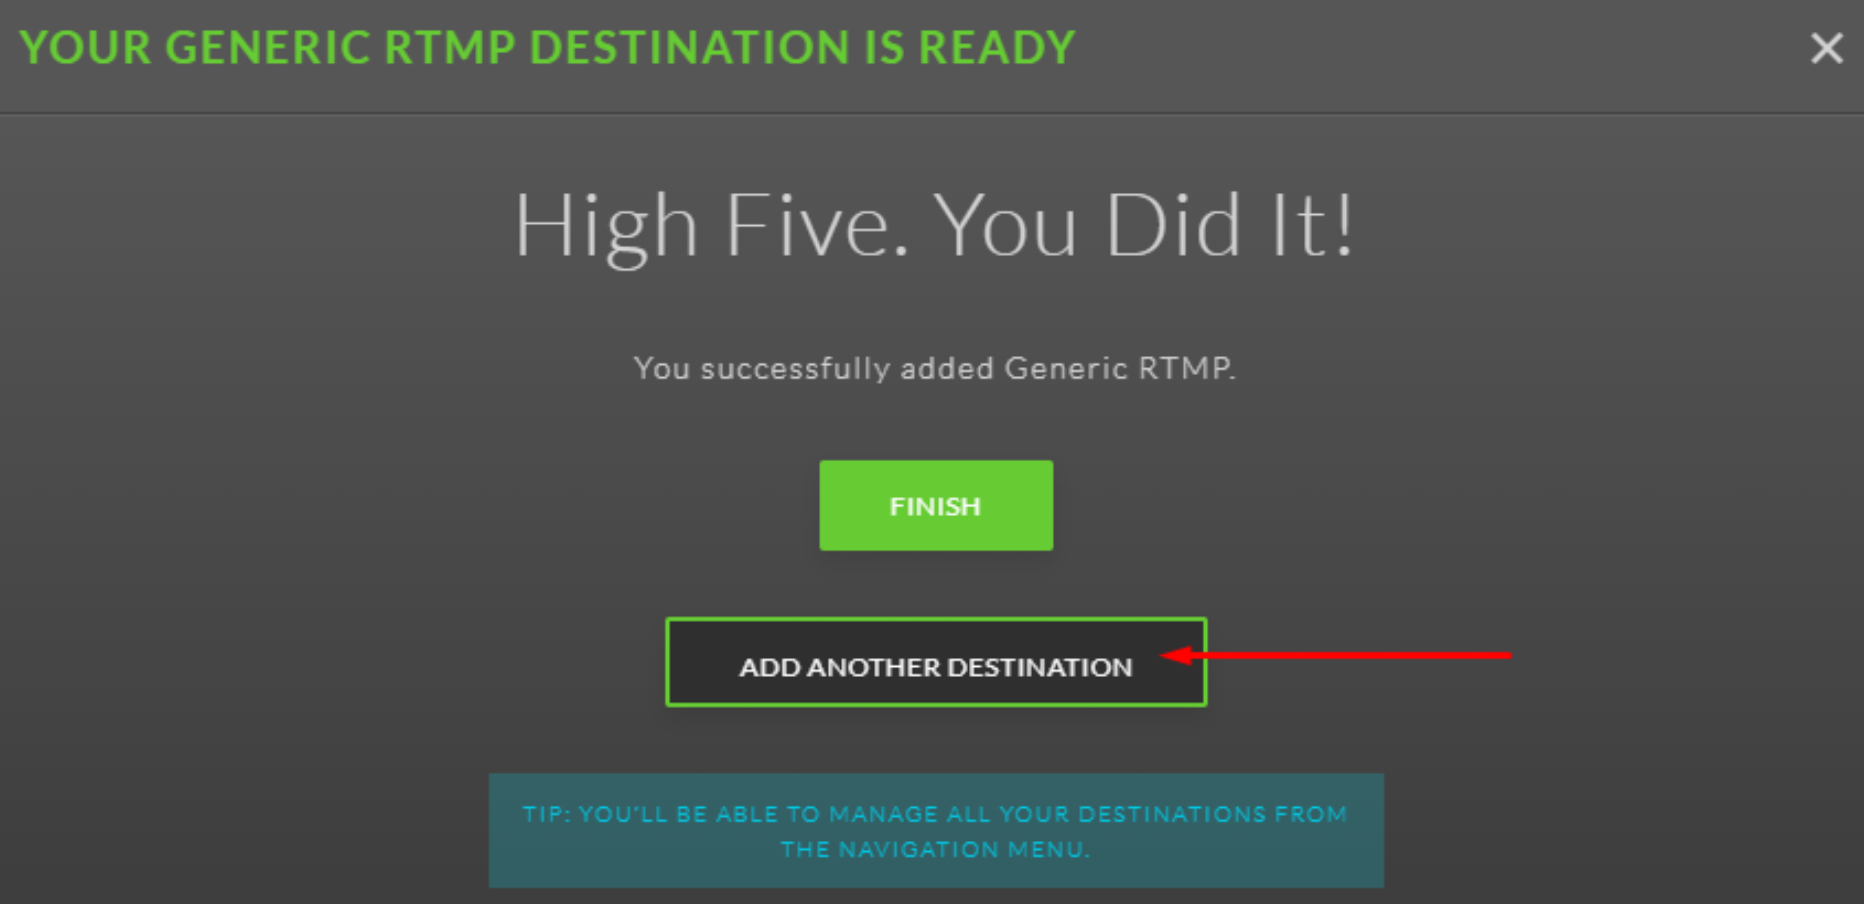

Then click on “Go Live” to start the streaming in Switchboard Live.


Step 11:
In your Dacast account, you can click on the preview to take a look at your stream and when you are ready, enable your live stream to go online:


Not a Dacast user yet? Try our platform for FREE for 14 days:


