Written tutorial:
Today, we’re laying out a feature-specific walkthrough on how to set up and use geo-restriction and domain control to set permitted website referrals.
The feature restricts access to your streams, so it can only be watched when embedded on your own web pages and in the geographical area you’ve selected.
Settings Referrer Restrictions
First, you will want to create a referrer restriction list. To do this, click “Settings” and scroll down to “Security.”
You should see the following screen:

Click on “Add Group” (located at the far right part). Then proceed to add in the requested information.
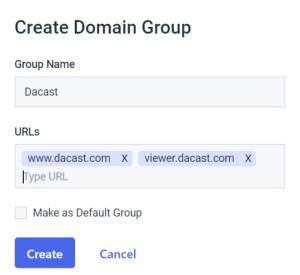
Name the Domain Group and enter the URLs you wish.
It doesn’t matter whether you specify the protocol (the https:// part) but it is important that the domain exactly matches where the content will be embedded.
For example, if you enter dacast.com but the content is embedded on www.dacast.com then playback will not be allowed.
After you are done entering a URL, click on the white area to add it or simply press the spacebar on your keyboard. Click the “X” if you need to remove any specific URL.
Please note that you can put in specific URLs, such as “www.yahoo.com/mysite.” You can also do broad URLs, for example, all pages found on “www.dacast.com” would be covered when entering in that address.
When finished, click “Create.” If you need to create more, you can add them in otherwise, click the “X” icon.
You also have the option to mark the group as your default. If you check “Make as Default Group,” all content on your Dacast account will be set according to the Default Group you just created.
![]()
If you want to change a referrer list on a specific piece of content, you can do so by going on the “Security” tab and clicking the padlock icon.
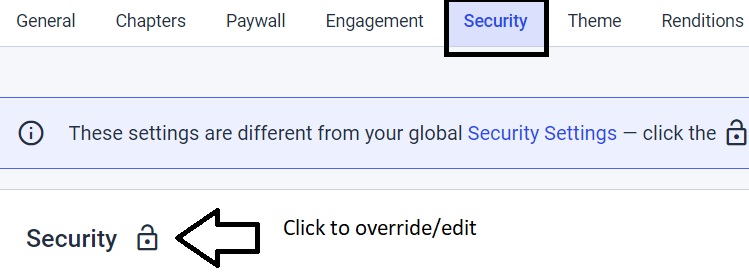
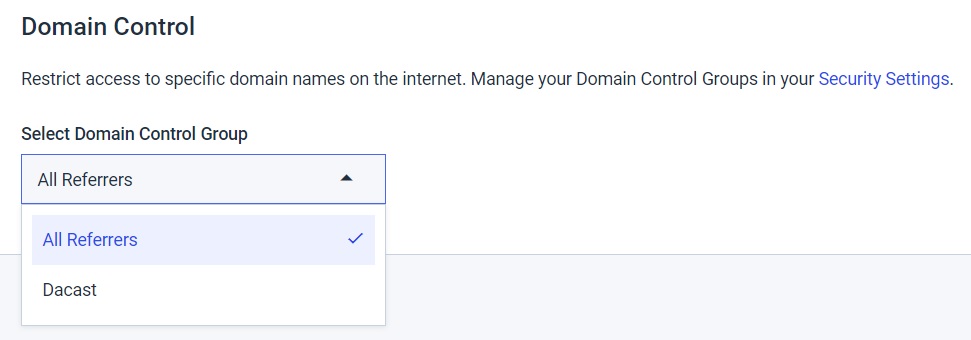
From there scroll down to the bottom under “Domain Control,” and choose whether you want to change it. Either set it back to “All Referrers “(which is the default) or just retain it to the group you created.
Don’t forget to click “Save” to preserve any changes you’ve made.
Setting Geo-Restrictions
For geo-restrictions, it is pretty much the same process. If you wish to make a specific country list you must create a geo-restriction group. To do this, click “Settings” and then scroll down to “Security.”
You should see the following screen:

Click on “Add Group” (located on the far right), then proceed to add the requested information.
You also have the option to set the group as your default. If you check “Make as Default Group,” those settings will be applied to all content on your Dacast account.
![]()
Name the Geo-Restriction Group and enter the countries you wish to grant access to on the search bar. Click “Create” afterward to save.
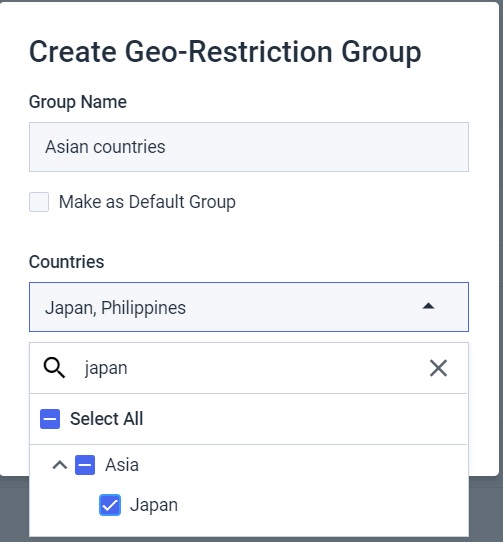
In the example above, the Philippines and Japan were the countries included on the list, thus they are the only countries that can view the content. Any other countries that are not on the list will not be able to view the content.
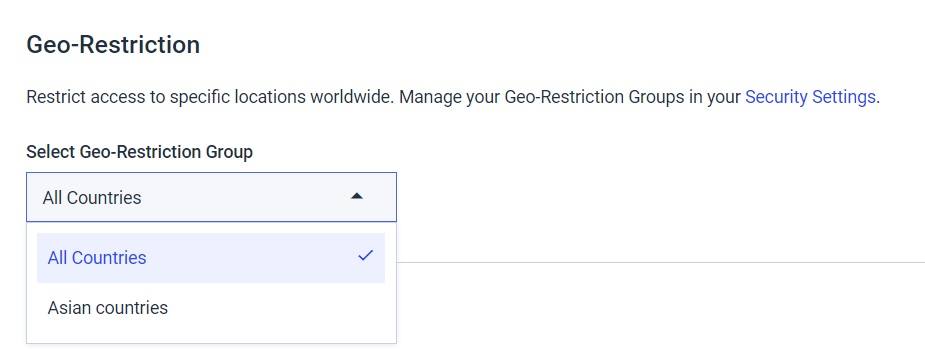
The default Geo-Restriction group on Dacast in all countries, so if you want to change the specific content, you can do so by going on the “Security” tab. Click on the padlock icon.

From there scroll down under Geo-Restriction, and you can either change Geo-Restriction for that specific piece of content from either the Default (all countries) or to the group you created.
Don’t forget to click “Save” to preserve any changes you’ve made.
Any questions or need help/access to this feature? Please contact us.
Not yet a Dacast user, and interested in trying Dacast risk-free for 14 days? Sign up today to get started.
Additional Resources
- What is a website referrer?
- How Does Dacast Do Country Restrictions?
- What is an All-Device Player?
- The Ultimate Guide to Referrers and Restrictions
- How to Set Up Security Preferences in Dacast’s New Back Office
 Stream
 Connect
 Manage
 Measure
 Events
 Business
 Organizations
 Entertainment and Media
 API
API Tools
Tools Learning Center
 Support
 Support Articles