


How to Record a Live Stream: 4 Proven Methods + Best Settings (2026 Update)
In 2026, the way we create and consume content has shifted dramatically. On-demand access, hybrid events, and AI-powered automation are now the norm, not the exception. Whether you’re hosting virtual conferences, streaming live sports, or engaging niche audiences in real time, the ability to record and repurpose your live streams is vital.
With platforms like Dacast offering built-in recording, monetization, and distribution features, it’s easier than ever to turn live content into a long-term asset. However, success in this space still requires the right tools and strategies.
In this blog post, you’ll find out everything about how to record a live stream. We’ll discuss when and why you might want to create a live stream recording of your online events. We’ll also cover several different live-stream recording methods, including using dedicated live-streaming software, an encoder, or an online video platform. Finally, we’ll go through the most popular methods of monetizing your live stream recording so you can capitalize on your content.
TL;DR :
- Fastest, lowest-risk option (business): enable cloud recording in your video platform (auto-archives + easy VOD workflow).
- Most control (creators/producers): record in OBS/vMix/Wirecast (scenes, overlays, ISO recording if supported).
- Quick + simple: use built-in screen recording (best for demos; limited quality/control).
- Highest reliability (events/multi-cam): record via a hardware encoder (stable, but higher cost).
- Pro tip: for important events, use two recordings (cloud backup + local master).
Table of Contents
- Why Record Live Streaming Video?
- The 4 Best Ways to Record a Live Stream
- 1. Recording via Encoding Tools
- 2. Live Stream Recording via Built-In Screen Capture Tools
- 3. Live Stream Recording via Video Platform
- 4. Live Stream Recording via a Hardware Encoder
- Quick Comparison: Which Recording Method Should You Choose?
- Best Settings + Tech Requirements (What Actually Matters)
- AI-Powered Auto-Recording & Clipping (What’s Real in 2026)
- How to Monetize Recorded Live Streams (Live → VOD Revenue)
- FAQ
- Record Your Live Video Stream With Dacast
Why Record Live Streaming Video?

Some of the most basic reasons why broadcasters seek the best way to record live streaming video in 2026 include:
- Saving footage for the archive
- Using recordings for promo reels, advertisements, etc.
- Continuing engagement after live events have ended
- Generating revenue via on-demand video
Let’s take a closer look at a few other reasons broadcasters choose to create a recording of their live streams.
Business Benefits of Recording Streams
Recording your live streams can unlock powerful opportunities for growth, outreach, and long-term content value.
Reach Larger Audiences
One of the biggest reasons for recording your live stream and hybrid events is reaching larger audiences, even after the event is over. This tactic becomes especially valuable for special live events that your viewers have a significant interest in but can’t watch for some reason.
Due to scheduling conflicts or differing time zones, only a portion of your total potential audience can likely tune in to a given live event in real time. Given that reality, you can easily double, triple, or quadruple your total views by creating a recording and publishing it after the stream has ended.
Furthermore, recordings allow you to reach people whose internet isn’t fast enough to handle live streamed events. You can expand your reach to almost everyone with proper buffering, an option to download, or even DVD/USB stick-based files.
Extend Revenue Generation
One popular reason for streaming video content online is to generate revenue. If this is your goal, recording streams for on-demand playback can help you maximize your profits.
As we noted above, a large portion of views for any given program will happen after the live event. However, that’s only possible if you make the content available for further watching to your viewers.
We will discuss the specifics of monetizing your live stream recordings later on in this post.
Promo Reels and Previews
Other great use cases for recording your live events are using the footage for commercials, promo reels, and demonstrations of your past work. Even footage that might seem “worthless” at first glance can have value as “b-roll” or background shots.
During video editing, use shots from previous events to create a montage to illustrate the efforts of your company or organization. A rapid series of cuts showing various events, speakers, gatherings, and other pre-recorded content can communicate a great deal in a short time.
If for no other reason than the possibility of future use, we highly recommend keeping old stream recordings around for the long term.
Viewer Experience Benefits of Recording Streams
Recorded streams greatly enhance the viewing experience by offering flexibility, accessibility, and lasting engagement.
Give Viewers a Second Chance to Watch
Another key reason to capture and publish your live recording online is to make it possible for viewers to replay the stream and catch anything they find especially pertinent or might have missed during their first watch.
Viewers may find so much value in your event that they will rewatch your live stream recording again and again. Suppose you’re doing live sports broadcasts, for example. Then, making live streams accessible after the game or match is over allows your loyal fans to rewatch the best plays and game highlights whenever they want, increasing the number of views you get in the process.
Maintaining relationships with these dedicated followers will increase the likelihood of them tuning in to future streams and live events. True fans can be extremely powerful, and recording your live streams can help you capitalize on this potential.
Use Cases
Dacast is used by churches, schools, and businesses alike – for everything from live streaming to making the most of recorded content.
Churches & Houses of Worship
- Many churches and houses of worship use Dacast to broadcast their services live and on-demand, reaching communities worldwide. With our reliable and high-quality streaming solutions, faith-based organizations can stay connected with their members, wherever they are.
Education & Remote Training
- Schools and training institutions leverage Dacast to deliver live and recorded classes, supporting both remote and hybrid learning models. Our platform helps educators engage students more effectively and improve learning outcomes through seamless video delivery.
Business & Enterprise Training
- Twin Galaxies, a gaming community platform, uses Dacast’s video hosting and API integration to manage a vast library of user-uploaded content and stream live events. This case study demonstrates how they built a scalable video-based business.
Modern Use Cases
Modern use cases show how Dacast goes beyond traditional streaming – helping organizations harness AI, automate content repurposing, and deliver on-demand experiences that drive ongoing engagement and marketing success.
- AI-Powered Clip Generation for Highlights & Repurposing. Dacast’s blog highlights how broadcasters use AI‑powered clip‑making tools to generate real‑time highlights and shareable snippets during live events. These clips can be instantly repurposed for social media teasers, newsletters, and evergreen campaign content.
- Strategic Repurposing of Archived Content with Cloud DVR. Dacast’s Customer Stories Archive shows how clients leverage cloud DVR to store and manage recorded training sessions and sermon recordings as evergreen assets—turning them into explainer videos, testimonials, and drip-fed on-demand content. This approach extends the value of each broadcast, supporting long-term engagement and continuous marketing beyond the initial live event.
- Simulcast and Pre‑Recorded-as-Live (Simulated Live). Dacast provides guides and customer examples that demonstrate how organizations use the simulcast workflow to stream live or prerecorded content across platforms (e.g., Facebook, YouTube, etc.)—ideal for hosting evergreen content or scheduled launches as live channels.
The 4 Best Ways to Record a Live Stream
There are several ways to record a live stream. You can use a software or hardware encoder, try an online video platform or a player, or have a dedicated screen-capture tool. Why don’t we get better acquainted with how to record live streaming video with each of these methods?
Built-in Screen Capture Tools
Many operating systems and devices include basic screen capture tools that allow users to record their screen with minimal setup. These tools are often easy to use but may lack advanced features like multi-source recording, overlays, or integrated live-stream management. They’re best suited for quick, straightforward recordings without complex editing or encoding needs.
1. Recording via Encoding Tools
Both software and hardware encoding tools offer powerful solutions for capturing live video streams, each suited to different production needs and levels of complexity.
Streaming Software
There are a couple of types of software you can use to capture live streams and turn them into recordings. The most common are encoding software and streaming software with dedicated live-stream recording tools. Often, you can find both functionalities in a single tool.
Software encoders are appealing because of their low cost and ease of use. They also support future performance enhancements as the software can be upgraded as new features or product versions are released. Streaming software is very similar.
The main difference between the two is that streaming software offers more functionality than just encoding. Many include encoding tools in addition to “studio” tools that you can use for mixing, editing, and adding other elements to live streams. Stream recording is another important function that many offer.
The exact process for live stream capture will vary from software to software, so we encourage you to look for instructions specific to your chosen video platform.
Hardware Encoders
Hardware encoders are physical devices dedicated to encoding live video signals and saving or streaming them in real-time. They tend to be more reliable and have lower latency than software encoders. Hardware encoders are often preferred in professional broadcast environments, multi-camera productions, and setups requiring robust, consistent performance without taxing a PC.
2. Live Stream Recording via Built-In Screen Capture Tools
Most modern computers come with native screen recording capabilities, making them a simple option for basic live stream capture.
Mac:
- Press Shift + Command + 5 to open the screen recording tool
- Choose to record the entire screen or a portion
- Set the save location under “Options”
- Start/stop recording with the same shortcut
- Press Win + G to open the Xbox Game Bar
- Click “Record” to begin and stop recording
- Recordings are saved in the default capture folder
While these built-in tools are convenient, they offer limited control over recording quality and features, making them better suited for quick, low-complexity recordings.
3. Live Stream Recording via Video Platform
Doing an audio or live stream recording via a streaming service is as simple as enabling an option in your account settings. You may also need to enable stream recording for the specific live stream/channel you plan to capture.
There are quite a few advantages of recording live-stream video content on a professional live streaming platform. For one, you don’t need additional processing power or storage space because you’re not transcoding locally. This approach also means you don’t have to worry about local disk failures.
The reason for this is that OVPs record to redundant RAID-based servers. You also maintain control and rights to all your content when you stream with a professional OVP like Dacast. In that sense, it’s a win-win.
Only some video hosting platforms offer live stream recording, so make sure to review all the features of the platform and the plan you have before you try to record your live streams.
Unlike Vimeo and Wowza, Dacast allows direct monetization with flexible paywall options, while also offering automatic cloud stream recording across all plans without extra fees.
Customer Testimonial
“Dacast’s auto-record feature ensures every live stream is archived automatically—no more missed recordings or manual setup.” — Jane K.
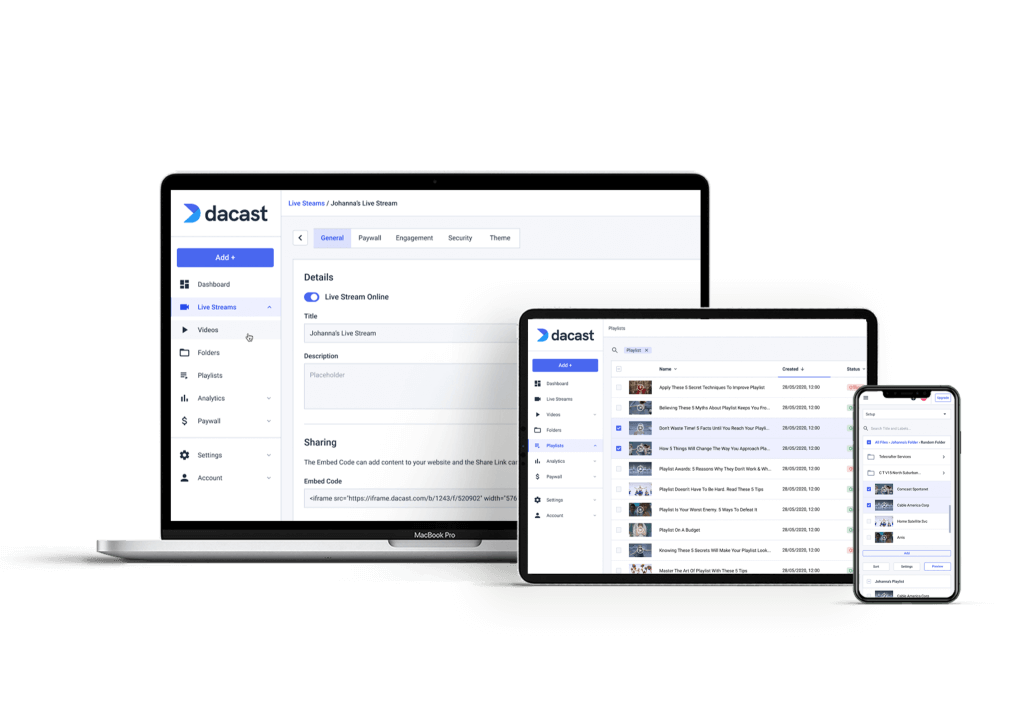
How to Record a Live Stream on Dacast

Now, let’s look at how to record a stream on Dacast, a professional online video platform.
Our live stream recording tool lets you easily record live streams and automatically upload them to your on-demand video library – making it simple to generate VOD from live stream recording with no extra steps.
To use this feature, you’ll need a Dacast account. Once you set that up, turning on the live stream recording feature takes just a few clicks.
Here’s how to activate the live-stream recording feature on Dacast:
- Log in to your Dacast account.
- Create a new live-streaming channel or edit an existing channel over which you’d like to enable live stream recording.
- Configure your stream settings so that they are compatible with the stream recording feature (HTML5 channel, H.264 video codec, AAC audio codec, maximum bitrate 3.5 Mbps.)
- Set the channel status to “On.”
- In the live channel settings, go to the “General” tab.
- Go to “Settings” and click the “Live Stream Recording” slider.
- Toggle it to the “On” position.
- Start streaming, and Dacast will automatically record the live stream.
- A camera icon will appear under the “Features” column, indicating active recording.
- After streaming, navigate to the “Video On Demand” section in your Dacast account.
Your recorded stream will be listed in the format “Live recording – [date], [time] (UTC).”
When you configure your settings as such, Dacast will automatically record all of the live streams on the channel you’ve configured the settings for. You can always disable the live-stream recording option if you wish.
To learn more about how to record live-stream broadcasts with Dacast, check out this live-stream recording tutorial.
Live Stream Recording with Other OVPs
Other live streaming platforms, including Vimeo and Wowza, also offer live-stream recording functionality. Both providers also output files in the MP4 format and archive files in your account. IBM Cloud Video also has similar functionality.
When it comes to live stream recording, however, each platform is a bit different. Some have unique features, and some are easier to use than others. Check their user guides for specific instructions whenever you use any of these or other online video platform with live recording.
Potential Disadvantages of Recording Streaming Video via an OVP
As with anything, there are disadvantages to this approach as well. The main disadvantage is that your OVP can only record live streams using the highest quality you send to the platform.
Since you’re likely significantly compressing your video between the camera and the online streaming, you can lose a great deal of quality here. This is especially true for broadcast-quality cameras, which may record at 30+ Mbps. From there, you must compress the video files down to 5 Mbps or less for streaming.
However, these potential drawbacks aren’t unconquerable issues for most broadcasters. Unless you’re worried about doing a lot of video editing in posts, files recorded online should be of sufficient quality for many uses. Even professional broadcasters who record locally may want to enable automatic cloud recording for live streams. That way, you have an automatic off-site backup in place should issues arise.
4. Live Stream Recording via a Hardware Encoder
Hardware encoders are a bit different from the software encoders we discussed earlier. They are standalone, dedicated devices that do not require a PC to run.
Hardware encoders have specialized internal components and firmware and don’t share resources with other processors. However, this high speed comes at a price, as these devices are considerably more expensive than their software counterparts.
With a hardware encoder, live stream recording for businesses is a somewhat different process – you want to explore your encoder settings to determine whether this method is possible.
Hardware encoders are also less flexible, as some don’t support simultaneous live-stream recorders at all.
Quick Comparison: Which Recording Method Should You Choose?
Now that you know more about each recording method, let’s quickly compare their features, technical requirements, capabilities, and appropriate uses.
| Factor | Streaming Encoders | Built-in Screen Capture Tools | Video Platform (OVP) | Hardware Encoder |
| Ease of Use | Moderate: needs setup | Easy: built-in tools | Easy: toggle in platform | Moderate: hardware setup |
| Cost | Low: often free or cheap | Free | Varies by platform and plan | High: expensive devices |
| Required Storage | High: local disk space | Moderate | Low: Cloud storage | High: Depends on recording |
| Video Quality | Good: system-dependent | Moderate: system-limited | Good: Limited by stream | Excellent: minimal compression |
| Editing Capabilities | High: mixing & editing | Low: Basic capture only | Low: Limited platform tools | Low: no editing features |
| Best For | Pros needing editing & control | Quick demos & casual use | Businesses & automatic archiving | Professional broadcast & events |
Common Use Cases for Live Stream Recording: Comparing Four Methods
Here’s a quick look at how Software, Built-In Tools, OVPs, and Hardware Encoders fit common recording needs like tutorials, demos, and presentations.
| Use Case | Software Encoders | Built-In Screen Capture Tools | OVPs (Online Video Platforms) | Hardware Encoders |
|---|---|---|---|---|
| Tutorials & Education | Advanced editing, overlays, multi-source capture | Simple, quick recordings | Easy recording, cloud storage, easy sharing | High-quality, stable, for professional use |
| Product Demos | Custom layouts, branding, real-time mixing | Basic screen capture, limited features | Reliable hosting, auto-archiving, monetization | Multi-camera setups, low latency |
| Business Presentations | Live mixing, professional-grade output | Quick meeting or pitch recording | Auto-record, cloud access, easy replay | Stable, consistent quality for live events |
| Professional Broadcasting | Full control, multi-camera, live editing | Not suited for complex productions | Scalable streaming, automatic recording | Dedicated hardware, ultra-low latency |
| Content Repurposing For Live Streams / Highlights | Manual clipping and editing | Requires manual post-processing | Some platforms offer clipping tools | Limited or external clipping tools |
Best Settings + Tech Requirements (What Actually Matters)
To ensure smooth and reliable live stream recording, here are the key CPU and storage requirements for each common recording method in 2026:
Software Encoding Tools
- Recommended: Modern Intel i7 processor or better
- RAM: 8 GB or more
- Storage: Ample free disk space to save large video files locally
Built-In Screen Capture Tools
- Recommended: Modern Intel i7 processor or equivalent
- RAM: Minimum 8 GB
- Storage: Sufficient free local storage to save recordings without interruptions
Online Video Platform (OVP) – Dacast
- CPU/RAM: Minimal local requirements, as processing is done on servers
- Storage: Files stored on Dacast’s RAID-based servers; local storage is only needed if downloading recorded videos
- Bandwidth and transcoding credits apply to recording usage
Hardware Encoders
- CPU/RAM: Not applicable, as encoding is offloaded to dedicated hardware
- Storage: Internal or external storage device required, depending on encoder model (e.g., built-in disk or external hard drive)
AI-Powered Auto-Recording & Clipping (What’s Real in 2026)
In 2026, AI-powered tools are rapidly transforming how content creators and sports streamers record and repurpose live streams. These tools use machine learning to automatically detect key moments, highlights, or specific actions within a live stream and create instant clips or recordings without manual intervention.
For content creators, AI clipping tools streamline post-production by generating ready-to-share snippets for social media, increasing engagement while saving time. Sports streamers benefit from AI auto-recording technologies that identify goals, fouls, or exciting plays in real time, enabling instant highlight reels and dynamic replays.
Combined with cloud DVR and live to VOD automation, these AI-powered solutions enable seamless recording, storage, and on-demand access to live streams. This integration enhances content distribution, allowing creators and broadcasters to maximize the value of their streams through smart, automated recording, clipping, and immediate video-on-demand availability.
These AI-powered solutions are becoming essential for anyone looking to maximize the value of their live streams through smart, automated recording and clipping workflows.
How to Monetize Recorded Live Streams (Live → VOD Revenue)
As we mentioned, recording and uploading your live streams as on-demand VOD content can help extend your revenue generation in terms of time and total sales.
For many businesses and organizations, high-quality pre-recorded video content is as good as gold. Financially speaking, video is a very significant asset that will give you high returns if you manage it properly. Instead of just throwing something out there for viewers, use it with a purpose that will benefit you in the long run.
Let’s take the NBA as an example. If you’re not aware, the NBA now generates the majority of its revenue via live broadcasts on TV. However, it also records all live-streamed content and makes that coverage available to subscribers on-demand.
This expands the NBA’s revenue potential while making true fans very happy. For avid sports fans with busy lives or no cable, live stream recording allows them to watch every game or special highlight on their own time.
At Dacast, we offer secure stream recording and monetization, meaning that every transaction you and your viewers make using our video paywall is secure and protected. All data collected by the paywall system is enforced and protected.
Viewers can purchase content securely by credit card, and all payments processed by the system are SSL encrypted to protect data during transmission.
With that in mind, let’s look at some specific methods for monetizing live-stream recordings.
1. SVOD
Subscription-based video on demand, or SVOD for short, is the monetization option most viewers are accustomed to. This subscription-based model gives users access to content in exchange for a monthly recurring fee.
Netflix and ESPN+ are two excellent examples of streaming services that use SVOD.
2. AVOD
Advertising-based video on demand, or AVOD for short, gives users free access to content with the stipulation that sponsored ads are part of the experience. YouTube is a perfect example.
AVOD allows broadcasters to generate revenue without requiring paywalls, ongoing subscriptions, or transactions with viewers.
3. TVOD
Transactional video on demand, or TVOD for short, is another monetization option. This type of monetization is based on users paying to view specific content that is not available elsewhere.
A pay-per-view model, such as HBO charging extra for a boxing match or a concert record live broadcast online, is TVOD in action. Prime Video and Apple TV also use a version of TVOD.
4. AI-Inserted Midroll Ads
In 2026, AI is helping insert midroll ads into live and recorded streams based on what viewers like and how they behave. This means ads feel more relevant, which keeps people engaged and boosts revenue – all without interrupting the viewing experience. Advertisers get better results with smarter targeting.
5. FAST (Free Ad-Supported TV)
FAST channels offer free live or on-demand TV supported entirely by ads. It’s perfect for viewers who don’t want to pay subscription fees but still want quality content. For advertisers, FAST delivers large, engaged audiences, making it one of the fastest-growing ways to monetize video this year.
6. Dynamic Pricing Models for PPV
Dynamic pricing lets pay-per-view costs change in real time depending on demand, event popularity, or where viewers are watching from. Prices go up when demand is high and drop during slower times. This flexible approach helps sellers get the most revenue while giving viewers fair pricing options.
Pittsfield Community Television Case Study
A community television network used Dacast’s TVOD service to offer digital access to locally produced shows, and launched a modest SVOD subscription for full access to archived programs. Within months, they expanded their audience beyond their town, generating new revenue while retaining local viewers. The SVOD model provided recurring income, and TVOD pay-per-view screenings of special programs added incremental value.
We featured PCTV’s story as a strong example of how local broadcasters can successfully monetize community content. Their success shows how even small media organizations can expand their reach and generate steady revenue using Dacast’s tools.
How To Get Monetization on Dacast
If you’re wondering how to enable monetization for your content on the Dacast platforms, here are a few simple steps you can follow:
1. Enable Monetization:
- Log in to your Dacast account and upload the recorded video.
- Navigate to the “Monetization” section and choose SVOD, AVOD (Advertising Video on Demand), or TVOD.
2. Set Pricing or Ad Preferences:
- For SVOD: Create subscription tiers with varying price points.
- For TVOD: Set a fixed price per recording.
- For AVOD: Enable ad placements and configure ad providers.
3. Customize the Paywall:
- Add branding and choose payment options (credit card, PayPal, etc.).
- Enable multiple currencies for global accessibility.
4. Promote Your Content:
- Share direct links to recordings via email, social media, or your website.
- Offer discounts or free previews to attract new viewers.
Which Monetization Method to Use
Ultimately, the video monetization method you use depends on your specific audience and the sort of content you provide them with. Depending on your monetization strategy, you’ll want to choose an online video platform that offers one or more of these VOD options.
With Dacast, you can set up pay-per-view, advertising, and subscription packages for all your video content. Our paywall supports transactions in over 140 currencies, and you can purchase them through credit card or PayPal transactions.
You can set up as many pay-per-view monetization prices as you want on your video content. Our packages also include control rates, promo codes, and viewing windows. Dacast’s integrated payment system will handle all transactions directly in the player for fast and easy access to your video.
FAQ
1. Can I record a live stream without using extra software?
Yes, you can! Many video platforms—like Dacast—offer automatic recording, so there’s no need for third-party tools. This cloud-based video recording shows how to save a live stream for later viewing or turn it into on-demand content. With Dacast, it’s as simple as enabling the Dacast live stream recording feature in your dashboard.
2. What is the best software to record live stream 2026?
The best software to record live streams depends on your needs, but top picks include OBS Studio, vMix, and Wirecast for professional-quality output. These stream recording tools are great for tutorials, webinars, and even recording Twitch streams for on-demand access. Dacast video recording features handle this for you automatically in the cloud, simplifying your setup.
3. What are the technical and storage requirements for recording a live stream?
Recording your live streams—especially in HD or 4K—can consume a lot of CPU and storage. If you’re using live stream recording software, make sure your device has at least a quad-core processor, 8GB of RAM, and sufficient disk space (1–2 GB per hour of HD video). To bypass these requirements, many businesses use cloud DVR for live video, like Dacast’s cloud-based video recording, which shifts the storage and processing to the cloud.
4. What is the difference between recording with streaming software and a hardware encoder?
Software encoders like OBS and vMix are flexible and ideal for users who need full control over overlays, scenes, and layouts while recording a webcast. On the other hand, hardware encoders offer reliability and are preferred for high-end broadcasts and recording live streams for businesses. Dacast supports both options and pairs well with VOD setups for post-event delivery.
5. How do I automatically record streams with Dacast?
To record a live stream on Dacast, simply enable the auto-record option in your channel settings. It uses cloud-based video recording, so your stream is saved instantly without any manual steps.
6. What is the ideal format or resolution for stream recording in 2026?
MP4 with H.264 video and AAC audio remains the most compatible format. For resolution, 1080p at 30fps is the sweet spot for smooth playback and future streaming to VOD or on-demand use.
7. How can I monetize my recorded live streams?
Once your stream is saved, Dacast offers live stream monetization tools like pay-per-view and subscriptions. It’s a great way to monetize recorded live stream content, whether it’s learning how to record a webinar, training, or event.
Record Your Live Video Stream With Dacast
Whether it’s international sports, on-demand shows, or interactive video through a web camera, recording live streams is tremendously valuable. Live video recordings help you strengthen viewer engagement, reach new audiences, and increase revenue from more views.
How well you can record will largely depend on your streaming software. That’s why using a professional live-streaming platform like Dacast is a great idea. Dacast will help you record your live streams in the best quality. It also offers a ton of useful features, such as video monetization, so you can capitalize on your recordings and increase your revenue.
You can try Dacast and all its features with our 14-day free trial.
For regular tips on live streaming and exclusive offers, feel free to join our LinkedIn group.
Are you recording your live streams? We’d love to hear about your experience. We know that many of our readers are experienced live streamers themselves. Drop a note in the chat box below, and we’ll get back to you.