
How to Create a Video Podcast: A Complete Guide for Beginners

Video podcasting is growing at lightning speed and transforming how creators can engage with their audiences. Unlike the well-known audio podcasts, podcasting with video allows you to incorporate visual elements, making your content more engaging. With this format, you can connect with your viewers more easily through your facial expressions, body language, and on-screen visuals, boosting the storytelling in ways audio alone cannot.
The video podcasts’ popularity is skyrocketing, fueled by increasing video consumption trends. By 2027, the global podcast audience is expected to surpass 650 million listeners, with video podcasts playing a major role in this growth.
With social media and dedicated video hosting services, there’s never been a better time to expand your reach beyond traditional podcast directories. Since video content ranks higher in search results, it also offers SEO advantages that will help you attract a wider audience. Plus, with ad revenue and premium subscriptions as monetization opportunities, why not make video podcasting your lucrative avenue?
If you’re ready to launch your own video podcast, this guide will walk you through every step – from planning and choosing the right equipment to recording, editing, and distributing your content. With Dacast’s powerful video CMS and seamless live streaming capabilities, you can maximize your podcast’s potential and grow your audience effortlessly.
Let’s explore how to create a video podcast successfully!
Table of Contents:
- How to Create a Video Podcast: A Complete Guide for Beginners
- Essential Equipment & Software for Video Podcasting
- How to Record a High-Quality Video Podcast
- Editing & Post-Production: Turning Raw Footage into a Pro-Level Podcast
- Hosting and Distribution
- Promotion & Audience Growth
- Monetization Strategies
- Common Mistakes to Avoid in Video Podcasting
- Future Trends in Video Podcasting
- How to Create a Video Podcast with Dacast
- Final Thoughts & Next Steps
Planning Your Video Podcast
Before you hit record, let’s discuss strategy. A great video podcast begins with a solid plan, so you’ll need to select the right topic, structure your episodes, and decide where to publish.
Choosing a Niche & Target Audience
What’s your podcast about? If you already have an idea, awesome! If not, think about topics you’re genuinely excited to talk about. Your passion is the key, but the audience demand is equally important. To find the best niche for you, think about where your interests overlap with what people are actively searching for.
- Search YouTube and Spotify for trending video podcasts.
- Check forums like Reddit and Quora to see what questions people are asking.
- Use Google Trends to spot rising search topics.
Still, standing out in a sea of podcasts is an even bigger challenge. Find other video podcasts in your niche and study them. What’s good about them, and what’s missing?
- Are their episodes too short or too long?
- Do they lack visuals or engaging edits?
- Are they covering broad topics instead of niche, high-interest ones?
Find the gap and fill it. Maybe you add a unique video format, a fresh take, or deeper research. Whatever it is, own your space and make your podcast a must-watch in your niche.
Podcast Format & Structure
The format sets the tone of your podcast and influences its level of engagement. Here are some of the most popular formats:
- Interview-based – Bring on guests and industry experts for insightful conversations.
- Solo podcast – Share your thoughts, experiences, or expertise directly with your audience.
- Panel discussions – Get multiple perspectives on a topic for dynamic conversations.
- Storytelling – Use narration, visuals, and creative editing to tell stories.
As for episode length, keep in mind:
- 15-30 minutes – Great for casual, on-the-go listeners.
- 45-60 minutes – Ideal for in-depth discussions and dedicated audiences.
Also, consider whether your podcast should be scripted or free-flowing. A full script keeps you polished, while a free-flow conversation sounds more natural.
Consistency is also an important factor, so be sure to decide on a publishing schedule – weekly or biweekly is ideal for audience retention.
Choosing the Right Platform

So, where should you publish your video podcast? The short answer is everywhere you can. But let’s break down the major platforms and why they matter.
1. YouTube
Podcasting with video on YouTube is non-negotiable if you want maximum visibility. It’s the world’s second most popular search engine, meaning people actively search for content like yours.
2. Spotify Video & Apple Podcasts
Spotify and Apple Podcasts started as audio-first platforms, but now they also support video. This means you can tap into their massive listener base while giving your audience a visual experience, reaching both audio and video podcast listeners in one place.
3. Rumble & Alternative Video Platforms
Rumble and other emerging platforms are getting more popular as YouTube alternatives. While their audience is smaller, they often have less competition, so your content has a better chance of standing out.
4. Your Own Website
Hosting your podcast on your own website gives you full control because there are no algorithm changes or platform restrictions. This is where Dacast comes in. With its secure video hosting and monetization tools, you can embed high-quality video podcasts directly on your site and even set up paywalls for premium content.
Essential Equipment & Software for Video Podcasting
So, you’ve got a plan – now let’s talk gear. Investing in quality tools from the start will help you later. Whether you’re on a budget or going pro, here’s everything you need to get crisp video, clear audio, and a smooth editing workflow.
Camera & Video Setup
Your camera is the first element that grabs your viewers’ attention. Good video quality keeps people watching, but that doesn’t mean you have to drop thousands on a high-end setup.
Best Cameras for Video Podcasting
- Budget-friendly: Logitech Brio, Elgato Facecam, or a good smartphone such as iPhone 15 or newer or Samsung Galaxy S22 Ultra or newer can be good budget-friendly options.
- Mid-range: Sony ZV-1, Panasonic Lumix G7 cameras (solid for beginners who want DSLR-like quality without complexity).
- Pro-level: Sony A7 IV, Canon EOS R5 cameras (top-tier sharpness, depth, and color for cinematic video).
Webcams vs. DSLRs vs. Smartphones
- Webcams: Best for convenience, but limited in quality.
- DSLRs/Mirrorless Cameras: Best quality overall, but require external power and capture cards.
- Smartphones: Surprisingly great, especially with apps like Filmic Pro for manual controls (as long as you know what you’re doing).
Framing, Lighting & Background Setup
You don’t need a fancy studio, but bad lighting kills video quality regardless of your camera. Here’s how to fix it:
- Framing: Set the camera at eye level and follow the rule of thirds for a balanced look.
- Lighting: Use a lighting setup with key light, fill light, and backlight for a pro look.
- Background: Keep it clean and clutter-free. You can use soft LED lights or a branded backdrop.
Audio Equipment
Practice shows that bad audio can ruin your podcast even faster than bad video. While people might forgive a slightly grainy video, they will likely click away if your sound is muffled or echoey.
Best Microphones for Video Podcasting
- Budget: Audio-Technica ATR2100x, Rode NT-USB Mini (affordable and solid sound quality).
- Mid-range: Rode PodMic, Shure MV7 (balanced sound with great clarity).
- Pro-level: Shure SM7B, Electro-Voice RE20 (the industry gold standard for rich, professional audio).
Audio Interfaces & Mixers
You will require an audio interface if you have XLR microphones (like the Shure SM7B):
- Budget: Focusrite Scarlett 2i2 (simple, clean sound for solo or dual mic setups).
- Pro: Rodecaster Pro II (a full podcasting studio with sound effects, multi-channel recording, and built-in processing).
Soundproofing & Audio Quality
Pro tips for soundproofing and boosting your audio quality:
- Soft surfaces absorb sound, so use foam, carpets, or curtains to minimize the echo.
- Pop filters help cut down on harsh “P” and “B” sounds.
- Mic placement matters, so keep it 4-6 inches from your mouth for optimal clarity.
Recording Tools

Your recording setup mostly depends on your format, whether it’s solo episodes, in-person interviews, or remote conversations. Here’s what works best for each:
Recording for In-Person Podcasts
The best tools for this are OBS Studio (free) and Ecamm Live (Mac). You can also record directly into your camera and edit the content later. If you have a multi-camera setup, you can use an HDMI switcher (like ATEM Mini) for seamless live switching between angles.
Recording for Remote Podcasts
When you’re doing interviews with guests who are not in the same room, you need software that syncs high-quality video and audio without lag.
- Riverside.fm (studio-quality local recording, even if the internet lags).
- Zencastr (crisp, separate audio/video tracks for the speakers).
- Zoom (not the best quality, but easy to use and familiar for guests).
Editing Software
Once you’ve recorded your podcast, it’s time to polish it. Editing is where you add the final touches, such as trimming mistakes, balancing audio, adding branding elements, and making your podcast look and sound professional.
Best Video Editing Tools
- Adobe Premiere Pro is the industry standard for professional video editing. It has many features, but it has a steep learning curve.
- Final Cut Pro: It’s mac-exclusive and optimized for fast rendering and editing.
- DaVinci Resolve: Free and powerful – probably the best free editor out there.
AI-Powered Editing Tools
- Descript: It transcribes your podcast and allows you to edit text. Perfect for fast, AI-powered workflow.
- Runway ML: Serves for AI-assisted editing, background removal, and auto-cut features.
Essential Features to Look For:
- Multi-track editing – Keep video, audio, and effects on separate layers for easy adjustments.
- Noise reduction – Remove background hiss and improve voice clarity.
- Captions & branding – Add subtitles, transitions, and custom overlays to make your podcast more engaging.
How to Record a High-Quality Video Podcast
So, how to create a video podcast that makes people want to watch your work? Just pressing ‘’record’’ is not enough – you want your videos to look professional. Whether you are recording solo or interviewing a guest, here’s how to get high-quality video, audio, and a setup.
Recording a Solo Video Podcast
If you’re hosting a solo podcast, you have total control over the setup, so do the following:
- Set Up Your Space: Find a quiet, well-lit area with a clutter-free background.
- Frame Your Shot: Use a medium close-up (shoulders up) at eye level.
- Check Your Lighting: A three-point lighting setup works best, but even a single key light can improve quality.
- Mic Placement: Keep your mic 4-6 inches from your mouth and test for the best sound.
- Do a Quick Test Recording: Check audio levels, lighting, and framing before starting.
Pro Tip: Speak directly to the camera like you’re talking to a friend. This makes the podcast feel more personal.
Recording Guest Interviews
Recording with a guest, whether in-person or remote, adds a new layer of complexity. Here’s how to keep things smooth:
In-Person Interviews:
- Use a dual-mic setup for clear, balanced audio.
- Frame both you and your guest evenly (side-by-side or split-screen works well).
- Have a backup recording, just in case.
Remote Interviews:
- Use Riverside.fm or Zencastr for high-quality local recordings on both ends.
- Coach your guest on lighting and mic placement before starting.
- Wear earbuds or headphones to prevent hearing the audio back.
Pro Tip: To keep the conversation natural, keep a running list of follow-up questions based on your guest’s responses.
Best Practices for Video Framing & Lighting
You don’t need a film studio, but bad framing and poor lighting will make your podcast look amateurish.
- Keep Your Camera at Eye Level: A downward or upward angle is unflattering.
- Use the Rule of Thirds: Don’t stand at the center.
- Ensure Soft and Even Lighting: Use a key light in front of you, a fill light to soften shadows, and a backlight to separate you from the background.
- Avoid Harsh Shadows and Glare: If you wear glasses, angle your key light slightly above and to the side to reduce glare.
Using B-Roll Footage & Overlays to Enhance Engagement
A static video podcast can feel visually boring, so adding a B-roll and overlays is a great way to keep viewers engaged.
What is B-Roll?
B-roll is extra footage that you cut into your podcast to make it more dynamic. Let’s say you are talking about a book – you can show a clip of it. If you’re discussing a study, you may want to display charts or stats.
Overlays & Graphics
- Lower-thirds: Display your name, guest names, and episode title.
- Callouts and Captions: Highlight key points with on-screen text.
- Logos and Branding: Keep your podcast visually consistent with branded elements.
Pro Tip: Canva and Adobe Premiere Pro have great templates you can use for adding professional-looking overlays.
Live Streaming vs. Pre-Recorded Podcasts
Should you stream live or record and edit before publishing? Both options have their pros and cons.
Live Streaming Pros
- Real-time audience interaction where viewers can comment and ask questions live.
- No post-production is needed, so it saves editing time.
Live Streaming Cons
- More pressure because mistakes happen in real-time.
- If you experience tech issues they are harder to fix.
Pre-Recorded Podcasts Pros
- You have more control over quality – you can edit mistakes, fix audio, and add effects.
- The final product looks more polished.
Pre-Recorded Podcasts Cons
- Editing and post-production can be time-consuming.
- You miss out on real-time engagement.
Pro Tip: If you’re a beginner, we suggest starting with pre-recorded episodes. Once you’re comfortable, you start trying occasional live episodes for more interaction.
Managing Technical Difficulties During the Recording
Here’s how to handle tech issues like a pro:
- Backup Everything: Use an external recorder for audio and a secondary camera just in case.
- Do a Test Run: Check sound, video, and lighting before every session.
- Ensure You Don’t Have Internet Problems: If you’re recording remotely, hardwire your connection instead of using Wi-Fi.
- Keep an Extra Mic Handy: Your main mic might fail, so having a backup USB mic can save your episode.
- Make Sure Your Audio is in Sync: Clap at the beginning of recording since this creates a sync point for easy editing.
Pro Tip: If you lose audio, use AI tools like Descript to clean up and enhance low-quality sound.
Editing & Post-Production: Turning Raw Footage into a Pro-Level Podcast
Editing helps you remove awkward pauses, boost your video quality, and add branding elements that make your podcast look professional. Whether you’re a beginner or looking for advanced techniques, here’s how to take your video podcasting journey to the next level.
Basic Editing Techniques (For Beginners)
Here’s what you should look out for if you’re new to editing:
- Trim the Excess: Cut out long pauses, “umms,” and off-topic tangents.
- Make Smooth Transitions: Use simple fades or cuts between sections.
- Adjust Color and Lighting: Fine-tune brightness, contrast, and saturation so your video looks consistent.
- Basic Audio Cleanup: Use tools like Adobe Premiere Pro or Descript to remove background noise and improve clarity.
Advanced Editing Techniques (For a Pro Look)
Here are some extra tips for the seasoned editors:
- Multi-Camera Editing: If you filmed with multiple angles, switch between them to keep things visually interesting.
- Overlay Graphics and Callouts: Highlight key points with text overlays, name tags (lower thirds), and pop-up visuals.
- Dynamic Zoom & Crop: Add slight zoom-ins during key moments to create a more engaging feel (this is a trick many YouTubers use).
- Motion Graphics and Animated Text: Use tools like Adobe After Effects or Canva to add custom branding animations.
How to Create Branded Intros & Outros
A strong intro hooks your audience, and a well-crafted outro prompts viewers to subscribe, follow, or check out your next episode.
What to Include in an Intro
- Podcast Name and Tagline: Make it memorable and consistent.
- Short Teaser: Quickly hook the audience by hinting at the episode’s topic.
- Branded Visuals and Music: A simple animated logo + music clip will create a more professional feel.
What to Include in an Outro
- Call-to-Action: Encourage people to subscribe, rate, or visit your website.
- Closing Remarks: End with a quick summary or final thought to wrap things up.
- End Screen Elements: Add suggested videos and a subscribe button if you’re on YouTube.
- Create Animated Text: Use Canva, Adobe Premiere Pro, or Kapwing for customizations.
Removing Filler Words & Background Noise
To remove filler words, you can use Descript for a more automated process with one click.
If you’re editing manually, use waveform editing in Adobe Audition or Audacity.
Use noise reduction filters in Adobe Audition, Audacity, or DaVinci Resolve to clean up background noise, and wear headphones to capture every little detail. If your mic has background noise, apply a high-pass filter to cut out low hums. Record somewhere quiet to avoid spending hours fixing bad audio later.
Adding Captions & Transcripts for SEO
Why are captions and transcripts a must for podcasting with video?
- Boosts SEO: Search engines index text, so captions help your podcast rank higher.
- Increases Accessibility: Many viewers watch videos without sound, so captions make the videos more practical.
- Better Engagement: People stay longer when they read along.
Best Tools for Captions & Transcripts:
- Descript & Rev – AI-generated captions with high accuracy.
- YouTube Auto-Captions – Not perfect, but a good starting point.
- Kapwing – Simple tool for adding and styling captions.
Pro Tip: Upload a full transcript to your show notes. This will make your podcast more searchable on Google.
Creating Social Media Clips from Full Episodes
The last thing you want to do in video podcasting is let your content fade away after publishing. Make sure to repurpose it into bite-sized clips for YouTube Shorts, TikTok, and Reels on Instagram.
How to Create Viral-Worthy Clips:
- Find the best soundbites
- Add captions and emojis
- Resize for different platforms
- Use jump cuts & zooms
- Use AI tools like Opus Clip to auto-generate short clips in seconds
Encoding and Video Formats
Different platforms prefer different formats, but these are the most common ones:
- MP4 (H.264/HEVC): Best for YouTube, social media, and streaming.
- MOV (Apple ProRes): Higher quality but larger file size.
- MKV: Good for archiving raw footage, but not widely supported for streaming.
Pro Tip: Always export in MP4 (H.264) unless you need high-quality ProRes for further editing.
Compression Techniques
Uploading large video files can be challenging, so compression can help you maintain quality while reducing file size.
Some of the best compression tools include:
- HandBrake: Great for compressing without compromising quality.
- Adobe Media Encoder: Offers fine-tuned compression for different platforms.
- FFmpeg: Advanced tool for batch compression and custom encoding settings.
Pro Tip: When compressing, set the bitrate to around 10-12 Mbps for 1080p and 25 Mbps for 4K for the best balance of size and quality.
Hosting and Distribution
Once you’re done with creating a high-quality video podcast, you need to get it in front of the right audience. By choosing the right hosting platform, you can ensure smooth playback, easy sharing, and wide distribution across multiple platforms.
Where to Host a Video Podcast
Unlike audio podcasts, video podcasts require more storage, higher bandwidth, and a platform optimized for streaming. Here are the best options:
YouTube
- Massive audience & built-in discovery via YouTube’s algorithm.
- Monetization potential (ads, sponsorships, memberships).
- SEO-friendly as videos appear in Google searches.
Downside: You don’t own the platform, and YouTube’s policies can limit your content reach.
Vimeo
- Ad-free and premium viewing experience.
- More control over branding and customization.
- Great for embedding on websites and sharing private links.
Downside: No built-in audience like YouTube; primarily for hosting, not discovery.
Podcast Hosting Platforms
If you want your video podcast to be available on Spotify, Apple Podcasts, and other directories, you will need a podcast hosting service that integrates RSS feeds.
Among the most popular platforms are Anchor, Libsyn, and Podbean. However, if you want a dedicated video hosting platform with live-streaming options, Dacast is a solid choice. It provides high-quality, ad-free video hosting with advanced analytics and monetization options, making it great for podcasters who want more control over their content.
How to Upload to Multiple Platforms Efficiently
You’ll want your video podcast available everywhere to maximize your reach – YouTube, Apple Podcasts, Spotify, and more. Here’s how to do it efficiently:
1. Upload Your Full-Length Video Podcast
- Host on YouTube, Vimeo, or Dacast.
- If using a podcast host like Libsyn or Podbean, upload your video there.
2. Extract the Audio-Only Version
- Use Descript or Adobe Premiere Pro to export just the audio.
- Upload the audio file to Anchor, Libsyn, or Podbean for audio podcast distribution.
3. Share Clips on Social Media
- Use tools like Opus Clip or Kapwing to create short highlights.
- Share on TikTok, Instagram Reels, LinkedIn, and Twitter to drive traffic.
4. Embed on Your Website
- If using Dacast, Vimeo, or YouTube, embed the episode directly on your site.
- Include episode transcripts and show notes for SEO benefits.
RSS Feed Integration for Podcast Directories
You’ll need an RSS feed for your video podcast to be available on Apple Podcasts, Spotify, and Google Podcasts.
An RSS feed is like a subscription link that podcast directories use to check for new episodes. When you upload a new episode, your RSS feed automatically updates your listings on all platforms.
How to Set Up Your RSS Feed
- Choose a podcast host (Libsyn, Anchor, Podbean, etc.).
- Upload your episodes (audio-only or video-supported formats).
- Generate your RSS feed link (your hosting service provides this).
- Submit it to podcast directories.
Promotion & Audience Growth
The key to audience growth in video podcasting is a mix of SEO, social media, email marketing, collaborations, and strategic promotions. Here’s how to attract more viewers and keep them coming back.
YouTube SEO
Optimizing your YouTube episodes for search can boost visibility and attract organic traffic. These are the most important elements:
Titles:
Keep your titles clear, keyword-rich, and engaging. A good example would be “How to Get Your First 1,000 Podcast Listeners (Step-by-Step).”
Thumbnails:
To increase click-through rates, use eye-catching visuals for the thumbnails. Bold text and high-contrast colors can achieve this while remaining consistent with the branding. Emphasize your or your guests’ facial expressions and emotions.
Descriptions & Timestamps:
Write a detailed episode summary using relevant keywords and add timestamps to help viewers jump to key sections. If you’re hosting your podcast on Dacast, you can use its analytics tools to track engagement and see which parts of your video get the most attention.
Leveraging Social Media
TikTok, Instagram, and LinkedIn are amazing for podcast growth. Instead of just posting full episodes, repurpose content into bite-sized, shareable clips.
Best Types of Short Clips to Post
- Highlights and key takeaways (30-60 sec soundbites).
- Behind-the-scenes moments (they humanize your brand).
- Q&A segments or teasers (these build curiosity for full episodes).
Email Marketing & Newsletters
Growing an email list lets you stay connected with your viewers. Here’s what to include in your emails:
- New episode announcements (with a direct video link).
- Exclusive content (bonus clips, behind-the-scenes insights).
- Calls to action (ask for feedback, reviews, or topic suggestions).
Collaborations & Cross-Promotion
Collaborations and cross-promotion are great for tapping into new audiences. Here are some tips:
- Invite guests from your niche.
- Feature other podcasters in your episode and ask them to do the same.
- Exchange shout-outs in newsletters or social media.
- Join Facebook groups & Reddit communities related to your niche and engage with discussions before promoting your podcast.
Paid Promotions
Consider running targeted paid ads for faster exposure. The best platforms to do that include:
- YouTube Ads – Promote clips or full episodes before relevant videos.
- Facebook & Instagram Ads – Target specific audiences based on interests.
- TikTok Ads – Great for short, engaging clips that hook viewers fast.
Pro Tip: Start small ($5 – $10 per day) and test different ad creatives to see what resonates best with your audience.
Monetization Strategies
Here are five solid ways to monetize your video podcast:
1. Sponsorships & Brand Deals
Brands love niche audiences. To attract sponsors:
- Grow a dedicated listener base in your niche.
- Create a media kit with audience stats and engagement rates.
- Contact brands or use platforms like Podcorn to find sponsors.
2. YouTube Ad Revenue
If you’re publishing on YouTube, monetize through AdSense once you hit 1,000 subscribers and 4,000 watch hours (or 10M Shorts views in 90 days). Optimize your titles, descriptions, and thumbnails for better ad-friendly content.
3. Affiliate Marketing
You can also earn commissions by promoting products or services. To do that, sign up for ShareASale, Amazon Associates, or niche affiliate programs. It’s an easy process of adding affiliate links in video descriptions and mentioning them naturally in episodes.
4. Exclusive Memberships and Patreon
Offer premium content to paying fans via Patreon, YouTube Memberships, or Buy Me a Coffee. You can offer:
- Early access to episodes
- Bonus Q&A sessions
- Behind-the-scenes content
- Exclusive content
5. Repurposing Content into Courses and Ebooks
Your podcast can also fuel digital products like:
- Online courses that you can host on Teachable or Udemy.
- Ebooks that you can sell on Gumroad or Amazon KDP.
- Paid newsletters via Substack.
Common Mistakes to Avoid in Video Podcasting
Even the best podcasters make mistakes, but you can certainly avoid these common ones and set yourself up for success.
Poor Lighting and Audio Quality
Bad lighting and muffled audio will drive viewers away fast.
- Invest in good lighting (softbox or ring lights).
- Use a quality microphone (even a budget USB mic is better than your laptop’s built-in one).
- Reduce background noise with soundproofing or AI tools like Krisp.
Ignoring SEO and Metadata Optimization
If people can’t find your podcast, they can’t watch it. So you need to:
- Optimize titles, descriptions, and tags (especially on YouTube & Spotify).
- Add timestamps.
- Include transcripts and captions.
Failing to Engage With Your Audience
Podcasting is much more than just you and your guests talking – you need to use your content to build a community around it.
- Ask viewers to comment, like, and subscribe (but make it natural).
- Regularly respond to comments and DMs.
- Shout out to loyal listeners to encourage more interaction.
Not Repurposing Content Effectively
As we already discussed, the last thing you want to happen is to let your content go to waste. Make sure to:
- Create short clips for TikTok, Instagram Reels, and LinkedIn.
- Turn episodes into blog posts or Twitter threads.
- Pull out valuable takeaways for email newsletters.
Inconsistent Posting Schedule
If you’re not showing up consistently, don’t be surprised when your audience stops tuning in. You need to:
- Stick to a realistic posting schedule.
- Batch record episodes in advance to stay ahead.
- Use project management tools to plan your content.
Future Trends in Video Podcasting
Here’s what’s coming next in video podcasting:
AI and Automation Are Changing Production
AI tools like Descript are making editing faster – from automatic transcriptions to audio cleanup. Expect more automation to simplify the production process.
Short-Form Content Is a Must
TikTok, YouTube Shorts, and Instagram Reels are dominating right now, so you need to repurpose long episodes into short clips. Quick, engaging highlights can grab new viewers and direct them to full episodes.
Live and Interactive Podcasts Are Growing
More creators are using live streaming, audience polls, and real-time chat to boost their engagement. Platforms like Dacast, Twitch, and YouTube Live make it easy to turn passive listeners into active participants.
The Rise of AR and VR in Podcasting
Similarly to the other fields, video podcasts will benefit from AR and VR, mostly through advanced storytelling. The future may bring fully immersive podcast experiences.
5G and Cloud-Based Production for Remote Recording
Faster internet speeds and cloud-based tools like Riverside.fm are making high-quality remote podcasting smoother than ever. Expect fewer tech barriers and better production quality, no matter where you record.
How to Create a Video Podcast with Dacast

Dacast is a powerful, all-in-one video hosting and streaming platform that offers video podcasters reliable live streaming, secure video-on-demand (VOD) hosting, and multiple monetization options.
Dacast’s secure, customizable HTML5 video player, seamless integration with websites and apps, and advanced security features ensure a high-quality streaming experience for you and your audiences. The platform’s Over-The-Top (OTT) video delivery solutions enable you to reach people across multiple devices.
Whether you prefer live broadcasting or uploading pre-recorded episodes, Dacast provides a global content delivery network (CDN) to ensure smooth and reliable video playback worldwide, including in regions with strict internet restrictions, like China.
High-Quality, Reliable Streaming
With low-latency streaming, adaptive bitrate encoding, and partnerships with leading CDNs, Dacast guarantees a smooth viewing experience for podcast audiences. The cloud-based infrastructure ensures minimal downtime, making it an excellent choice for podcasters who rely on consistent, professional-grade streaming.
Flexible Monetization Options
Dacast provides podcasters with multiple ways to monetize their content, offering complete control over revenue generation:
- Pay-Per-View (TVOD): Charge viewers on a per-episode or per-series basis.
- Subscription-Based Monetization (SVOD): Offer premium content through a monthly or annual subscription.
- Ad-Based Monetization (AVOD): Generate revenue by running ads before, during, or after your podcast episodes.
- Hybrid Monetization: Combine multiple revenue streams.
Other valuable monetization tools include:
- Built-in paywall for secure transactions.
- Promo codes and group pricing for promotional campaigns.
- Multi-currency support for international audiences.
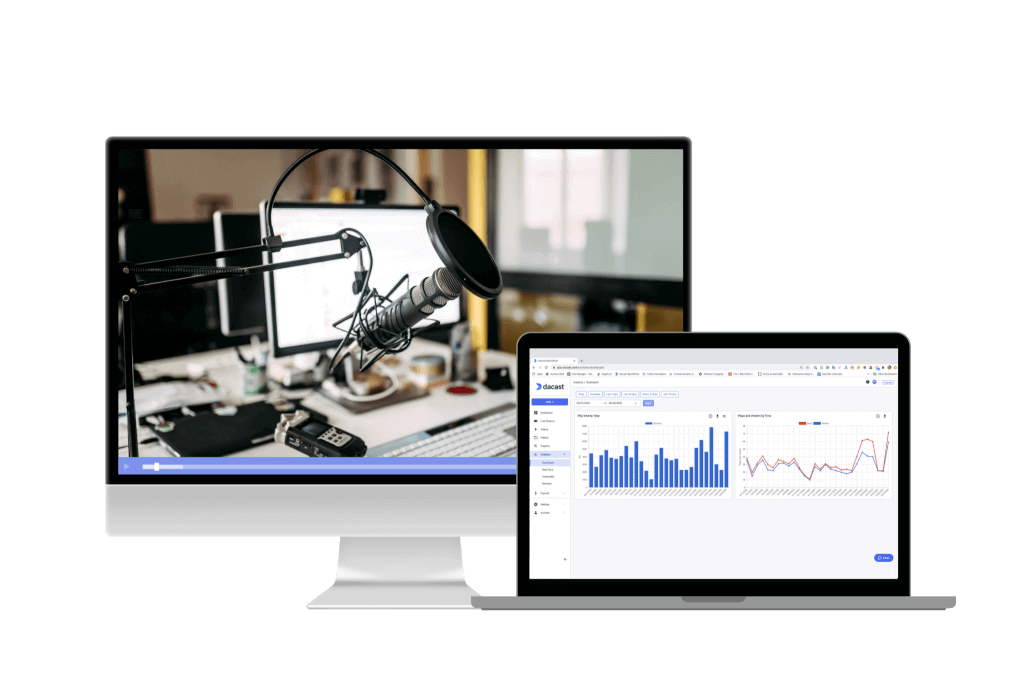
In-Depth Analytics & Performance Tracking
Dacast offers detailed analytics and reporting, including:
- Viewer engagement tracking
- Geographical data
- Real-time insights
Customizable & Secure Video Player
Dacast’s ad-free HTML5 video player is fully customizable, allowing you to brand your content with logos, colors, and interactive overlays. Key features include:
- White-Label Branding: Remove third-party branding for a professional look.
- Advanced Security: AES video encryption, password protection, and secure video hosting.
- Multi-Platform Embedding: Easily integrate your player into websites, apps, and social media.
Integration Process with Dacast
Setting up your video podcast on Dacast is a straightforward process:
1. Sign Up and Choose a Plan
Dacast offers a 14-day free trial to test the platform. After that, podcasters can choose from various pricing tiers based on their bandwidth and storage needs:
- Starter ($39/month) – Best for small-scale podcasters.
- Event ($63/month) – Ideal for one-time live podcast events.
- Scale ($165/month) – Designed for high-volume content creators.
- Custom Plans – Tailored solutions for enterprise-level podcasters.
2. Upload and Organize Your Video Content
- For live podcasts – Schedule live streams directly on Dacast.
- For pre-recorded episodes – Upload videos in supported formats (MP4, MOV, etc.).
- Organize content into categories or create a branded video portal with Dacast’s Expo 3.0 feature.
3. Customize and Secure Your Video Player
- Brand your HTML5 player with custom colors and logos.
- Enable password protection or geo-restrictions to control access.
- Set up monetization options (pay-per-view, ads, or subscriptions).
4. Embed and Distribute Your Podcast
- Embed the player on your website, blog, or landing pages.
- Use M3U8 media links to stream on Roku, Apple TV, and other smart TV apps.
- Simulcast live episodes to YouTube, Facebook, Twitch, and other social media platforms.
5. Track Performance and Optimize Content
Monitor your podcast’s performance with Dacast’s analytics dashboard, make improvements based on real, and polish your content strategy.
Final Thoughts & Next Steps
Creating a high-quality video podcast requires planning, recording, editing, hosting, and promotion. To get started immediately, follow this quick checklist:
- Define your podcast concept and format.
- Invest in quality audio and video equipment.
- Record and edit engaging episodes with strong visuals.
- Choose a reliable hosting platform for distribution.
- Optimize your podcast for SEO and social media promotion.
- Monetize through sponsorships, memberships, or pay-per-view.
If you’re ready to take the next step, explore additional resources like podcasting courses, online communities, and directories to refine your strategy.
Looking for a professional hosting solution? Dacast offers a 14-day free trial – no credit card required.
For more insights and industry updates, join our LinkedIn group today!