


HLS Encoder and Video Bitrate Settings for HTTP Live Streaming [2026 Update]

Live streaming is more accessible than ever—but “easy to go live” isn’t the same as “good to watch.” The difference usually comes down to encoder settings: codec, bitrate ladder, GOP/keyframes, audio, and how you ingest the stream into your online video platform (OVP).
This guide updates the classic HLS settings checklist for 2026 workflows, including modern packaging (CMAF/fMP4), adaptive bitrate best practices, and the most common ingest path (RTMP → HLS)—plus when SRT is worth considering.
TL;DR:
- HLS is the safest delivery format for broad device/browser playback and adaptive bitrate streaming.
- For standard HLS, aim for ~6s segments (packager/OVP side), and set encoder keyframes to ~2s for smooth switching.
- Use H.264 + AAC-LC for maximum compatibility; consider HEVC (Apple-heavy audiences) or AV1 (efficiency) when your workflow supports it.
- Publish multiple renditions (ABR ladder) so viewers don’t buffer when their network changes.
- Most broadcasters still ingest via RTMP because it’s widely supported; SRT is increasingly used for more reliable low-latency contribution over unpredictable networks.
Table of Contents:
- What is HLS Streaming (HTTP Live Streaming)?
- How HLS Works
- Retain Backlinks with M3U8 Files
- Adaptive Bitrate Streaming in HLS
- HLS Encoding with HLS Ingest
- RTMP Ingest and HLS Streaming
- 7 HLS Encoder Setting Configurations to Consider
- RTMP Encoder Settings for HLS Streaming
- How to Connect Your Encoder to Your OVP
- FAQs
- Conclusion
What is HLS Streaming (HTTP Live Streaming)?
HTTP Live Streaming (HLS) is an HTTP-based streaming protocol created by Apple that delivers live and on-demandvideo reliably at scale—typically through standard web servers and CDNs.
Why it’s still the default in 2026:
- Broad playback support across devices and browsers (especially when delivered to an HTML5 player)
- Adaptive bitrate streaming (ABR) to reduce buffering when networks fluctuate
- Works well with CDNs and “normal” HTTP infrastructure
Important clarification (because “HLS encoder” is confusing):
In many modern workflows, your encoder doesn’t “stream HLS” directly. Your encoder usually sends a contribution feed (commonly RTMP or SRT) to your OVP, and the OVP packages that feed into HLS for playback.
How HLS Works
HLS delivery usually looks like this:
- Encode video + audio into a streamable format (commonly H.264/H.265/AV1 video + AAC audio).
- Package + segment the stream into small media chunks (often targeting ~6 seconds for standard HLS).
- Generate an M3U8 playlist (manifest) that tells the player which segments exist and in what order.
- Create multiple quality renditions (your ABR ladder), each with its own playlist.
- The player switches renditions automatically based on bandwidth/CPU conditions.
Standard HLS vs Low-Latency HLS (LL-HLS)
If you need more “interactive” latency, Apple documents Low-Latency HLS as an extension to HLS that can reduce end-to-end delay while keeping CDN scalability.
(LL-HLS changes how playlists and partial segments are delivered; not every OVP supports it—so treat it as an optional upgrade, not a baseline assumption.)
Retain Backlinks with M3U8 Files
This H2 is worth keeping—but it needs a 2026 reframing.
Most sites don’t earn SEO backlinks to raw .m3u8 URLs. What you do risk losing is:
- embedded-player references in blog posts/docs,
- app integrations pointing to specific playback URLs,
- partner sites linking to “watch” pages that depend on a specific stream endpoint.
Best practice: keep playback entry points stable
If you’re migrating platforms/CDNs or changing packaging:
- Keep your public watch-page URLs unchanged (that’s where backlinks usually point).
- Keep the embed code stable whenever possible.
- If your workflow exposes direct manifests, keep the master playlist URL stable and rotate the origin/CDN behind it (or implement redirects).
- Avoid changing stream IDs/paths unless you 301 redirect old endpoints.
M3U8 still matters because it’s the control plane of HLS playback: it’s the single file the player reads to find segments and renditions.
Adaptive Bitrate Streaming in HLS
Adaptive bitrate (ABR) is the reason HLS “just keeps playing.”
With ABR:
- If a viewer’s network slows down, the player switches to a lower-bitrate rendition instead of buffering.
- If bandwidth improves, it switches back up—automatically.
ABR works well when:
- renditions are spaced logically (not 10 ladders that are nearly identical),
- segment boundaries/keyframes are aligned well enough to switch cleanly,
- audio settings are consistent across renditions.
HLS Encoding with HLS Ingest
“HLS ingest” means the encoder (or contribution pipeline) is sending HLS-style segmented output into your platform.
In 2026, HLS ingest is still less common than RTMP or SRT ingest because:
- ingest-side segmentation can add delay,
- it’s more complex operationally than pushing a single continuous feed.
When does HLS ingest make sense?
- You have a specific workflow that requires it (some hardware/managed workflows)
- You’re aligning with an ecosystem that expects HLS segments upstream
Otherwise, most broadcasters use RTMP or SRT for ingest and HLS for delivery.
RTMP Ingest and HLS Streaming
For many organizations, the practical “default stack” remains:
RTMP (ingest) → Transcode/Package → HLS (delivery)
Why it’s still common:
- RTMP ingest is widely supported by encoders and tools
- HLS delivers broad playback compatibility
Where SRT is gaining ground in 2026:
- more reliable contribution over imperfect networks (remote production, mobile, bonded networks)
- improved security/resilience compared to older RTMP assumptions
7 HLS Encoder Setting Configurations to Consider
Below are the settings that most directly affect quality, stability, and ABR performance.
1. Best HLS codec options (2026)
Start with these defaults:
- Video: H.264 (AVC) for maximum reach
- Audio: AAC-LC
Optional upgrades (workflow-dependent):
- HEVC (H.265): good efficiency, great for Apple-heavy audiences; confirm licensing and playback targets.
- AV1: best compression efficiency when supported by your pipeline and target devices.
2. Container + packaging (TS vs CMAF/fMP4)
In 2026, many modern HLS pipelines use CMAF with fragmented MP4 (fMP4) for efficiency and alignment with modern players/workflows. Apple documents CMAF usage with HLS (including playlist signaling like EXT-X-MAP).
3. HLS resolution settings and video quality
Use resolutions that match your audience and content type:
- Webinars/talking heads: 720p is often “enough”
- Product demos/sports/events: 1080p is common
- 4K: only if you truly need it and can sustain the bitrate + processing end-to-end
4. HLS bitrate settings (recommended 2026 starting ladder)
Bitrate ladders vary by content complexity, FPS, and codec. Here’s a safe starting point for H.264 / 30fps:
| Rendition | Resolution | Video bitrate (Mbps) | Audio bitrate |
|---|---|---|---|
| High | 1080p | 4.5–6.5 | 128–192 kbps |
| Mid | 720p | 2.5–4.0 | 128 kbps |
| Mid-low | 480p | 1.2–2.0 | 96–128 kbps |
| Low | 360p | 0.7–1.2 | 64–96 kbps |
| Very low | 240p | 0.3–0.6 | 48–64 kbps |
Notes:
- If you stream 60fps, expect to push the top renditions higher.
- As a sanity check, many workflows consider >4 Mbps a reasonable top rung for “good” 1080p results (content dependent).
- Always test: animation, sports, confetti, and dark scenes need more bitrate than slides.
5. Internet speed and bandwidth requirements
A practical rule:
Your sustained upload should be ~2× your highest outgoing bitrate (or 2× the sum if you’re uploading multiple renditions from the venue).
Example:
- If your top stream is 6 Mbps video + 0.192 Mbps audio ≈ 6.2 Mbps,
- aim for ~12–15 Mbps sustained upload for headroom.
6. CBR vs VBR (what to use in 2026)
- CBR (or constrained VBR / capped VBR) is usually safest for live HLS workflows—predictable bandwidth, stable packaging, fewer surprises.
- VBR can improve quality in complex scenes but may create bitrate spikes that hurt stability on marginal networks.
If your OVP explicitly recommends CBR for ingest, follow that.
7. Frames per second (FPS) + keyframe interval (GOP)
- FPS: 30 is a solid default; 25 is common in PAL regions; 60 for sports/fast motion when your bitrate and encoding capacity can handle it.
- Keyframe interval (GOP): for many HLS workflows, 2 seconds is the most common baseline and is explicitly required/recommended by some platforms and workflows.
Also keep your packaging in mind:
- Standard HLS commonly targets ~6s segments.
- A 2s GOP tends to make segmenting and ABR switching smoother (clean IDR boundaries).
RTMP Encoder Settings for HLS Streaming
Even though HLS is the playback protocol, most teams still configure RTMP encoder settings because RTMP is the common ingest method.
Required Encoder Settings for Dacast
Dacast requires specific encoder setting configurations to ensure that the platform works properly and produces the highest quality of content.
The following settings are required for live streaming with Dacast, regardless of your selected resolution and bitrate:
- VIDEO CODEC: H.264 (x264 may work)
- FRAME RATE: 25 or 30
- KEYFRAME INTERVAL: 2 secs (or 2x frame rate)
- SCANNING: Progressive
- RATE CONTROL: Constant (CBR)
- AUDIO CODEC: AAC-LC
- AUDIO BITRATE: 128 kbps
- AUDIO CHANNELS: 2 (Stereo)
- AUDIO SAMPLE RATE: 48 kHz (48,000 Hz)
For more information on Dacast’s preferred and required encoder settings, please check out our dedicated Knowledgebase article
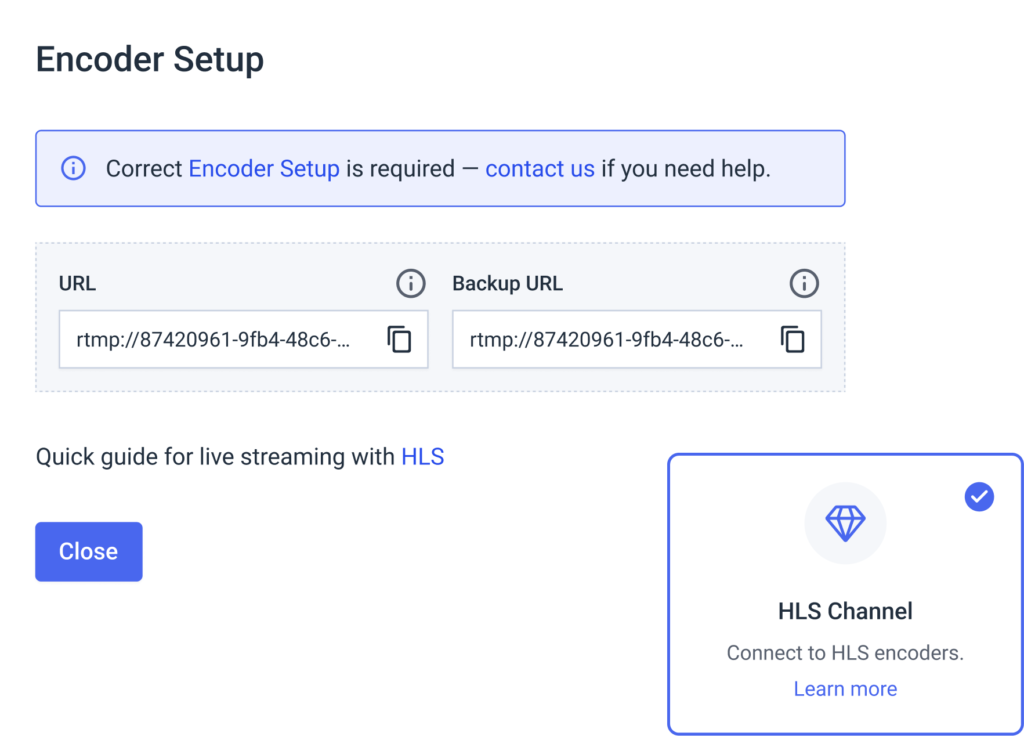
How to Connect Your Encoder to Your OVP
The exact steps vary by encoder, but the inputs are usually the same:
- Create a live channel in your OVP
- Copy the encoder credentials:
- Stream URL / Server URL
- Stream key / Stream name
- (Sometimes) username/password or tokenized auth
- Paste them into your encoder (OBS or hardware encoder), then run a short test stream
- Verify:
- audio sync
- stability (no dropped frames)
- correct rendition ladder (if your OVP is generating ABR)
With Dacast, these details are generated inside the channel’s encoder settings area.
For a detailed walkthrough on how to set up your encoder with Dacast, please check out our dedicated encoder setup tutorial
FAQs
1. What are the best HLS encoder settings for live streaming in 2026?
For most workflows, use RTMP (or SRT) ingest → HLS delivery through your OVP. Recommended starting settings:
- Video codec: H.264 (AVC)
- Audio codec: AAC-LC
- Frame rate: 30 fps (or 25 fps where standard)
- Keyframe interval (GOP): 2 seconds
- Rate control: CBR (or constrained VBR if your platform supports it well)
- Audio: 48 kHz, stereo, 128 kbps
This combo delivers stable packaging and smooth adaptive bitrate switching (ABR).
2. What codec should I use for HLS streaming: H.264, H.265 (HEVC), or AV1?
- H.264 (AVC): best compatibility and safest default for HLS playback
- H.265 (HEVC): better compression; strong in Apple-heavy audiences, but licensing/workflow support matters
- AV1: best compression efficiency; adoption depends on your devices, player, and pipeline
Best practice: Use H.264 as the baseline, then add HEVC/AV1 only if your platform and audience benefit.
3. What is the best HLS keyframe interval (GOP) for ABR?
Use a 2-second keyframe interval (often written as GOP = 2s).
This improves:
- ABR switching performance
- segment boundary alignment
- playback stability on variable networks
Many OVPs explicitly recommend or require this for HLS workflows.
4. What HLS segment length should I use?
For standard HLS, ~6-second segments are common and widely compatible.
If you use Low-Latency HLS (LL-HLS), segment and playlist behavior changes (often partial segments), so follow your OVP’s LL-HLS guidance.
5. What is a recommended HLS bitrate ladder (adaptive bitrate settings) for 2026?
Here’s a strong starting HLS bitrate ladder for H.264 / 30fps:
- 1080p: 4.5–6.5 Mbps video + 128–192 kbps audio
- 720p: 2.5–4.0 Mbps + 128 kbps audio
- 480p: 1.2–2.0 Mbps + 96–128 kbps audio
- 360p: 0.7–1.2 Mbps + 64–96 kbps audio
- 240p: 0.3–0.6 Mbps + 48–64 kbps audio
Tip: Sports, fast motion, and 60fps need higher top-end bitrates.
6. How much upload speed do I need for HLS live streaming?
A simple rule: your sustained upload speed should be ~2× your outgoing bitrate (more headroom is better).
Example: if your top rendition is ~6 Mbps total (video + audio), aim for 12–15 Mbps sustained upload.
If you’re sending multiple renditions from the venue (true multi-bitrate upload), your required upload rises significantly.
7. Should I use CBR or VBR for HLS encoding?
For live HLS workflows:
- CBR is the safest for stability and predictable bandwidth
- Constrained VBR can improve quality if capped properly
- Pure VBR can spike bandwidth and trigger buffering or ingest instability
If your OVP recommends CBR, follow it—especially for RTMP ingest.
8. Why is my HLS stream buffering even with “good” internet?
Most common causes:
- No ABR ladder (single bitrate only)
- Bitrate is too high for viewers (or bitrate spikes from VBR)
- Encoder overload (dropped frames / CPU/GPU maxing out)
- Unstable ingest network (Wi-Fi congestion, packet loss)
- Player is forced down to a low rendition due to device/network constraints
Conclusion
In 2026, great HLS streaming is less about “using HLS” and more about dialing in the encoder fundamentals:
- A sensible bitrate ladder
- Predictable CBR/constrained VBR
- Consistent AAC audio
- A 2s keyframe interval
- A workflow that separates ingest reliability (RTMP/SRT) from playback scalability (HLS via CDN)
You can try Dacast completely free with our 14-day free trial.
Start streaming now
Any questions? Let us know in the comment section below! We love to hear from our readers and will respond as soon as we can.
For regular live-streaming tips and exclusive offers, you can join our LinkedIn group