
The video experts blog
OBS Tutorial for Dacast (PC): How to connect OBS Studio to Dacast

In this OBS Tutorial for Dacast, we are going to cover how to connect to Dacast streaming solution with OBS Studio. Open Broadcaster Software is free to download, open-source encoder. This OBS Tutorial has been realized with version 22.0.2.
For more details on how to add video sources and setting up hotkeys with OBS Studio, we recommend looking at this article instead.
Note that there is a faster and easier way to connect to Dacast when using OBS Studio. For that, we recommend using Dacast custom version of OBS Studio.
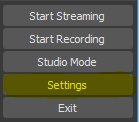
OBS Tutorial for Dacast: connect to Dacast
No time to read? We got you covered. This video will explain to you all you need to know to start live streaming using the Dacast version of OBS Studio broadcasting software:
In the left side menu, select “Stream” and choose “Dacast streaming as a service”.
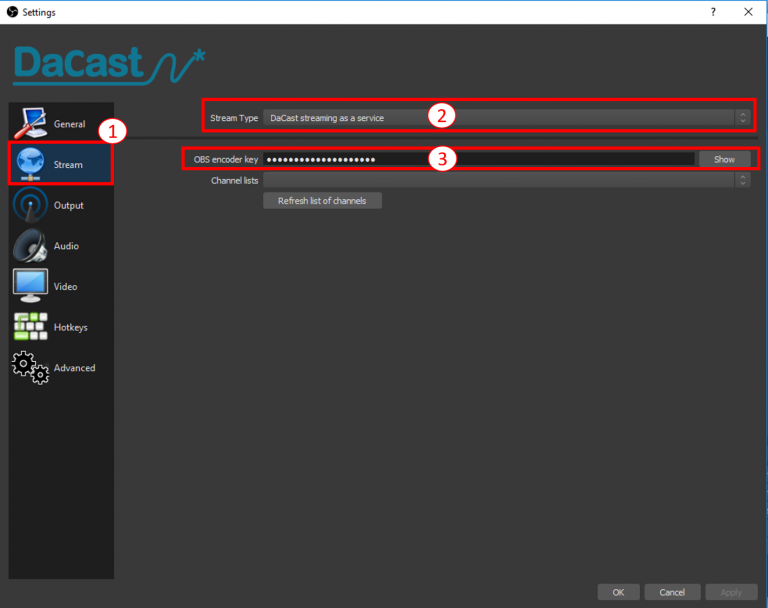
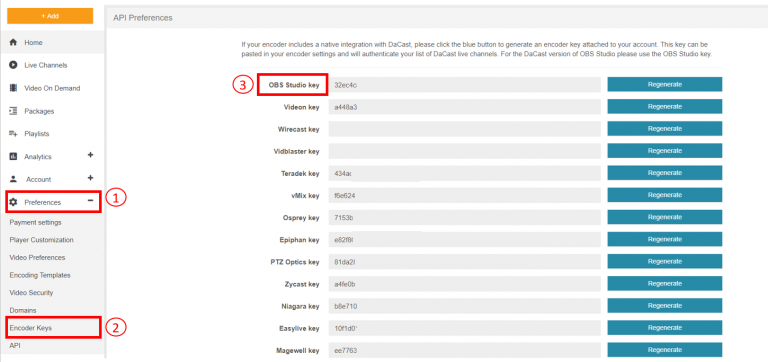
For the Stream Type, you should see “Dacast streaming as a service” by default; if not, please select it. Then you will need to enter your Dacast OBS encoder key. This key can found in your Dacast account. Go to your preferences section and then “encoder keys”.
Copy-paste your Dacast OBS Studio key in your OBS Studio live encoding software and then click on “refresh channel list”. Your live channels should appear in the channel list. Select the live channel you want to use for your live broadcast and that’s it!
If you’re using the default OBS Studio live stream encoding software, you can check the following video or read below.
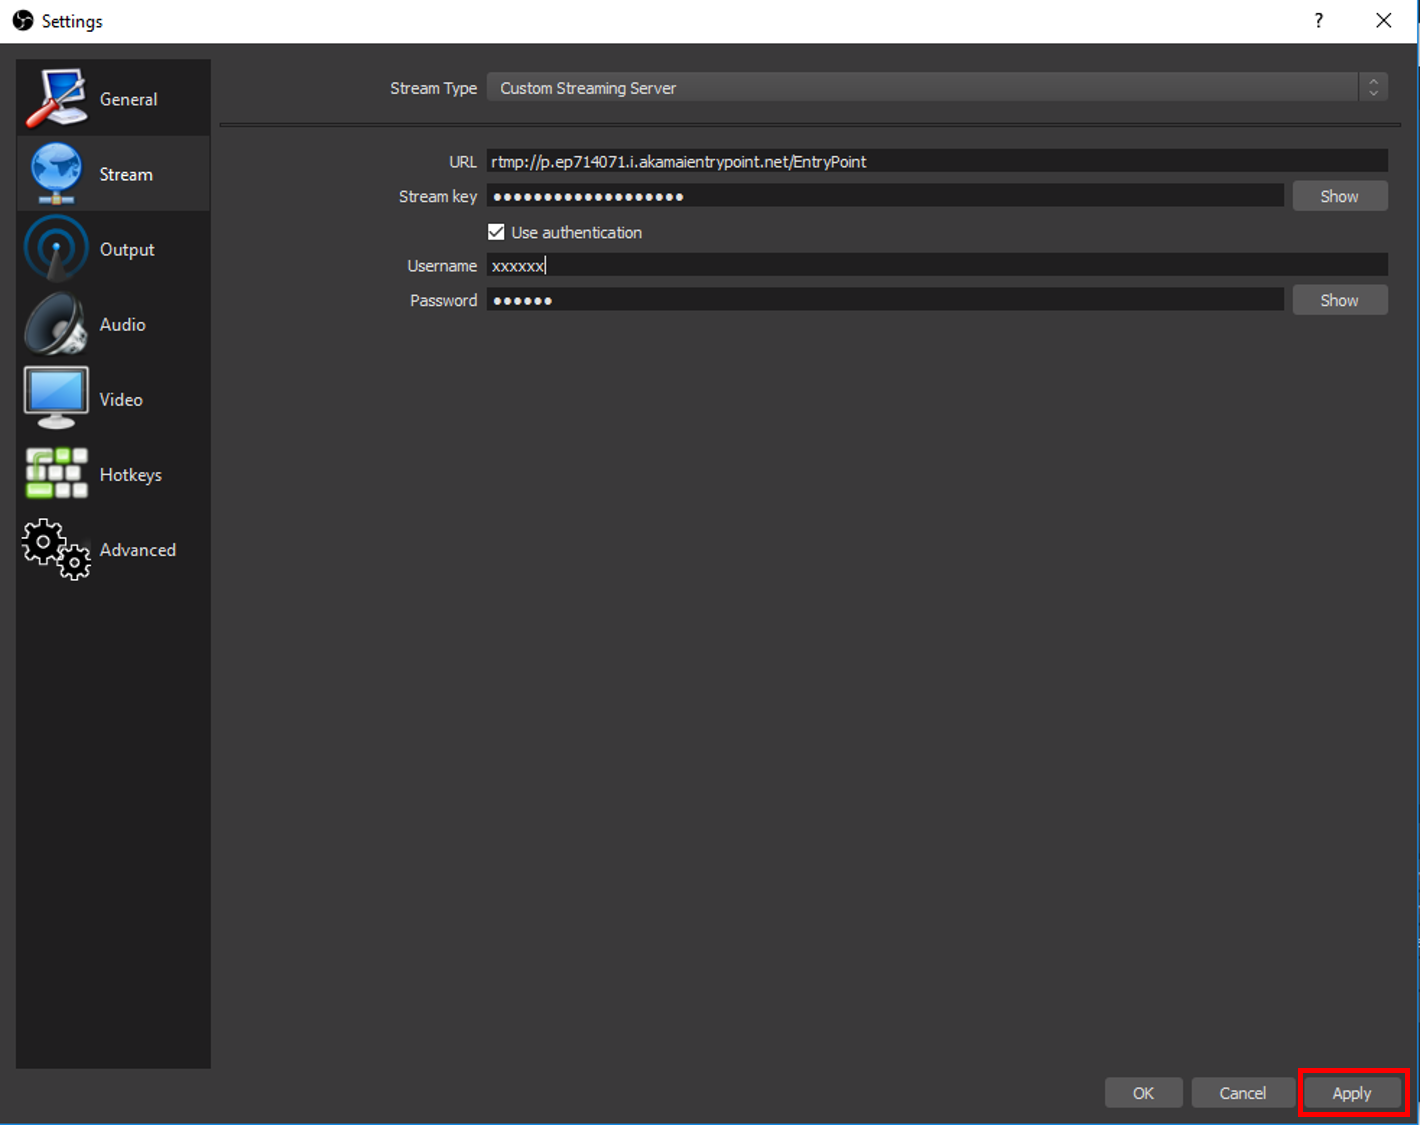
Select “Custom Streaming Server” when you are in the Stream section.
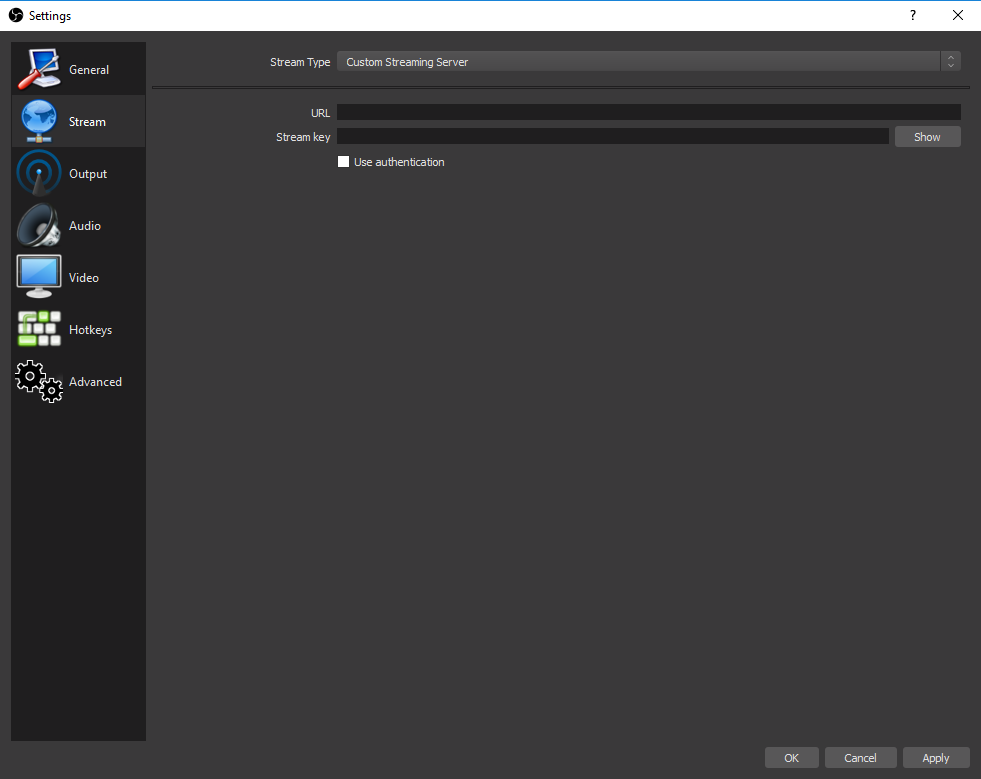
You should see 2 fields: URL and Stream Key. You will need to go to your Dacast account to fill out this information.
Login to your Dacast account and select the live channel you want to stream on. If you do not have a live channel yet, click on Create.

Then please go to the encoder set up a section of your live channel. In the third step of this section, you should see information similar to this :
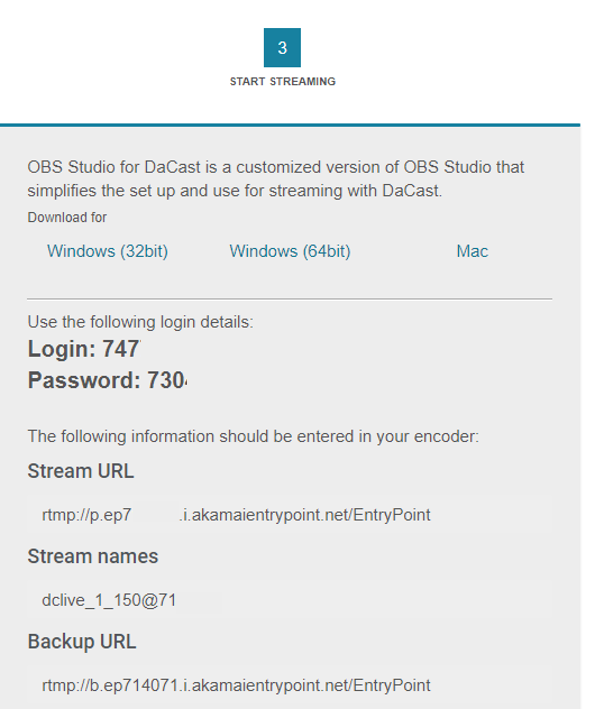
The stream URL goes in the “URL” field in OBS Studio. Stream names go in the field “Stream key”.
Once you have copy-pasted those elements, check the box “use authentication” :

The username is the login of your live channel. The password is the password of your live channel. Please do not enter the email and password you use to connect to your Dacast account as it won’t work. Once you have filled the required information, click “Apply”.
OBS Tutorial: Encoder settings
Now let’s go to the “Output” section that you can see on the left side menu. This is where you can review your encoding settings.
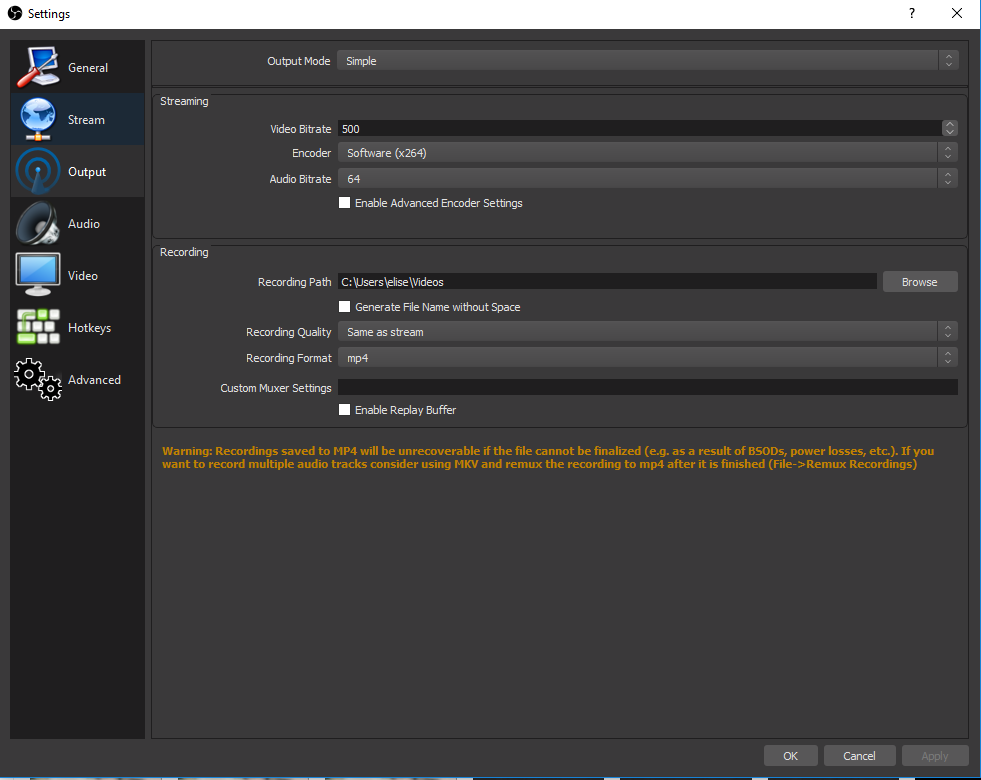
To launch a first stream, we recommend to use the “Simple” Output Mode and to set up a low bitrate to make sure everything is working ok with your live stream. Then to update the settings to offer your viewers the video quality you want.
At this time it is not possible to set up multi-bitrate streaming with OBS Studio so the best-case scenario might be to set up a standard definition to make sure all your viewers can access your live event from all devices. A standard definition would be 1 Mbps for the video bitrate but this requires at least 2 Mbps of upload speed so make you have it otherwise you should go for a lower video bitrate.
You can select the “Advanced” Output Mode that will allow you to go deeper in your encoding settings. We recommend that you keep x264 and a 2s keyframe interval in any case.
Once you are happy with your encoder settings, click OK.
OBS Tutorial: Start Broadcasting
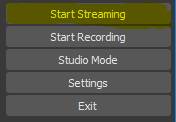
The final step is to click on “Start Streaming”.
To verify that you are streaming, check out the timer at the bottom of the OBS Studio encoding software windows:
![]()
To check out your live stream, you can use either :
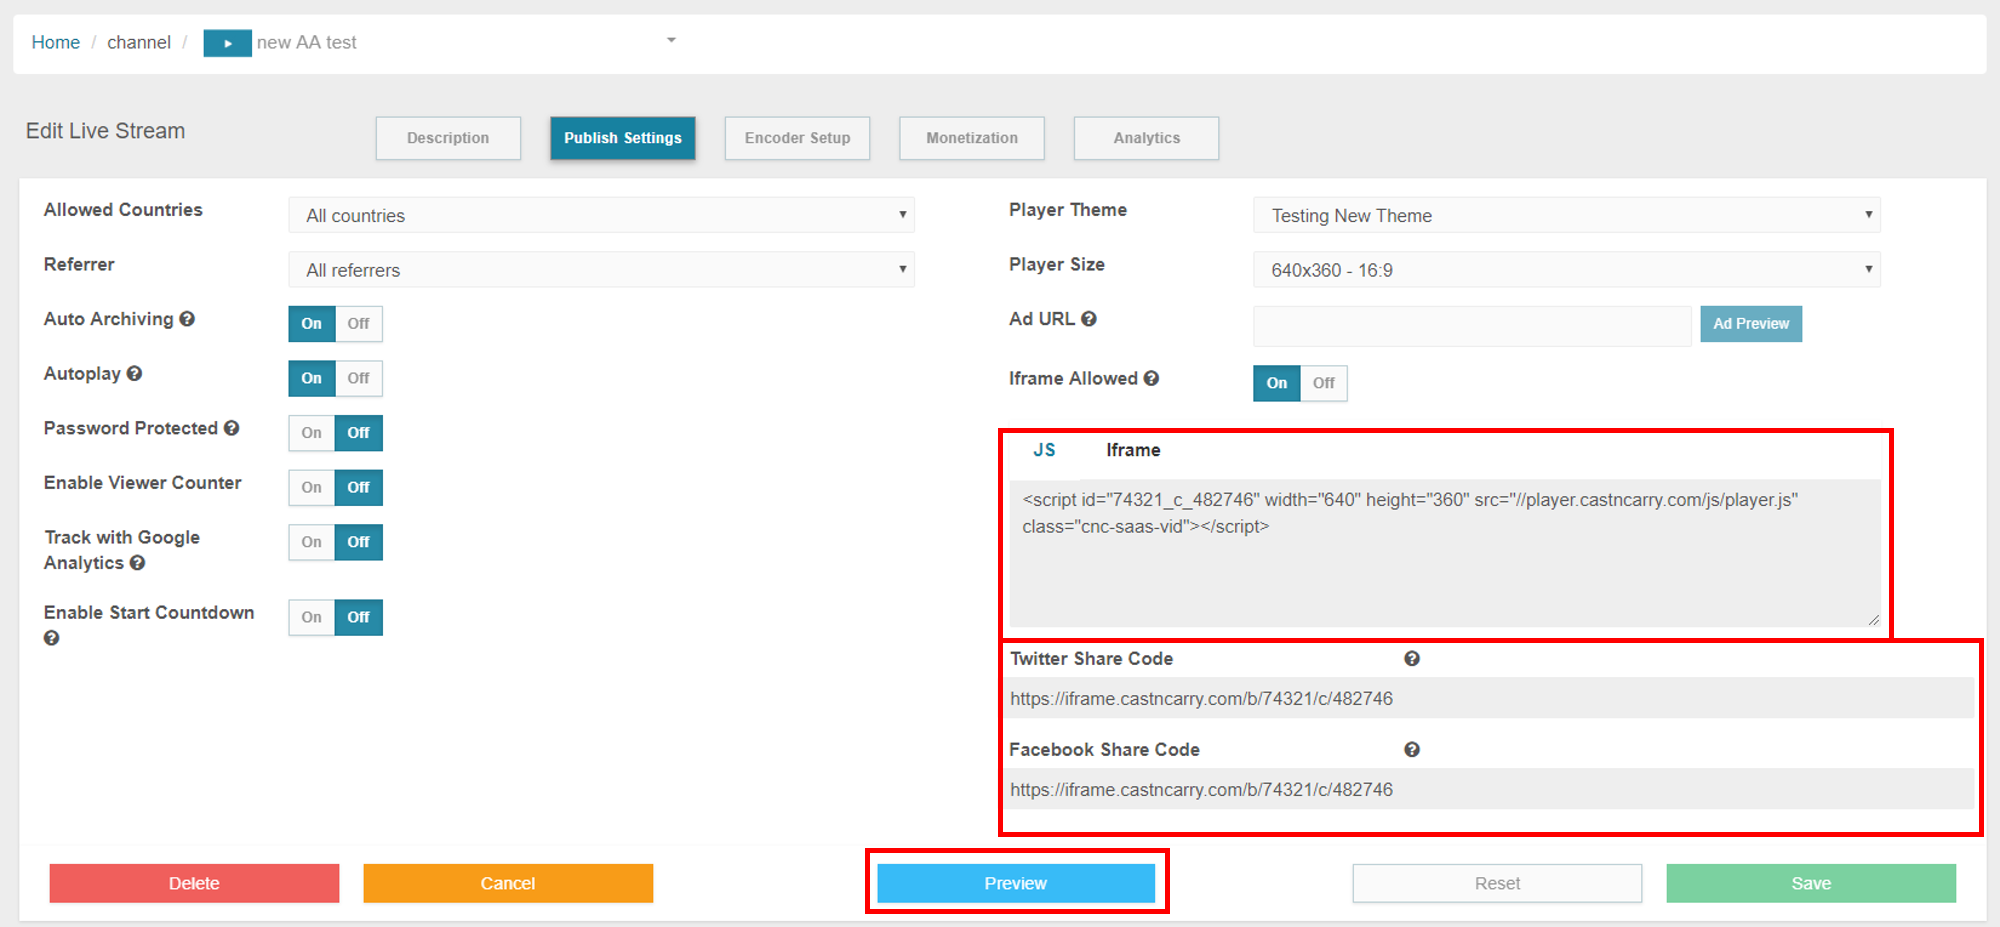
- The “Preview” button available in the publish settings section of your live channel
- The “Share Code” is an URL allowing you to share your live event on your social media platform. This is also available in the “publish settings” section of your live channel within your Dacast account
- The JS or iframe embed code, previously embedded on your website.
For more advanced features with OBS, visit their forums.
Any questions on your live stream? Any technical issues? our 24/7 support team is here to answer all our needs.
What if I am using a Mac and not a PC?
We got you covered! Check out this written tutorial.
Conclusion
OBS Studio is a great option to stream live video on your website if you are looking for a fast, simple and easy setup. However, Dacast is compatible with many other software and hardware encoders that are also great for professional live streaming. This includes Wirecast, vMix, VidBlaster, Teradek…
Are you looking for a reliable and easy-to-use online video platform? Why not sign up for a 14-day free trial (no credit card required)? That way, you can test out all the features before making a commitment. We’d love to get you set up for live streaming today!
Finally, for regular live streaming tips and exclusive offers, join the Dacast LinkedIn group.
By Eliot Miller and Max Wilbert.