
The video experts blog
EasyLive Cloud Video Editing Guide

Looking for an EasyLive cloud video editing guide? We walk through using the sophisticated, cloud-based platform in tandem with the Dacast live streaming solutions. This tutorial is intended to show off some of how to connect your Dacast account and content to EasyLive, along with showcasing some of the features of the platform.
What is EasyLive?
EasyLive is a powerful platform that adds overlay features to your stream and more. These features can include custom messages, Twitter feeds, pictures within pictures, cloud DVR, clipping and custom images as well. For its image capabilities, the system is sophisticated. It allows for precise placement of images and for live social elements, with the Twitter feed updated as you broadcast.
Linking Your Dacast Account
Because Dacast had a partnership with EasyLive, connecting your Dacast account with the platform is very simple. All that is required is an account with both EasyLive and Dacast.
Now first, login to your EasyLive account. If you don’t have an account, feel free to inquire to sales@goeasylive.com about getting one setup. You should see a Control Room similar to below:
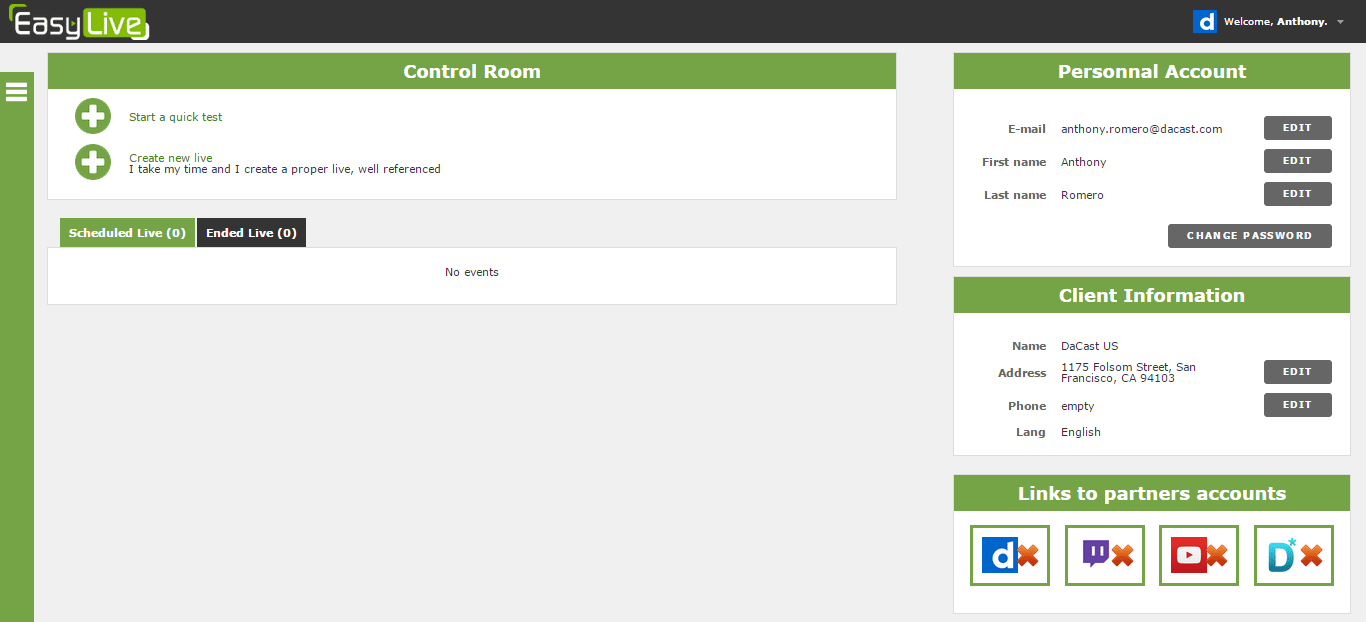
On this page in the lower right, click the Dacast D icon.

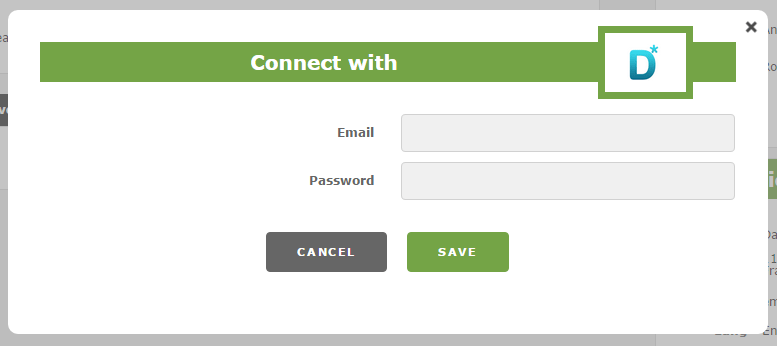
This will launch a lightbox where you can enter in your email and password associated with your Dacast account. Enter these in and click SAVE. If done correctly, the lightbox will close and the Dacast icon with change from the blue D with a red x to the blue D with a green check.
Note, if you see a “Disabled” here instead, click MODIFY to see the below screen.
Success, your Dacast account is now linked to your Easy Live account.
Connecting a Live Channel
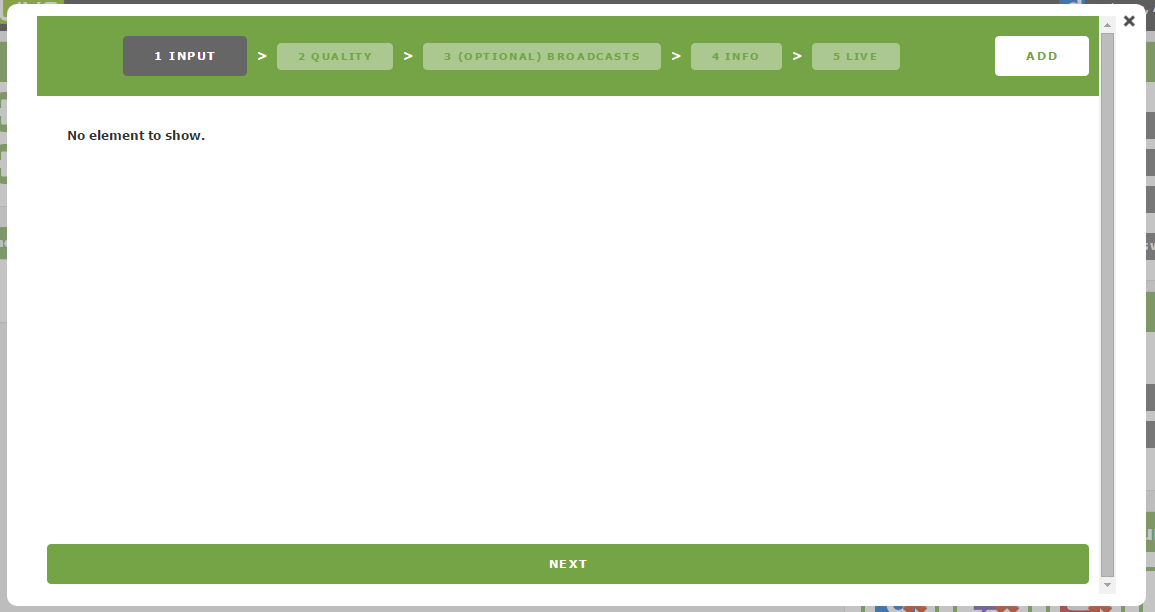
On the main page of your EasyLive account, click CREATE NEW LIVE.
This will launch a lightbox that has five steps to it: Input, quality, (optional) broadcasts, info and live.
Note that the settings you create here can be reused later. So your Input or Quality setting can be reused if you decide to create another live element on EasyLive. Furthermore, any of these details can be edited later on as well.
 1. Input
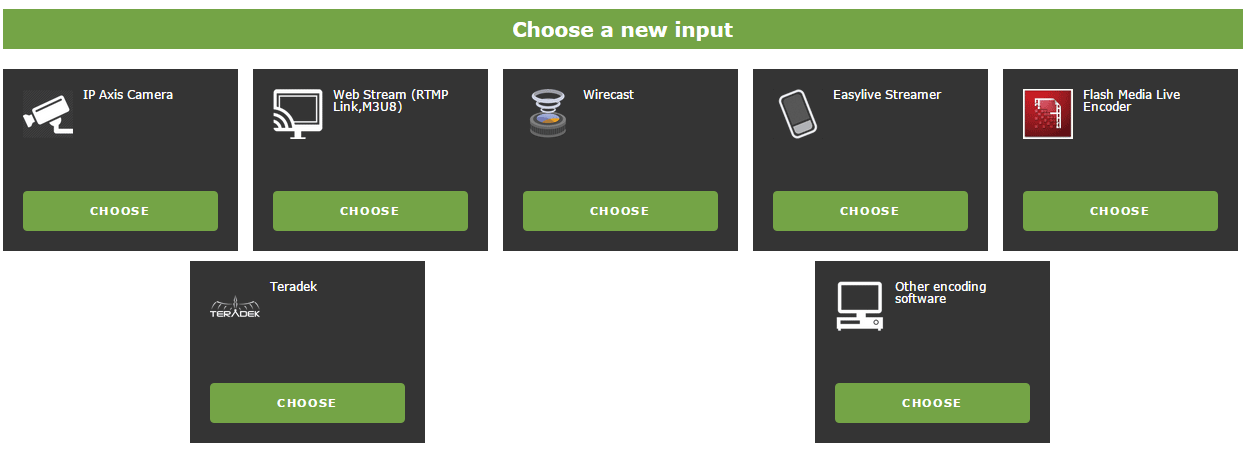
Click the ADD button in the upper right corner. This will launch a new lightbox that will let you select your source. This can include cameras, encoders (like Wirecast) and more. Pick your source and select CHOOSE.
It will then ask you to name this Input. If you plan to have multiple of the same kind, it can be useful to give it a unique name. After giving it a name, you will be returned to “1. Input” and will see your input from the list of options. Click the CHOOSE button, which will cause the area around the selection to turn green. You can now click NEXT to continue.
2. Quality
Similar to Input, Quality will be blank the first time you get here and you will have to click ADD to begin. This will present four options, three of them defaults and a fourth custom option as found below.
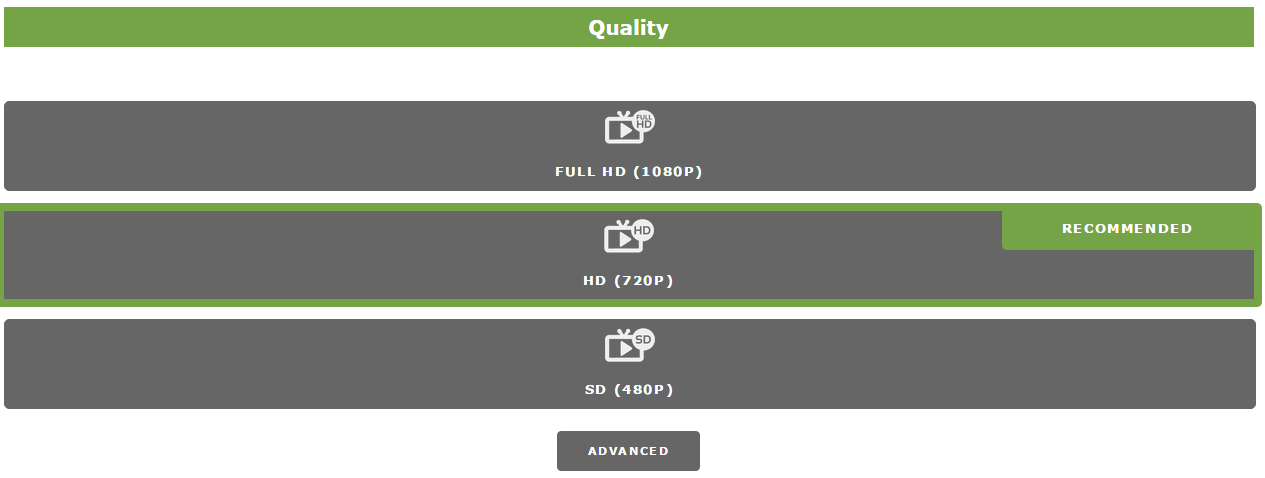
The defaults are SD (600 kb per second video, 60 kbps audio), HD (1.7 MB per second video + 128 kbps audio) and FULL HD (4.0 MB per second video + 128 kbps audio). Unless you have a really fast connection speed (8 MB per second upload on a wired connection) you will likely fall into the SD or HD realm, or possibly clicking ADVANCED to choose something in-between them that better suits your needs.
Note that all options by default use H.264 for the video, AAC for the audio and Baseline for the profile, which is all optimal settings for Dacast.
After picking your quality, it will be added to the 2. Quality listing. Click the CHOOSE button, which will cause the area around the selection to turn green. You can now click NEXT to continue.
3. (Optional) Broadcasts
Now you will be able to link your streaming to your Dacast live channel. Similar to before, click the ADD button in the upper right to begin. This will launch a new lightbox that will let you select your streaming service.
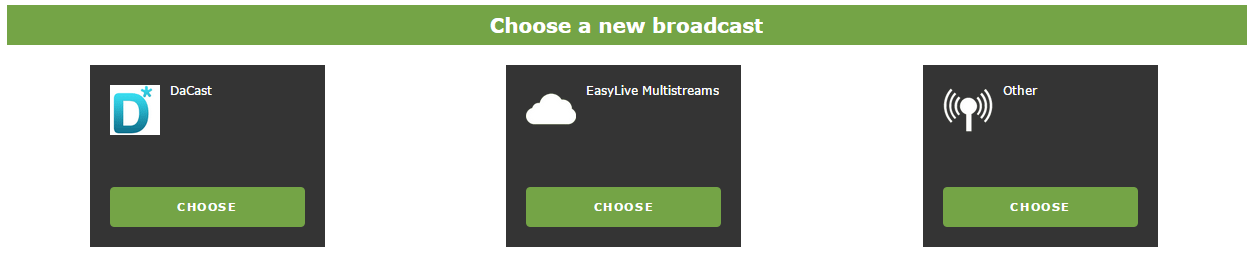
From this selection, click CHOOSE under Dacast. This will launch another lightbox that has a list of the live channels on your Dacast account. Pick the channel you want, and select CHOOSE then continue. Haven’t created a live channel on your Dacast account yet? If not, follow this guide first.
You can now click NEXT.
4. Info
Next up is providing some background information for your stream.
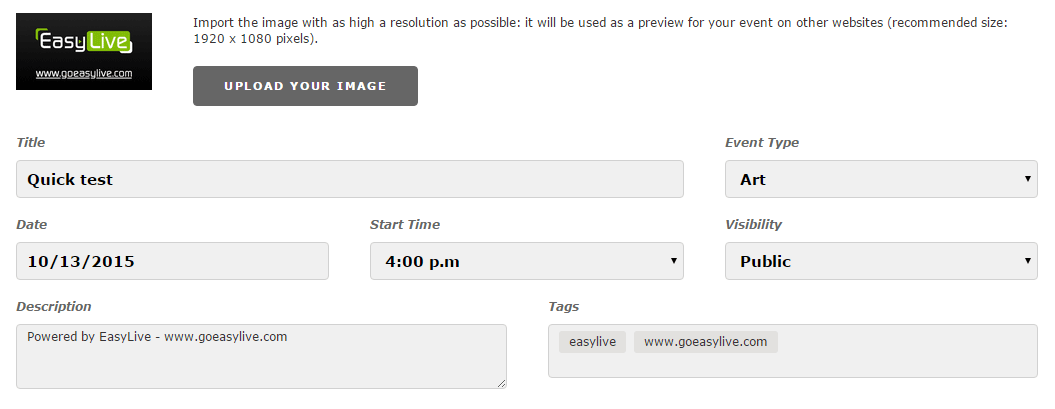
You can select a title, event type, start time, visibility (from within EasyLive), description and tags. You can also upload an image which works similar to a Dacast splash screen.
When done click NEXT.
5. Live
Now the system will drop you into the main area for your new live content. This looks like below:
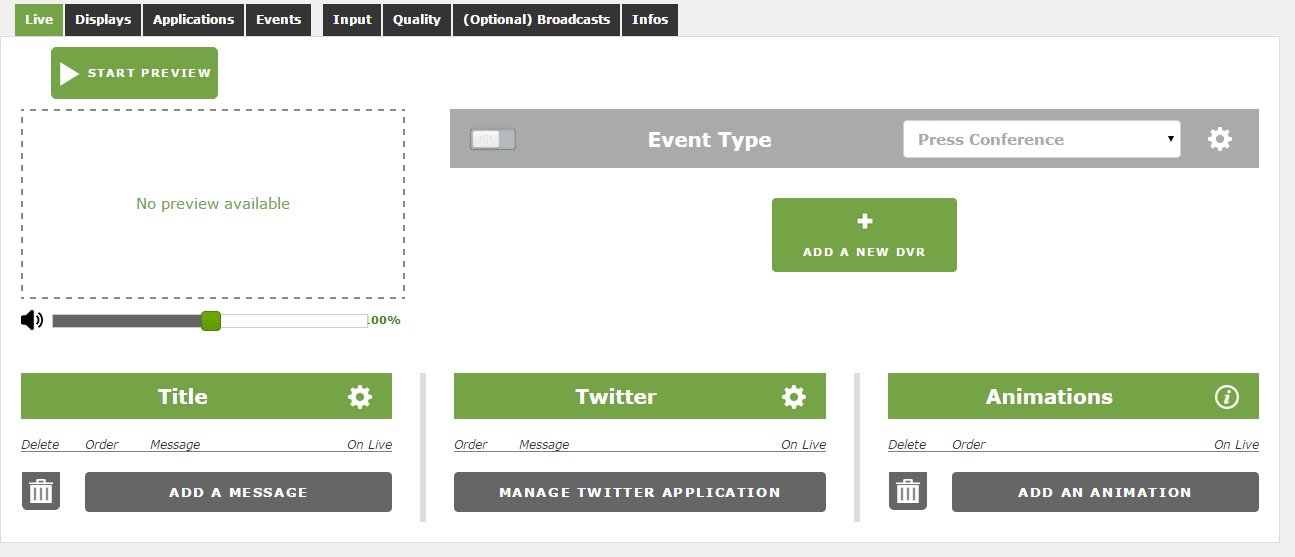
To begin, you will likely want to click START PREVIEW so you can see what your changes might do. This will give you information related to your encoder that will need to go inside the software or hardware. For example, when Wirecast is the input, it will tell you the “Stream URL” and “Stream Name” that will need to be entered inside the encoder. Note that the preview area will not playback the stream, but will use a still image to give you an idea of what the broadcast will look like. This image will populate once you begin broadcasting.
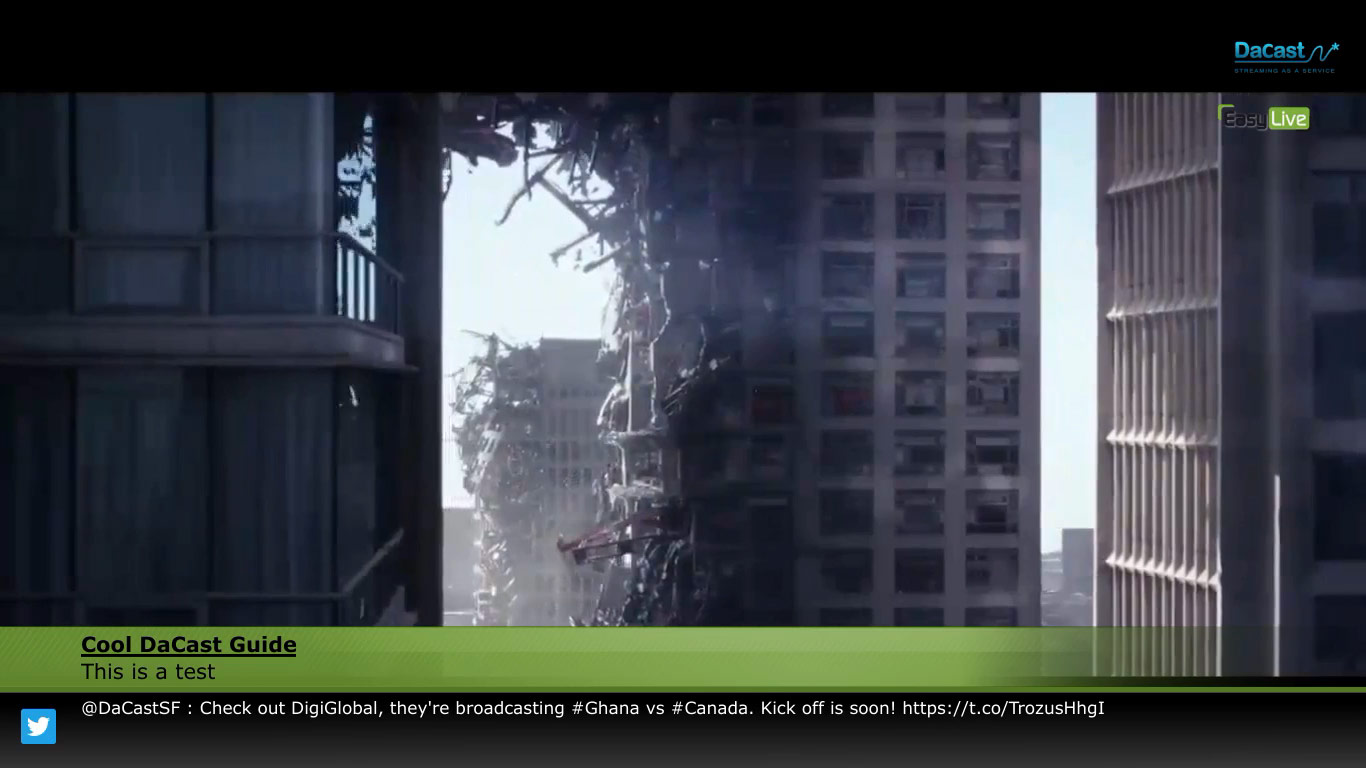
Each of the three options below control something that will overlay onto the stream. The Title lets you add a custom message in the lower thirds of the screen. Twitter will do the same but act as a rotating message inside by grabbing current Tweets. Animations lets you add custom effects, and actually controls where the watermark will go. Below is an example using all three effects:
There are also additional settings, for example, you can configure a DVR or add an event (which controls a score display on the video).
Once your preview is underway, you will notice options to START and STOP the broadcast from going live over your streaming service of choice.
By Anthony Romero.